Coastal Navigation Embroidery

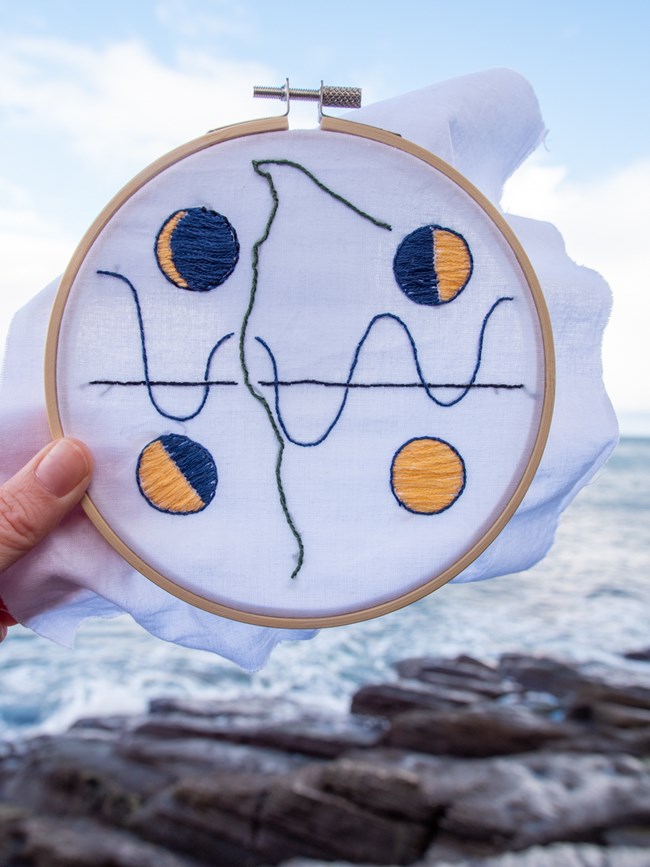
A hand holds an embroidery hoop with a design of four moons, the outline of the Olympic Coast, and an abstract tide chart. Waves crash against rocks in the blurred background.
The embroidery visits the very coast that inspired its creation.

NPS/E. Goode

Here's a craft project for the winter months! This design juxtaposes the outline of the Olympic Coast with an abstact image of a tide chart and phases of the moon.

When you are traveling certain sections of the Olympic Coast, it's really important to know when the tide will be high and low, because there are areas that could be under water at high tide - you don't want to end up stranded, or worse! Learning to use a tide chart and map will keep you safe and relatively dry (rain being a bit less predictable than high tide).

Contact the Wilderness Information Center to learn about safe routes, making reservations, or using your map and tide chart when you're backpacking on the coast.

Read on for instructions to make this embroidery design!
 

Step 1: Supplies
  • Embroidery thread. I used five colors: Dark green for the outline of the coast, black for the horizontal sea level line of the tide chart, pale yellow for the moons, and dark blue for the tide, outline, and dark parts of the moons. You can use any colors you choose!
  • Embroidery hoop. I used a 6-inch hoop. You could work on a larger hoop, but a smaller one would not work.
  • Fabric. I used a plain white cotton fabric. I think this design could also look striking on other colors like blue, but you want to make sure that your threads will contrast enough to be visible against the fabric, so if you go with dark fabric perhaps choose lighter shades for your threads.
  • Sewing/embroidery needle
  • Dissolving self-adhesive paper or disappearing washable marker, see step 2.
  • Thimble - optional, but nice
 
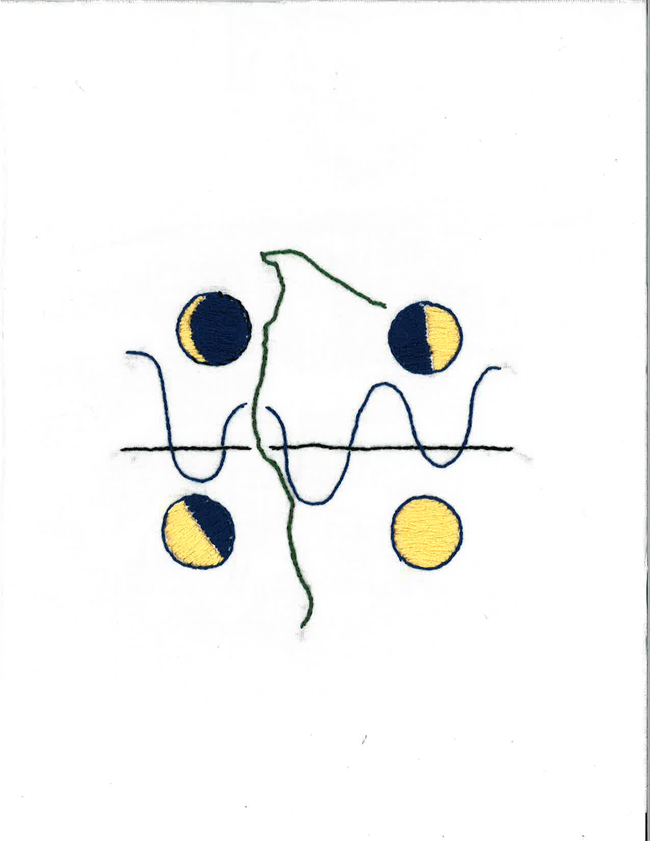
Threads embroidered on a white fabric background. Four moons in different phases surround a green outline of the Olympic Coast, and a black line and blue wave pattern representing a tide chart.
Embroidery design

Step 2: Getting the design onto your fabric

  • The first option to do this is to print the design (at right, right-click to get a full-size version you can print) onto a piece of self-adhesive, dissolving embroidery paper. You can buy this at many craft stores. I use the middle of my embroidery hoop to trace onto the paper, around the design. I then cut out that circle so that I can stick the design onto the fabric and hold the fabric taut in the embroidery hoop.
  • The second option is to print out the design on normal paper and then trace it onto the fabric lightly with pencil or with a disappearing/washable marker, also available at many craft stores. You may want to tape your paper and fabric onto a window so the light shining through makes it easier to trace the design. Then again, if you're on the Olympic Peninsula, there may be more light inside your home than outside during winter days.
  • If you feel confident drawing freehand, you can simply sketch your own design or your best interpretation of this one!
 

Step 3: Embroider

  • I used a whipped backstitch for the lines, waves, coast outline, and border around the moons. A whipped backstitch creates a pretty smooth line that stands out from the fabric. For these I used two strands of the the thread.
  • I used a satin stitch to fill in the moons with yellow and blue. For this I used four strands of thread.
 

Step 4: Finish

  • Once you're done embroidering your design, you can place it in clean water to dissolve the paper or disappearing ink, if you used one of those methods.
  • Once the paper or ink has washed away, you can hang up your fabric to dry.
  • Finally, you can display your design in its embroidery hoop, or use the fabric as part of a sewing project - perhaps a throw pillow for a friend who loves to backpack the Olympic Coast!

Last updated: November 12, 2023

Park footer

Contact Info

Mailing Address:

600 E. Park Avenue
Port Angeles, WA 98362

Phone:

360 565-3130

Contact Us