Last updated: February 20, 2025
Article
Missouri Virtual Ranger Online Activities
NPS Photo
Junior Rangers are special people who are dedicated to our National Parks. Their mission is to explore, learn, and protect, and to have fun while doing it!
While you can earn your Junior Ranger badge on your visit to the Missouri National Recreational River, we have also put together an opportunity for you to become a Missouri National Recreational River Virtual Junior Ranger.
Complete at least 6 of the 14 activities listed below to earn your Virtual Ranger badge! When you finish, download and print your badge to add to your collection!
If you are interested in receiving a hard-copy or electronic PDF version of our on-site Junior Ranger booklet, please email your request to us. For off-site visitors, please return or mail to Park Headquarters to receive a badge and become an official Missouri National Recreational River Junior Ranger.
Mail your completed program to:
Missouri National Recreational River
c/o Division of Interpretation
508 East 2nd Street
Yankton, SD 57078
Teacher Created Resources, Inc. Images
Bison Hide Activity
The American Bison was of the utmost importance to the Plains Indians. They used the bison for many different things ranging from food, to tools, clothing, and shelter. They utilized the meat and muscles, the bones, the horns, the stomach, the tongue, the hair and the hide of the bison. They also used the hides to record their history in what is called a winter count.
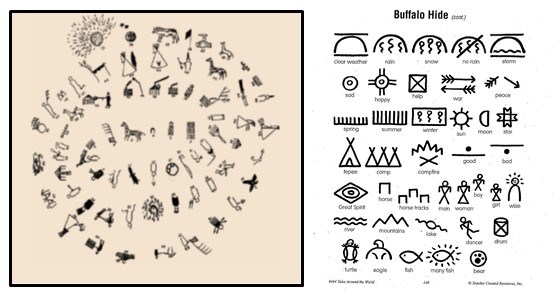
A winter count recorded each of the years in a generation. Symbols and figures were selected to represent a significant event or trigger a memory. A count keeper was selected to tell the story behind each symbol and to pass the oral history onto the next generations.
This example comes from Lone Dog who was the keeper of the count for his tribe from 1800-1871. The year is recorded in a counterclockwise spiral.
In this activity you get to create your own winter count! Think of a symbol to represent each year of your life or whichever years you choose. What are some important events, people, places, things or ideas that stand out as a highlight of any given year? Be creative!
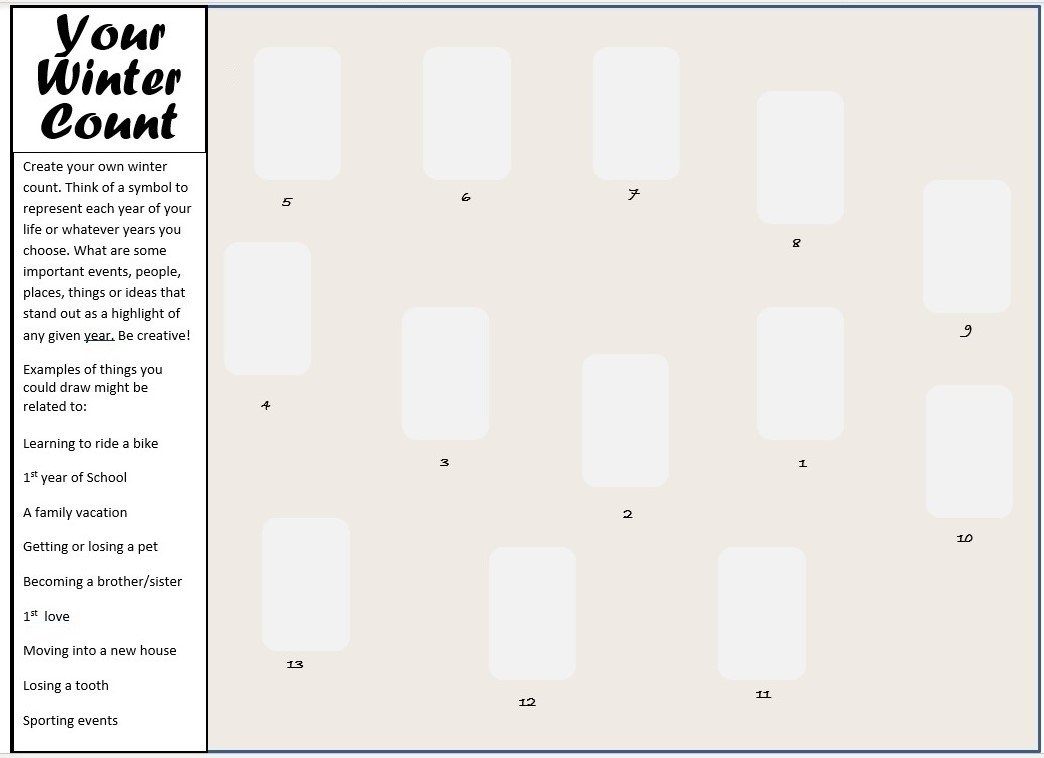
Print this template and make your own winter count!
NPS Photo
Arrowhead Adaptation Activity
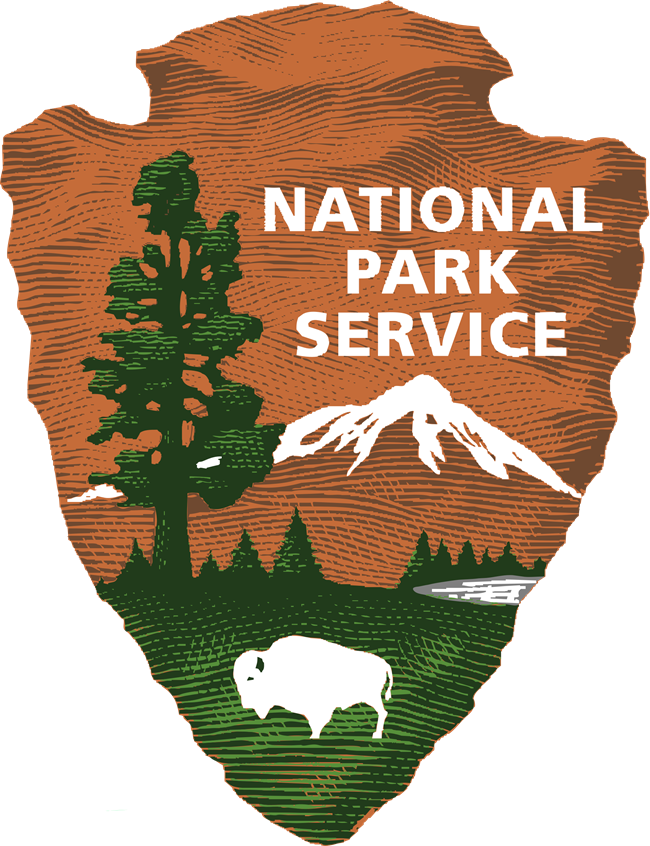
The arrowhead is the emblem of the National Park Service. Each part of the arrowhead represents a feature protected within National Park Service sites—these symbolize the natural, wildlife, water, geologic, cultural, and historic resources. The mountain represents landscapes and things like special landforms, scenic beauty, and geologic resources. The lake represents water resources such as rivers, lakes, and streams as well as the creatures that live in those water resources. The bison represents the wildlife that live within the National Parks. The tree, a Giant Sequoia, represents the plant life and natural resources that are protected in the National Parks. The arrowhead itself symbolizes the history and culture of the people within and around the different areas and National Parks.
In order to design your own arrowhead or design your own Missouri National Recreational River arrowhead, brainstorm some ideas with the following questions—
Unique Arrowhead:
- What kinds of plants are special to me?
- What kinds of animals are special to me?
- What types of landforms are special to me?
- What types of water resources are special to me?
- What shape represents history and culture to me?
Personalized MNRR Arrowhead:
- What kinds of plants are protected at Missouri National Recreational River?
- What kinds of animals are protected at Missouri National Recreational River?
- What are some types of landforms present within the Missouri National Recreational River?
- What are the names of the waterways present within the Missouri National Recreational River?
- What cultural stories are told at the Missouri National Recreational River?
Project: Park Protection Activity
The Missouri National Recreational River was established when the Wild and Scenic Rivers Act adopted by Congress was signed into law on November 10, 1978. The purpose of Missouri National Recreational River is to collaboratively work with multiple stakeholders to preserve and protect the natural, cultural, and recreational values of the last unchannelized and unimpounded segments of North America's longest river along the South Dakota and Nebraska border.
Use the dropdown bar to learn how to create your own park!
Using materials you have at home, create a logo for your park. Think about what makes that place special and what aspects of it you might use to represent the park in your logo. Tell us why you chose that place and those symbols to represent your park!
Creativity is key. What is the name of your park? What does it protect and preserve? Does your park have a mascot? If so, what is your park’s mascot and why?
Share your park, park logo, and mascot with us using the #FindYourVirtualMNRR and tag us @MissouriRiverNPS for a chance to be featured!
Steamboat Activity
The first steamboat to travel on the Missouri was the Western Engineer in 1819. Many steamboats followed suit some including the Yellowstone which reached Fort Union as well as some unlucky steamboats such as the Chippewa which exploded due to negligence; the Far West which was sunk by a snag; the Western which was crushed in ice jam by Yankton in 1881 and the Salouda which was overworked and blew the boiler.
Use the dropdown bar to learn more about steamboats and how to design your own!
Steamboats had many parts that kept the ship running including the bow, stern, pilot house, smokestacks, wood supply, boarding plank, cargo, whistle, boiler, paddlewheel, pilot, captain, engineer, crew men and grasshoppers.
The steamboat era of transportation lasted from 1819 to about 1890 as the building of the railroad shifted the way in which travel and transport was conducted.
For this activity you will design your own steamboat! Be sure to include the various parts of a steamboat: bow, stern, pilot house, smokestacks, wood supply, boarding plank, cargo, whistle, boiler, paddlewheel, pilot, captain, engineer, crew and grasshoppers.
Don’t forget about your steamboat’s flag! Design a flag that will get the attention of the people you pass on the shore!
Journey Journal Activity

Meriwether Lewis and William Clark led the Corps of Discovery on an expedition that covered more than 8,000 miles in a timespan of less than two-and-a-half years. President Thomas Jefferson sent these men to explore the continent. Throughout their journey Lewis and Clark noted and sketched many things in their journals ranging from geologic and geographic observations, astronomical and weather observations, scientific and ecological observations, cartographic drafts, the culture and the interactions they had with Native American tribes, what happened daily and much more.
Journals have many uses and are used in a variety of professions and activities. Want to be an explorer like Lewis and Clark? This activity will allow you to make your very own journal! You can write your experiences, observations, feelings, and even sketch what you see on your adventures!
Here’s what you’ll need to complete the activity:
-
Paper grocery bag, craft paper, or thin cardboard from a cereal box, snack box, frozen pizza box, etc.
-
Plain, graph, or lined paper
-
Ruler
-
Scissors
-
Thread
-
Glue
-
Coloring supplies
-
Utensil to poke a hole (safety pin, skewer, etc.)
-
Utensil to weave thread (safety pin, needle, etc.)
Procedure
-
Choose how many pages you would like to have in your journal.
-
Taking small sections at a time (such as 5 pieces of paper) fold that section in half. Make sure your edges are as flat as possible. We used the side of our ruler to flatten the edges.
-
Repeat this fold and flatten process until you have the number of pages you would like. (We considered one piece of paper folded in half to make two pages.)
-
Once all pages were folded, we used our hole punch to create three holes in the center fold of our pages.
-
Next we made the outside of our journal. We chose to use a thin cardboard from a snack box. To do this we took one of our paper sections and used it to trace a rectangle the same size as our journal pages.
-
Then we cut out our journal cover, marked where the three holes from our pages were and poked these out.
-
Next it was time to bind our journal together! Taking our weaving utensil, we started going through all of the holes in our cover and pages. We started on the inside of the journal, poking our utensil through the pages, through the cover, and then went through the second hole in our journal. We wove it through the second hole into the third and repeated this weaving pattern twice to bind our journal and cover. To complete the binding, we tied a note with the thread and trimmed off the excess.
-
The last step is to decorate your journal and start detailing your adventures!
Pelts and Picture Matching Activity
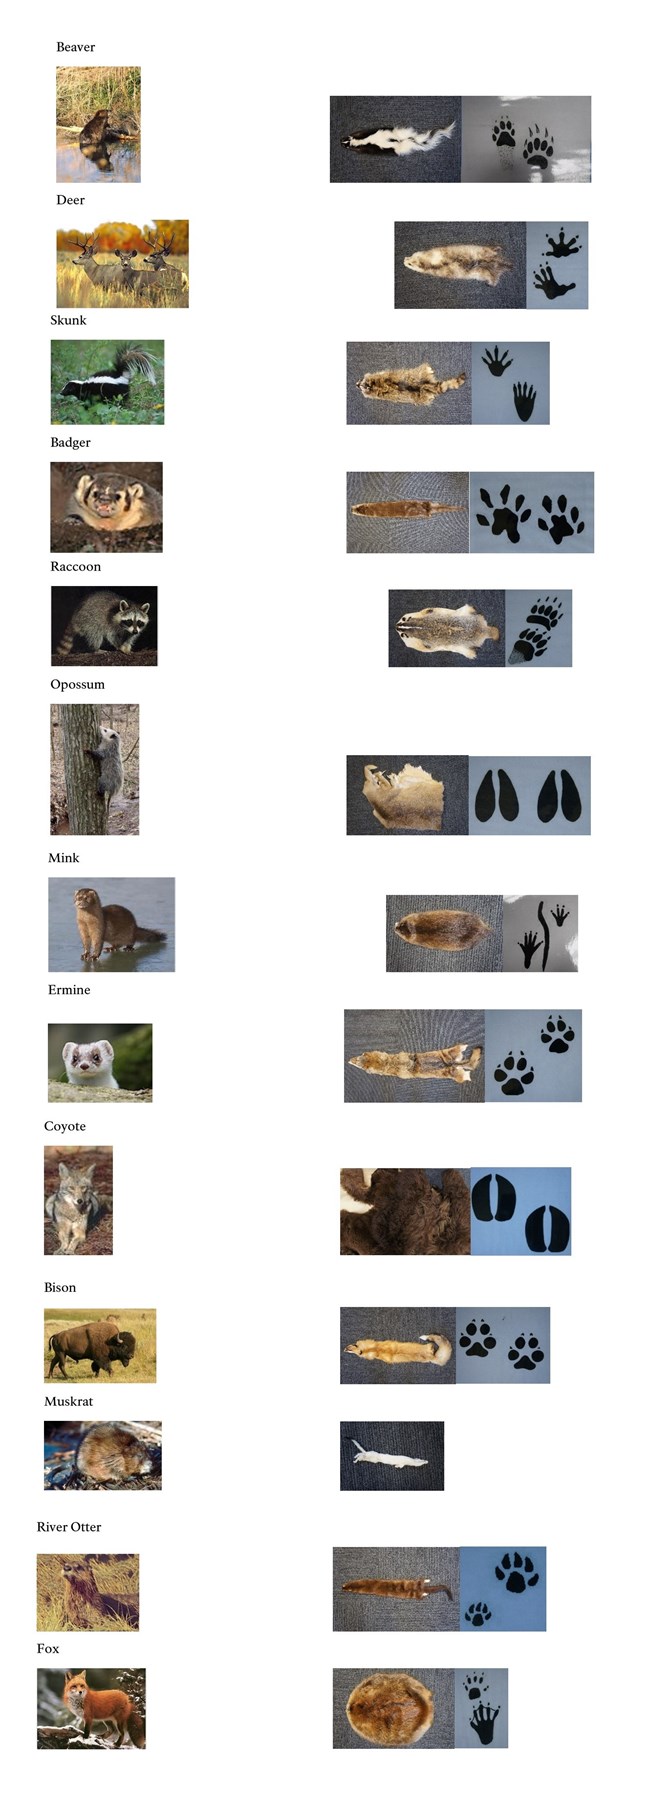
The fur trade increased Euro-American exploration of the Missouri River Valley. This trade focused on fur-bearing animals that could be used for various purposes including hats and clothing as different forms of insulating materials. Not only were pelts used for insulation, but in the 18th century in Missouri pelts were often used as currency. In other words, pelts such as beaver skins had a rate of exchange. For example, 1 kettle was equal to that of 1 beaver pelt; 1 tomahawk was equal to 3 beaver pelts and 1 blanket was equal to 6 beaver pelts.
Looking at the pelts, match them to their corresponding animal and its track marks. To comeplete this activity, save the image and draw connecting lines.
Use this dropdown bar to learn more about the fur trade:
Homestead Invention Activity
Life as a homesteader was not easy and required a lot of work in order to survive. Over time, agricultural inventions such as the plow, reaper, tractor, windmill and more played a major role in homesteading.
Think about what technologies make your life easier. Why was each invented?
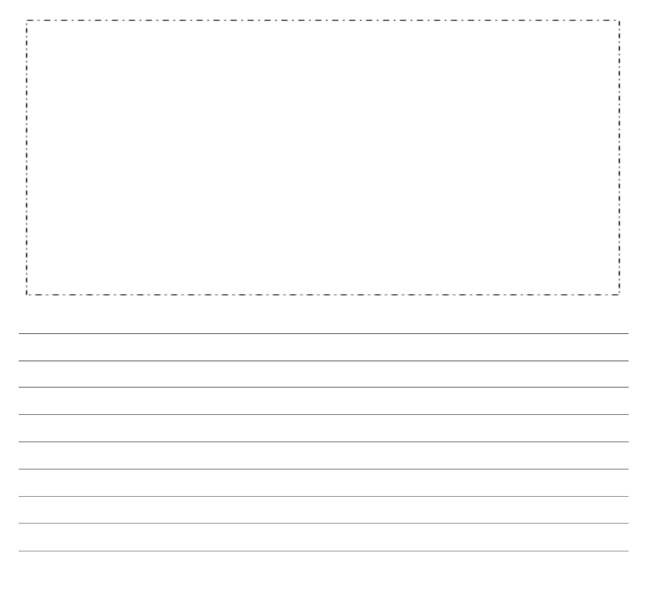
For this activity, invent something that you think would make your life easier! How would you develop it? How might it impact your life? Using the template to the right, draw your invention in the box and describe it on the lines below the box.
Utilizing these agricultural technologies as well as materials and items they had in their homes, homesteaders often reused and repurposed many of those materials and items. For example, homesteaders might have reused and repurposed items such as glass jars and wooden barrels. What are some items you might reuse and repurpose? What might you use them for? How does reusing and repurposing items help our environment, communities, and public lands?
Plesiosaur and Paleontology Activity
NPS Photos
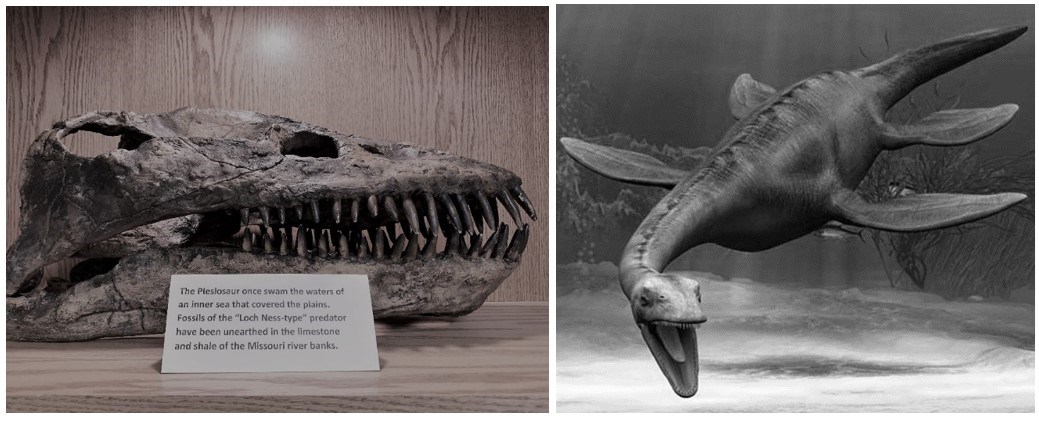
The Plesiosaur once swam the waters of an inner sea that covered the plains. Fossils of the “Loch Ness-type” predator have been unearthed in the limestone and shale of the Missouri river banks. In 2001 fossilized Plesiosaur bones were found near Ponca State Park, making it the second Plesiosaur skeleton to ever be found in North America.
Interested in studying fossils? That’s the job of a paleontologist! Paleontologists study the remains of past animals and plants and how they have changed. By “reading” fossils and rocks for clues about past environments and life, paleontologists help us understand what life was like on Earth a very long time ago. This activity will give you a chance to practice your paleontology skills! Use the dropdown bar to learn how to make your own fossil!
Our friends at John Day Fossil Beds National Monument and Yellowstone National Park have created a way for you to explore fossilization and petrification and make your very own fossils! Choose whichever fossilization or petrification process you prefer!
A Fossil is defined as any naturally occurring evidence of past life. Fossils need not be mineralized or enclosed in rock.
FOSSILIZATION
For this activity, created by John Day Fossil Beds National Monument, you will need the following materials—
-
Paper Cup
-
Liquid Mud or Clay- of two or more contrasting colors
-
Bones, Shells, Leaves- or other possible fossils
-
Plastic Spoons, Toothpicks, or Small Nails
Set Up
Choosing a small leaf, bone, and/or shells to act as your “fossils”, you will be simulating a lake in which mud is slowly being deposited. In this lake live plants and animals that fall to the bottom when they die. Once at the bottom, dead organisms are buried beneath mud and sediment.
Procedure
Step One: Put a bit of colored mud into your cup.
Step Two: Add mud to your cup in increments, alternating colors and allowing mud to settle between each addition. Be sure to add your fossils to the cup at any point in the “sedimentation” process.
Step Three: After your fossil(s) are buried beneath mud, allow the sediment to dry. The drying of the mud simulates the turning of sediment into rock. Drying will take place much faster if the cups are placed in a warm dry place, even a warm oven, for a few hours.
Step Four: Once drying is complete, excavate your fossils by tearing away the paper cups and digging at the mud with a plastic spoon.
TRACE FOSSILS
A Trace Fossil is an impression of the animal or plant after its death such as a natural mold of a shell.
For this activity, created by John Day Fossil Beds National Monument, you will need the following materials—
-
A Shallow tray or pie plate
-
Modeling clay
-
A carving tool such as a plastic knife, spoon, popsicle stick, etc.
-
A blank notecard to create a Specimen Card for your trace fossil
Set up
In order to have a better understanding of what a trace fossil is, it is important to understand the difference between a trace fossil and an impression made in sediment by non-biological processes preserved in rocks like ancient ripple marks, mud cracks, or raindrops preserved in rock. Those impressions do not represent activities of living things, and they are not trace fossils. A trace fossil is evidence of the activity of a living organism. Trace fossils could include an organism’s footprints, burrow tunnels, root cavities, eggs, nests, or coprolites.
It is your turn to choose a type of trace fossil to recreate that is made from an ancient organism that is now extinct. Be sure to research what the trace fossil looks like as well as the organism that makes it. Be creative!
Procedure
Step One: Using your modeling clay, mold your trace fossil. This is where your research will come in handy!
Step Two: When completed, fill out a specimen card that matches your trace fossil.
PETRIFICATION
Mineralization or Petrification is the condition when a fossil has effectively turned to stone. This occurs as the original organic material is replaced and filled in by minerals. Permineralization and replacement are two types of petrification.
For this activity, created by Yellowstone National Park, you will need the following materials—
-
1 tablespoon of Epsom salt (magnesium sulfate)
-
2 tablespoons of water
- 1 paper towel (folded into quarters)
- 1 plate
Procedure
Step One: Mix the Epsom salt and water on the plate. Roll the paper towel into a log or tube shape. Place the paper towel on the plate.
Step Two: Wait for the Epsom salt and water mixture to disappear. It may take up to a week to dry completely.
Step Three: Observe! What do you notice about your paper towel log?
Why It Works
Wood (your paper towel log) petrifies, or turns to stone, as dissolved minerals (your Epsom salt and water mixture) are absorbed and the minerals slowly replace the wood cells.
NPS Photo
Interested in exploring more fossils? Check out the National Park Service’s Junior Paleontologist activities.
Don’t forget to add our virutal passport stamp to your Paleo-Park passport!
Make Your Own Rawhide or Parfleche Activity
Today we use many different types of containers to travel with such as backpacks and suitcases. Much like the objects we use today, Parfleche were containers that were made by Plains Indians to hold a variety of different objects. These contains were different shapes and sizes and were made out of rawhide with sinew or strings and were often decorated. These geometric or abstract designs varied by tribe. The rawhide generally came from buffalo, sometimes elk or deer, and as they were used for travel, they were designed to hang on either side of a horse. Women would also use these containers to carry their belongings on their backs, like our modern-day backpacks, and would contain objects such as dried foods, clothing, sacred objects, and moccasins. As we learned in the Winter Count activity, the buffalo was a very important resource in the lives of the Plains Indians. In this activity you will learn how to make your own rawhide, or make your very own Parfleche container! Use the dropdown bar(s) to complete this activity!
Make Your Own Rawhide
The buffalo (bison) was essential in the lives of the Plains Indians. They used to buffalo for robes, clothing, food, eating utensils, rugs, fuel and tools. The buffalo was highly respected by the Native Americans and they always gave thanks for the buffalo’s assistance in their way of life.
For this activity you will need the following materials—
-
A large brown paper bag
-
Coloring utensils (crayons, markers, stamps, paint, etc.)
-
Scissors
Procedure
Step One: Cut along one seam of the paper bag to open the bag into a large piece of paper.
Step Two: Using scissors or tearing, cut or tear a hide shape from the paper.
Step Three: Using your chosen color utensils, create a story and design on your hide using various symbols or pictographs.
Step Four: Once your story is illustrated, begin to crumple your paper.
Step Five: Continue to work your paper by crumpling, flattening, working, and recrumpling your hide. The oils from your hands, the heat, and the friction all mimic the tanning process. The fibers of your brown paper will break down and soften the more you work the paper.
Step Six: Once you are happy with your hide, share it with us by tagging us on social media!
Instagram—@MissouriRiverNPS
Facebook--@MissouriNationalRecreationalRiver
Our friends at Fort Union Trading Post National Historic Site and Knife River Indian Villages National Historic Site have created patterns and instructions on how you can create your own Parfleche containers! They have included a Box Parfleche Pattern and an Envelope Parfleche Pattern that you can choose from.
Be sure to share your masterpiece with us and thank our friends at Fort Union Trading Post National Historic Site and Knife River Indian Villages National Historic Site for their patterns and instructions! #FindYourVirtualPark #VirtualJuniorRanger
River Safety Scramble Activity
Learn more about being safe on the river by unscrambling the words below to know what to bring along with you on your river adventure!
- IEFL ECTAKJ
- SAEOPRLN LFNIOTTOA VEDECI
- NTSECI LEEEPTLRN
- OIPPTRAEPAR FTACEARRTW
- EVRRI INTOICSNDO
- DINIKRGN WRTAE
- RXEAT DDPALE
- SEUNECRSN
- NESGSSLASU
- MDREIIBW AHT
- UBAELRD ERIRV DALSNAS
- FOLU RTEWHAE AREG
- IFTSR DAI ITK
- ERHTET PORES
- ALFOT LANP
- NKCAS
- Life Jacket
- Personal Flotation Device
- Insect Repellent
- Appropriate Watercraft
- River Conditions
- Drinking Water
- Extra Paddle
- Sunscreen
- Sunglasses
- Wide-Brim Hat
- Durable River Sandals
- Foul Weather Gear
- First Aid Kit
- Tether Ropes
- Float Plan
- Snack
Spirit Mound Historic Prairie Geology
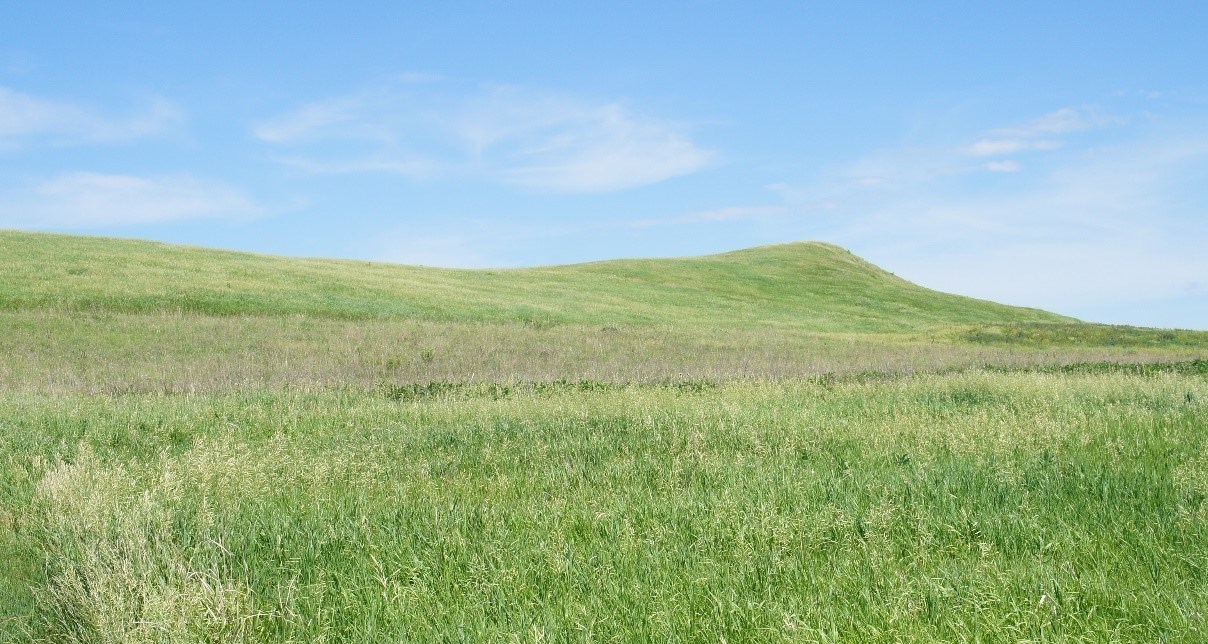
Spirit Mound holds various cultural and historical meanings and significance. The mound is held sacred by several Native American tribes and is associated with a visit from the Lewis and Clark expedition in 1804.
Spirit Mound is a natural hill that rises from a plain covered by glacial till and is known geologically as a formation of roche moutonee. This is a bedrock knob that was shaped but not leveled by the last Pleistocene glacier 13,000 years ago. The central core of Spirit Mound is a bedrock of Niobrara chalk that the continent ice sheet did not erode away. The chalk—consisting of fossil shells deposited in an ancient sea—is evident on the north side of the hill.
Studying rocks can help us gain a better understanding of the Earth. They can help us understand how things form and change, what materials they are made of, and explore concepts such as changes in environments. Ready to rock? Find a rock around your home and use the dropdown bar to study it carefully. Geological information on landforms and rocks and minerals may be helpful for this activity.
What color is your rock?
Does it have any: Fossils? Crystals? Dark or light bands? Bits of other rocks? Holes? Flakes? Spots? Stripes?
Is it: Shimmery? Transparent? Translucent? Glassy? Dull?
Geologists often draw the rocks and formations they see to help them see the details they might miss. Use the box template as your geologist’s sketch of your rock.
What does your rock feel like?
Is your rock heavy or light?
Does it feel jagged, smooth, or grainy?
Does it feel rough like sandpaper?
Does your rock have a smell?
What does your rock sound like when you tap it with your fingernail? With another rock?
Based on your descriptions, where do you think your rock came from? Our friend's at Devils Tower National Monument have a Rock Type table that is very useful for this activity!
How do you think it formed?
What kind of rock do you think it is?
When you are finished with this activity remember to put your rock back where you found it as Junior Rangers practice Leave No Trace ethics by not taking anything from its home in nature. You rocked that activity!
Lewis and Clark Trunk Activity
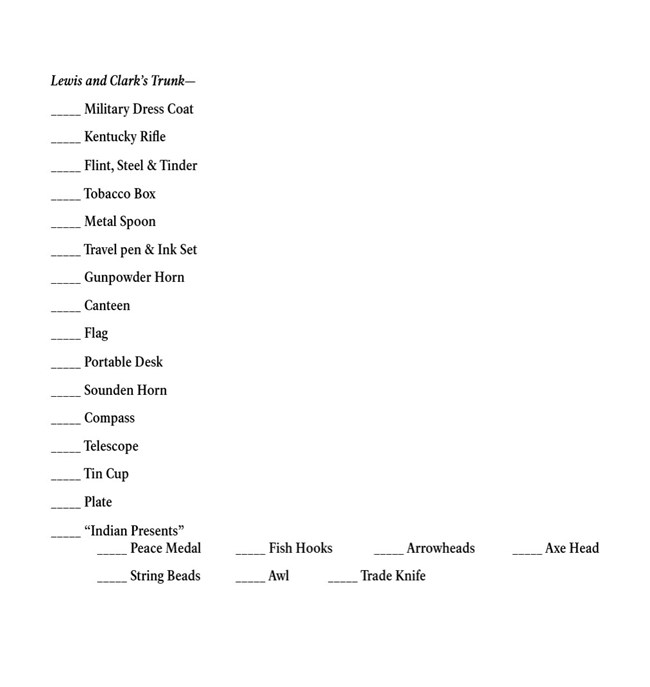
What Would You Take with You in Your Trunk?
Lewis and Clark led the Corps of Discovery, an important story tied to the Missouri River. Between 1804-1806 they were the forerunners of Westward Expansion. For their long journey they packed their essentials in a trunk. Below is a list of items that would have been included in their travel trunk. Decide what you would have included from this list on your own exploration!
Is there something that is not on this list that you would take with you?
Would anyone be going on the trip with you?
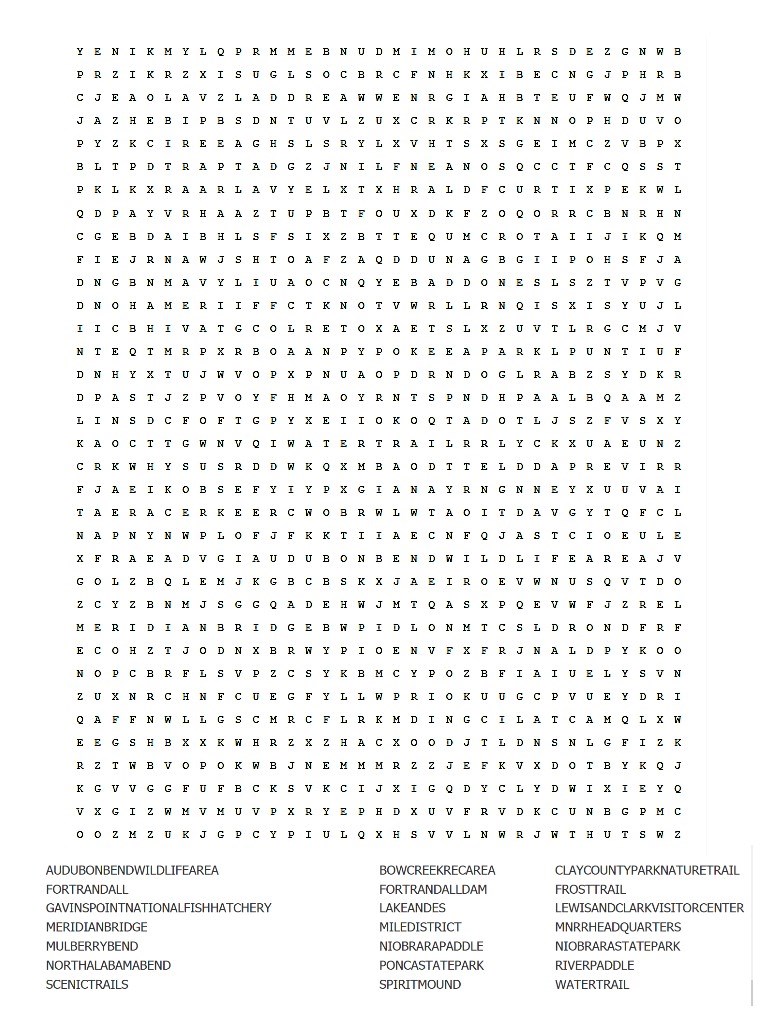
MNRR Destinations Word Search
Search your way through the jumble of letters and find some of the places to explore when you visit the Missouri National Recreational River.
Missouri National Recreational River Junior Ranger Quiz
- How many miles long is the Missouri River?
- How many miles of the Niobrara River are part of the park?
- Name two places Lewis and Clark visited within the park?
- Why was Yankton so important for steamboats?
- What is the name of the ship that hit a snag and is still visible in the river when the water is low enough?
- What is one of the reasons why the Missouri National Recreational River became a National Park Service site?
- There are lots of things to do when you visit the Missouri National Recreational River. Name three of them.
- What Native American groups live(d) along the Missouri?
- Name the three main endangered or threatened species in the Missouri National Recreational River.
- What types of natural features can you find in the Missouri National Recreational River?
- 2,341 Miles
- 20 Miles
- Spirit Mound, Mulberry Bend, Mouth of the Niobrara, Ionia Volcano, Mouth of Vermillion River, White Chalk Bluffs, Calument Bluff, Bow Creek, Gavins Point Dam, Old Baldy, Bon Homme
- Territorial Capital of Dakota
- North Alabama
- MNRR Significance Statements:
- The MNRR is one of the more prominent places in the United States where two contrasting geologic landscapes come together. The ancient sea sediments of the Cretaceous period, such as the chalkstone bluffs, and the glacially altered terrain of the Pleistocene, are clearly visible.
- The MNRR protects one of the last remnant examples in the nation of a dynamic channel habitat in a large river system. It contains a mosaic of sandbars, backwaters, islands, side channels, and riparian cottonwood forests that were historically found throughout the Missouri River corridor.
- The MNRR serves as a crossroads for a long and rich human history, past and present, from early American Indians to European America exploration, western steamboat commerce, and expansion to the West. The number and variety of prehistoric and historic resources, including prehistoric villages, steamboat wrecks, and Fort Randall, attest to the long history of human use.
- The MNRR provides a multitude of recreational opportunities that are regionally significant and are enriched by the variety of access points, land-based trails, and a national water trail. The ever-changing river provides visitors the unique opportunity to frequently re-explore the park.
- The Missouri National Recreational River provides rare and exceptional vistas of expansive river valleys, impressive geologic features, and a wide, braided river channel with sandbars, snags, and islands.
- Any of the Activities Guide suggestions, hiking, kayaking/canoeing, etc.
- Ponca, Yankton Sioux, Santee Sioux, Omaha, Yankton Nakota, Teton (Brule) Lakota
- Pallid Sturgeon, Least Tern, Piping Plover
- Islands, backwaters, sandbars, bluffs, etc.

You have completed the activites to become an official Virtual Junior Ranger at Missouri National Recreational River! All that's left is to read the Junior Ranger Pledge and print your badge!
“I, (fill in name), am proud to be a National Park Service Junior Ranger. I promise to appreciate, respect, and protect all national parks. I also promise to continue learning about the landscape, plants, animals and history of these special places. I will share what I learn with my friends and family.”
Congratulations!
You are now an official Missouri National Recreational River Virtual Junior Ranger!
To download your Virtual Junior Ranger badge, right click and “save image as” jpeg. Navigate to your downloads folder and open the image on your computer. From there you can print your Virtual Junior Ranger badge.
A few ideas for displaying your badge:
Print your badge, use it as a template to cut a piece of cardboard matching the shape, and then glue the paper and a pin onto the cardboard!
Use tape to secure it into your passport or scrapbook!
Set it as your background on a phone or tablet!
Tape it to your notebook!
The choice is yours!
