Article

Lifting and Hoisting Stone Grave Markers

Video

Open Transcript 

Transcript

Hello, in this video we're going to cover the basic procedures for lifting a stone grave marker using a hoist or lifting system. Two things to keep in mind is always exercise personal safety and to do no harm to the monument itself. These stones are extremely heavy, but very delicate and caution should always be taken. Many fallen or sunken grave markers are too large or weigh too much to be reset by hand. For these markers a mechanical hoisting or lifting system must be used. There are many types of lifting systems in use, from very complex cranes and truck mounted hydraulic booms to less complex gantries and tripod hoists. In this video we are going to demonstrate the use of the more economical and readily available tripod hoist. Before we get started, we want to make sure that all of our parts are secured and stable. To do this we will probably have to move the headstone away from the base to give us room to work. This is where our lift is needed. It is important that you follow all manufacture's recommendations when setting up a lift. Failure to follow these instructions could result in a malfunction, which could possibly harm the operators and damage the historic grave marker. Before hooking the load on, it is important to make sure that the lift is level and that all of the footings are on solid ground. If the area that you are working in is muddy or has sandy soil you might consider placing large pieces of wood under the feet to help distribute the weight. As we move forward with our reset, remember to always keep safety in mind. Make sure that your hoist operator has steel toe boots and other personal protective equipment, such as a back brace if needed. The next aspect of safety is knowing that your equipment is rated for the load that you want to lift. All hoisting equipment from straps to our tripod hoist have their load limit printed or tagged on them. It is important to know if your stone is within these limits. The weight of a stone can be easily calculated by measuring the dimensions of the stone and calculating the total volume. The volume is then multiplied by the stones density. More information and formulas for this are located on the NCPTT website at this address. To move this marker we are using a woven nylon lifting strap. One advantage of nylon straps is that they can be tied and attached to your monument in a variety of helpful styles. There are a wide variety of nylon straps available for lifting and hoisting. More information on the different kinds of straps and their specific uses can be found at this address. Chains or cables should not be used when moving historic markers for fear of damaging the fragile surface of these markers. Now it is time to clean the stone. Pay particular attention to the two surfaces that we need to bond together during the resetting. After the stone is washed it will need to dry out before anymore work can be done. It is a good idea to let the stone dry for a few hours before continuing work. Now that we have cleaned our stone, we are going to first focus on the base. The monument’s base is the most important part. Without a stable and plumb base any repairs done to the stone will risk the chance of failing in the future. If your base has the remnants of metallic pins we will need to remove them before continuing with the resetting. Instructions on how to remove and replace the metallic pins are in the NCPTT video “Resetting a Stone Grave Marker, Volume 1” also available on the NCPTT website. The next thing that we notice about our base is the traces of the old failed hard mortar. We must remove the loose mortar to get a good bond when the stone is reset. We are going to carefully remove the old mortar with a hammer and chisel. This procedure will be done to both the base and headstone. Now that our stone is dry and the old mortar is removed we can prepare the base of the headstone. For this reset we are going to use a two part epoxy on the broken tab and a lime pointing mortar around the edge of the headstone. Care should be taken when mixing a two part epoxy. We start by laying out the mortar around the edge of the stone about a half inch away from the outside of the headstone. Next it is time to place the headstone back on the base, making sure to guide the stone slowly and carefully. It is important to have enough help to safely lift and control the stone while it is maneuvered back onto the base. For this particular head stone two lead shims are inserted on one side to help level the stone. This is particularly important on larger stones but may not be needed on smaller ones. The lead is soft enough to flex and help level the stone without causing damage. Once you have checked that the headstone is level and plumb and made any adjustments necessary, you must then remove any extra lime mortar. Now that the stone is set we can carefully remove the lifting tripod. The stone should be braced while the mortar sets. Now that you have watched this video on the basic procedures for reseting a stone grave marker while using a hoist or lifting system, you will have the confidence and knowledge needed to reset stones in your cemetery. Remember to always exercise personal safety and to do no harm to the grave marker itself. And good luck in your preservation efforts.

Visit our keyboard shortcuts docs for details
Duration:
5 minutes, 40 seconds

This video covers the basic procedures for resetting a stone grave marker while using a lifting or hoisting system. Two important things to remember are to exercise personal safety first and to do no harm to the grave marker. These are structures may be surprisingly heavy yet delicate and a great amount of care must be exercised when moving and handling them.
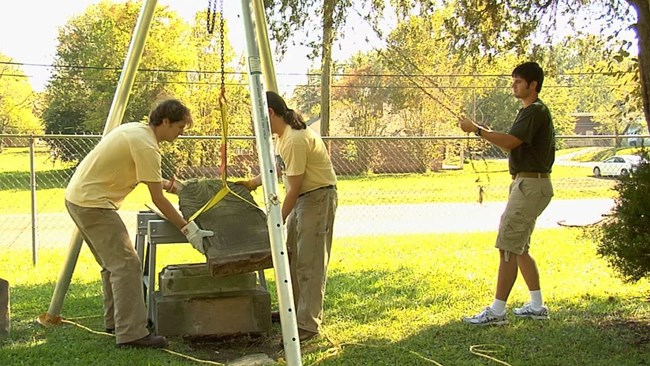
Jason Church and two research associates use a tripod hoist while resetting a gravestone.

National Park Service

Lifting Systems

Many fallen or sunken grave markers are too large or weigh too much to be reset by hand. For these markers a mechanical hoisting or lifting system must be used.

There are many types of lifting systems in use, from very complex cranes and truck mounted hydraulic booms to less complex gantries and tripod hoists.

In this video we are going to demonstrate the use of the more economical and readily available tripod hoist.
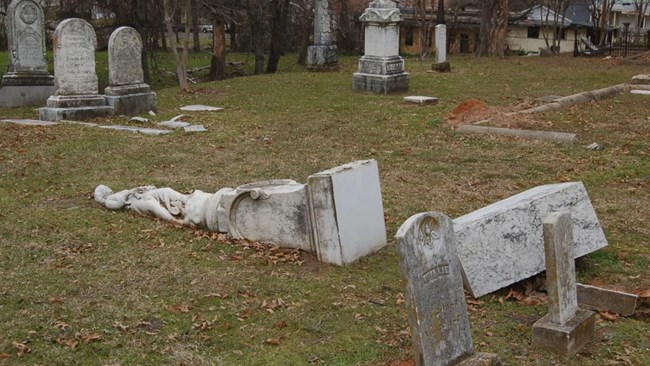
A statue figure on a pedestal has fallen from its base.

National Park Service

Safety

Before we get started, we want to make sure that all of our parts are secured and stable. To do this we will probably have to move the headstone away from the base to give us room to work.

This is where our lift is needed. It is important that you follow all manufacture’s recommendations when setting up a lift. Failure to follow these instructions could result in a malfunction, which could possibly harm the operators and damage the historic grave marker.

Before hooking the load on it is important to make sure that the lift is level and that all of the footings are on solid ground. If the area that you are working in is muddy or has sandy soil you might consider placing large pieces of wood under the feet to help distribute the weight.

As we move forward with our reset remember to always keep safety in mind. Make sure that your hoist operator has steel toe boots and other personal protective equipment such as a back brace if needed.

The next aspect of safety is knowing that your equipment is rated for the load that you want to lift. All hoisting equipment from straps to our tripod hoist have their load limit printed or tagged on them. It is important to know if your stone is within these limits.

The weight of a stone can be easily calculated by measuring the dimensions of the stone and calculating the total volume. The volume is then multiplied by the stone's density.

Nylon Lifting Straps

To move this marker we are using a woven nylon lifting strap. One advantage of nylon straps is that they can be tied and attached to your monument in a variety of helpful styles. There are a wide variety of nylon straps available for lifting and hoisting. More information on the different kind of straps and their specific uses can be found at this address. Chains or cables should not be used when moving historic markers for fear of damaging the fragile surface of these markers.

Clean the Stone

Now it is time to clean the stone. Pay particular attention to the two surfaces that we need to bond together during the resetting. After the stone is washed it will need to dry out before anymore work can be done. It is a good idea to let the stone dry for a few hours before continuing work.
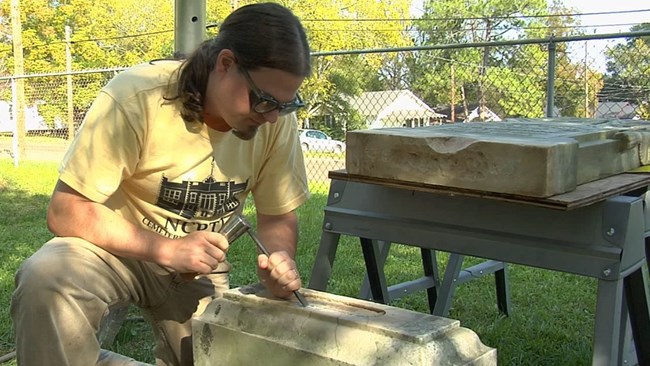
Jason Church uses a chisel and hammer to remove old mortar from the base of a grave stone.
Remove the old mortar with a hammer and chisel. This procedure will need to be done to both the base and headstone.
National Park Service

Prepare the Base

Now that we have cleaned our stone, we are going to first focus on the base. The monument’s base is the most important part. Without a stable and plumb base any repairs done to the stone will risk the chance of failing in the future.

If your base has the remnants of metallic pins we will need to remove them before continuing with the resetting. Instructions on how to remove and replace the metallic pins are in the NCPTT video “Resetting a Stone Grave Marker, Volume 1” also available on the NCPTT website.

The next thing that we notice about our base is the traces of the old failed hard mortar. We must remove the loose mortar to get a good bond when the stone is reset. We are going to carefully remove the old mortar with a hammer and chisel. This procedure will need to be done to both the base and headstone.

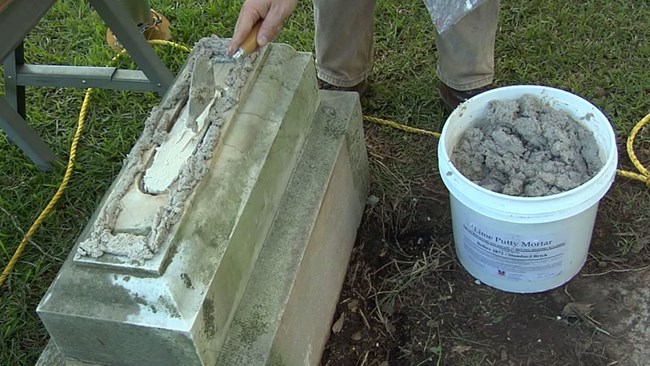
Jason Church applies new mortar to the cleaned base of a headstone.
For this reset we are going to use a two part epoxy on the broken tab and a lime pointing mortar around the edge of the headstone. Care should be taken when mixing a two part epoxy.

National Park Service

Mortar the Base

Now that our stone is dry and the old mortar is removed we can prepare the base of the headstone.

For this reset we are going to use a two part epoxy on the broken tab and a lime pointing mortar around the edge of the headstone. Care should be taken when mixing a two part epoxy.

We start by laying out the mortar around the edge of the stone about a half inch away from the outside of the headstone.
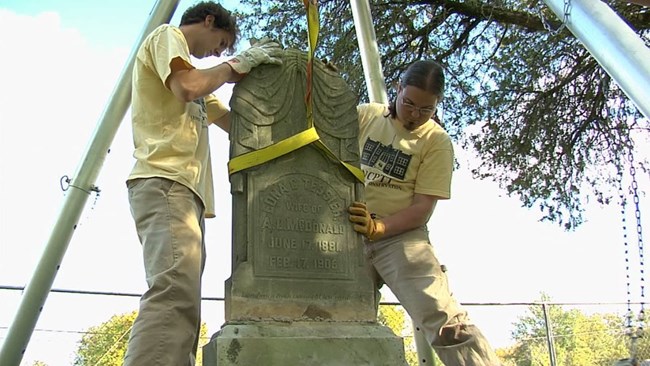
Place the headstone back on the base, making sure to guide the stone slowly and carefully. It is important to have enough help to safely lift and control the stone while it is maneuvered back onto the base.

National Park Service

Set the Stone

Next it is time to place the headstone back on the base, making sure to guide the stone slowly and carefully. It is important to have enough help to safely lift and control the stone while it is maneuvered back onto the base.

For this particular headstone two lead shims are inserted on one side to help level the stone. This is particularly important on larger stones but may not be needed on smaller ones. The lead is soft enough to flex and help level the stone without causing damage.

Once you have checked that the headstone is level and plumb and made any adjustments necessary, you must then remove any extra lime mortar.

Carefully Remove Lifting Tripod

Now that the stone is set we can carefully remove the lifting tripod. The stone should be braced while the mortar sets.

Learn More

Now that you have watched this video on the basic procedures for reseting a stone grave marker while using a hoist or lifting system, you will have the confidence and knowledge needed to reset stones in your cemetery.

Remember to always exercise personal safety and to do no harm to the grave marker itself. And good luck in your preservation efforts.

Learn more about NCPTT Cemetery Conservation.

Last updated: October 20, 2021