Part of a series of articles titled Preservation Matters.
Article
Preservation Matters: Maintenance - Graffiti Removal from Historic Features

RLA Conservation, Inc
The presence of graffiti on building materials is ubiquitous in urban and rural environments. Graffiti can affect many types of building materials and can cause properties to be devalued. Community law enforcement officials recom-mend rapid removal of graffiti to discourage vandals from adding more graffiti. Methods of graffiti removal should be cost-effective and easy to use, and result in minimal changes to the surface of historic structures.
Assessment
Before removing graffiti from an historic feature, it is important to identify the nature of the graffiti and the material to which it is applied.
First, identify characteristics about the graffiti:
- What was used to graffiti the historic feature? Spray paint? Permanent marker? Pencil?
- Was the graffiti carved into the surface?
- What is the color of the graffiti?
- How much graffiti needs to be removed?
- Has the graffiti been there a long time?
Next, identify the surface material of the fea- ture that was graffitied.
- Is the feature made of unpainted wood? Metal? Stone? Brick?
- Is the surface already painted? Can a new coat of paint be applied?
- Is the surface soft? Is it powdery or “sugar- ing?” Are there signs of wood decay?
Different building materials will absorb graffiti in different ways. For example, a painted metal or wood surface can be more easily treated than a soft brick or stone surface. The latter is porous, and the graffiti can soak into the material. Once the graffiti is removed from a porous material, “ghosting” of the graffiti can often be seen beneath the surface.
Different combinations of graffiti materials and surface materials make graffiti removal a complex issue and a demanding task. Test your treatment prior to undertaking full-scale graffiti removal. Always use the gentlest means possible to remove the graffiti.
PREPARATION
Carefully plan and test removal techniques before starting on a full scale cleaning.
Documentation
Document the vandalism before starting, keeping good photographic records.
Preparation
Plan your approach. Review the prod- ucts or techniques being used. Read the product literature, including any technical and safety data sheets. Follow the manufacturer’s recommen- dations; do not use products in an “off label” or non-recommended way.
Gather Supplies
Follow safety recommendations for personal protection, including protective clothing like coveralls or a Tyvek suit, goggles, chemical-ly-resistant gloves, closed-toe shoes, or an organic vapor respirator with an N95 particulate filter.Gather tools needed for graffiti removal which may include paint brushes or rollers, nylon scrub brush- es, “scratchless” scrub pads, and razor blades to scrape excess paint from the surface.
Test Patches
It is critical to conduct test patches prior to full-scale removal. Test patches allow you to adjust things like dwell time, stand-off distance,etc. Carry out test patches for each planned product or technique in inconspicuous areas of size six inch by six inch or less. Have several observers rank the performance of each technique and any possible visual damage before selecting a removal method.

RLA Conservation, Inc
Chemical Methods
Many graffiti removers on the market are chemical based, including water, steam, solvents, or alkaline solutions, and are used to dissolve the graffiti paint, marker, or ink.
CAUTION!
Some chemicals can be harmful to the historic feature and to humans: solvents can produce harmful fumes or VOCs, alkaline solutions can cause skin irritation and chemical burns, and steam can cause heat burns. Appropriate safety and personal protection are required for all graffiti removal techniques.
Solvents
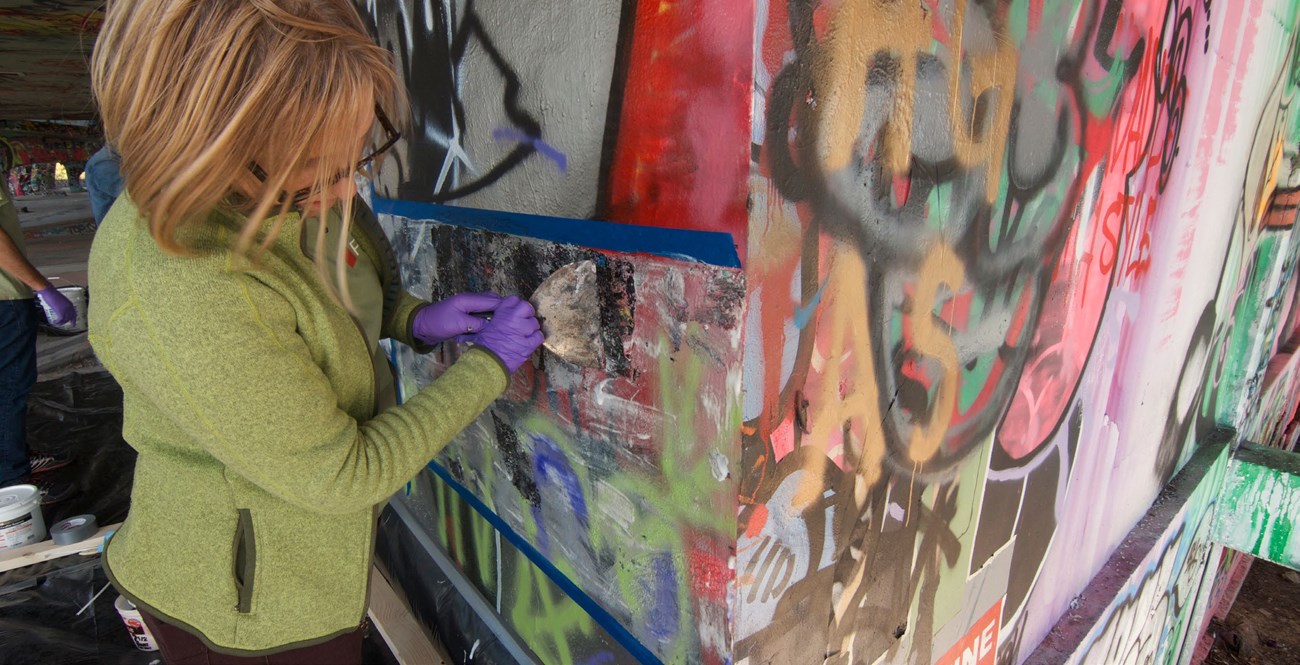
Solvent removal systems should be applied using a poultice or a gel to control penetration of the solvent into the surface. A poultice is made from an absorbent material (such as shredded paper, fluffpulp, or clays) mixed with the cleaner and applied as a slurry, as shown in the photograph courtesy of Fran Gale. Commercial cleaners in gel form can be applied directly to the surface. Fresh graffiti made with permanent markers can sometimes be removed with acetone, rubbing alcohol, or mineral spirits. Some commercial products that may beconsidered include Graffiti Solutions Elephant Snot, Graffiti Removal Inc. Heritage Graffiti Remover, ETS Taginator or ETS Tagaway.
Alkaline Solutions
Some cleaners use an alkaline additive that can be harmful to the surface if it isn’t properly removed or neutralized. These are general- ly not recommended for sensitive stone surfaces like limestone or marble. If an alkaline paint remover is used on masonry, the surface should be wetted first to keep the cleaner near the surface; the cleaner should always be rinsed from the surface starting from the bottom up; and a neutralizer must be used after cleaning to stop any damage to the surface.
Physical Methods
A variety of physical methods can be used to remove graffiti; try the gentlest method first.
Washing
A series of graded brushes (soft to hard), water, and a standard pH neutral, synthetic soap (such as Orvus WA Paste™ or Seventh Generation All-Purpose Cleaner - Free and Clear ) can be effective on crayon or chalk.
Scraping
A single-edge razor blade can scrape graffiti from surfaces such as glass or polished granite. Always apply gentle pressure and keep the blade sharp. Watch for scratching, which indicates the blade is rough and should be changed.
Spraying
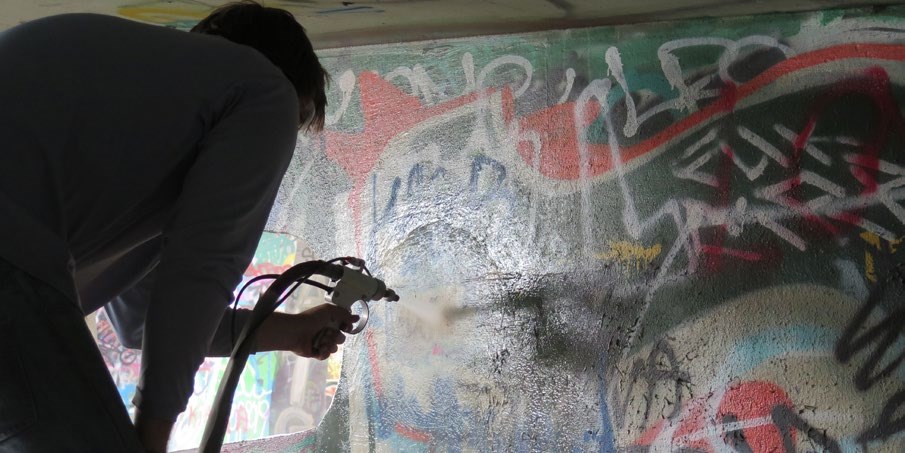
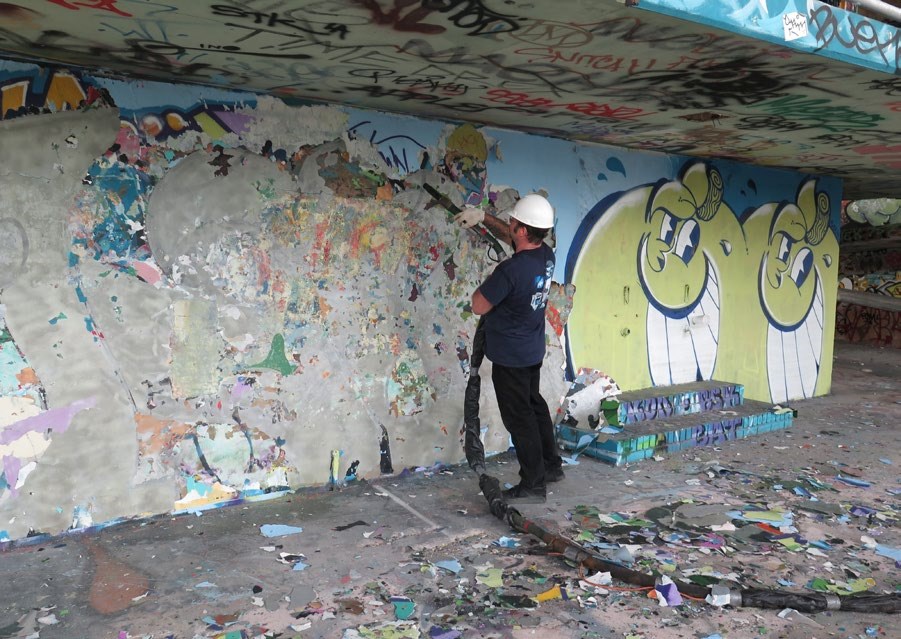
Pressure-washing, power-washing, micro-abrasion, and dry-ice misting are effective removal methods that abrade the graffiti from the surface. These techniques should be performed by professionals that understand variables like pres- sures, abrasive particles, and standoff distances. Always use a low-pressure spray (100-400 psi) that is controlled through a hose and delivery wand, keeping the wand at least 12” from the surface. Always test the method in a small area inconspicuous area. Remember that some historic materials, such as soft wood or masonry, can easily be damaged even at low pressures.
Laser Cleaning
Lasers can be very effective at re- moving paint from masonry. Benefits of laser clean- ing include its selectivity, the potential for gradual removal of graffiti, its repeatability, good control of the area treated, and its low environmental impact. However, laser cleaning can roughen the surface and has been known to cause staining or darkening of some stone surfaces. Laser cleaning requires a professional that is certified to use lasers.
WARNING!
Power tools, such as grinders, should never be used. Most power-washing equipment found in hardware stores operate at potentially damaging pressures of 1600-3200 psi.

RLA Conservation, Inc
REMOVAL TECHNIQUE
Select the most effective, but least damaging, removal technique for the job and work in small areas during the removal process.
Consider both chemical and physical processes for removal. Always try the least aggressive process first. Gradually increase the abrasive or corrosive nature of the technique to find the most effective but least damaging process.
After testing potential products, remove any excess or dimensional paint from the surface using a physical method, such as a mild abrasive or a power washer with a fan tip, to minimize the amount of paint that can dissolve and soak into the pores of the material during subsequent removal efforts.
Work in small areas as you go, especially if you have colored paints that may embed themselves in the surface and cause ghosting. Use a gel or proprietary product that has a thickener which will stick to the surface. If ghosting continues after your best cleaning efforts, you may need to resort to physical abrasive methods to remove the final graffiti remnants.
REFERENCES
Martin Weaver, “Removing Graffiti from His- toric Masonry” NPS Preservation Brief No. 38, https://www.nps.gov/tps/how-to-preserve/ briefs/38-remove-graffiti.htm, Accessed 10/02/2017.
Patricia Sanmartin, Francesca Cappitelli, and Ralph Mitchell, “Current methods of graffiti removal: a review,” Construction and Building Materials, vol. 71, (2014), pp 363-374.
“Graffiti and its Safe Removal,” Historic Environment Scotland, Edinburgh, Scotland, 2005. https://www.historicenvironment.scot/archives-and-research/publications/publication/?publicationid=cdb- fef7d-0c54-4179-9fa4-a59500ec3aa4, accessed 06/24/2020.
Anne Grimmer, “Keeping It Clean: Removing Exterior Dirt, Paint, Stains and Graffiti from Historic Masonry Buildings,” DIANE Publishing, 1992, 34 pp.
ABOUT NCPTT
The National Center for Preservation Technology and Training (NCPTT) is the leading research, technology and training center within the National Park Service. NCPTT publishes its Preservation Matters Series to provide easily accessible guidelines for preserving cultural mate- rials.
National Center for Preservation Technology and Training
645 University Parkway
Natchitoches, LA 71457
Website: www.nps.gov/ncptt
Phone: (318)356-7444
Credits
Series Editor: Kirk A. Cordell, NCPTT Executive Director
Author: Mary F. Striegel, NCPTT Materials Conservation Chief
Last updated: September 29, 2022
