Last updated: September 30, 2025
Article
Conserve O Gram 19/5: Considerations for the Removal of Fasteners from Archival Documents

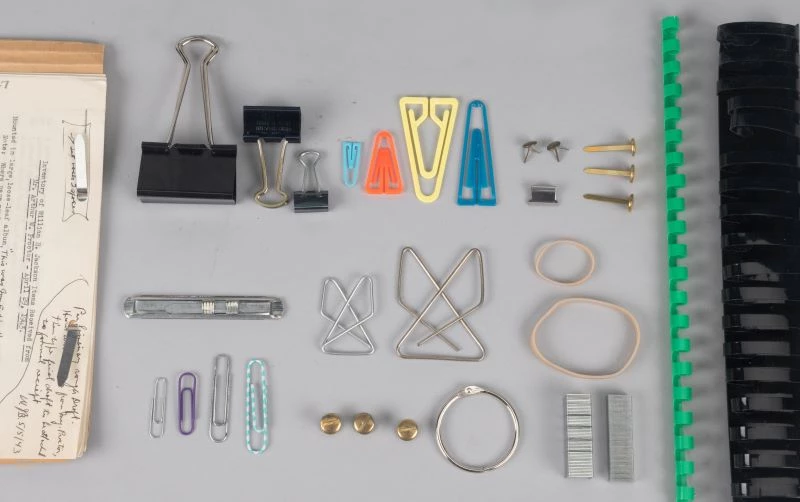
When archival documents are processed for permanent storage, fasteners such as staples, paperclips, pins, and other devices may be removed if they:
- Cause preservation concerns such as staining, significant distortion, or tears.
- Obscure text that cannot be found elsewhere on the record.
- Inhibit the safe digitization of the material.
Fasteners such as legal document ribbons, sealing wax, and thread stitches which enhance the meaning or value of the documents should often be left in place.
Fastener removal is a consideration in the level of processing chosen for a collection (i.e. minimal, low, moderate, intensive) based on factors such as anticipated use, staff time, preservation concerns, and digitization plans. These levels derive from the Guidelines for Efficient Archival Processing in the University of California Libraries (2020) and have been recommended by the National Park Service in the Museum Handbook, Part II, Appendix D: Museum Archives and Manuscript Collections (update in progress).
The decision to remove a fastener should be made on a case-by-case basis and does not need to be consistent across the entire collection (i.e. just because you remove one staple does not mean you need to remove them all.)
Fasteners are a method of retaining physical and intellectual order; it is imperative that if a fastener is removed, it is replaced with a less harmful alternative fastener or storage method. Refer to Conserve O Gram Volume 19 Issue 6: Attachments for Multi-Page Historic Documents for methods of refastening or grouping archival documents.
In this document, guidelines for addressing the most common fasteners are discussed at length with shorter notes on some less common varieties.
Some common fasteners may be safely removed by collection staff using appropriate tools and techniques described below; others, such as adhesives, tapes, grommets (see Figure 2) and other tightly adhered metal fasteners, should be left in place and removed by a paper conservator. Always err on the side of caution and use sound judgment to prevent damage. If unsure, leave the fastener in place and consult a paper conservator.
Paperclips
Metal
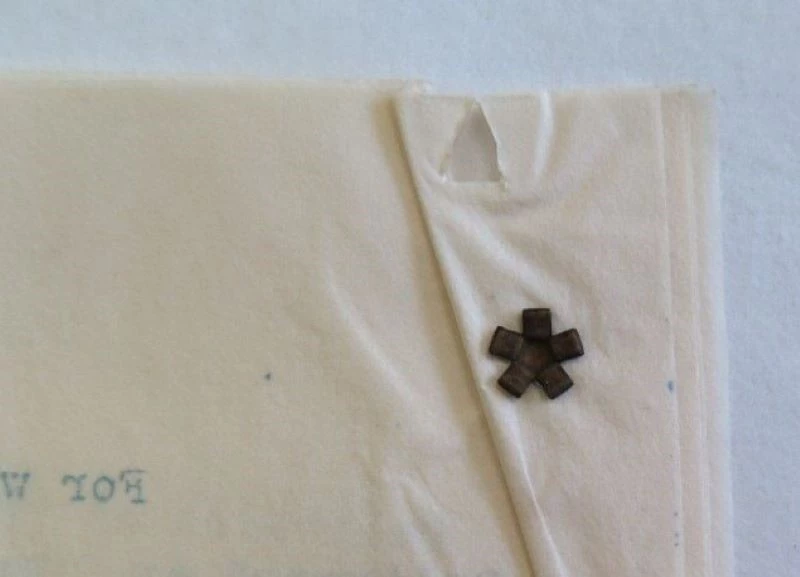
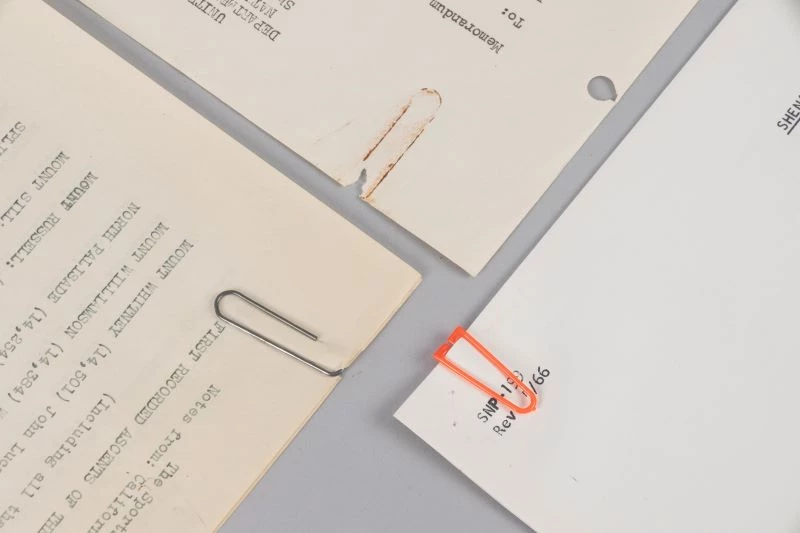
Metal paper clips can rust/corrode and cause stains. Removal is not recommended if the paper clip is free of rust, the storage environment maintains an acceptable range of temperature and relative humidity (RH), and there are no other compelling reasons for removal. Refer to NPS Museum Handbook, Part I, Chapter 4: Museum Collections Environment for NPS standards for temperature and relative humidity in collection storage.
If the paperclip is rusty and potentially adhered to the paper, removal is advised but should be weighed against the overall processing goals. To remove a metal paperclip:
-
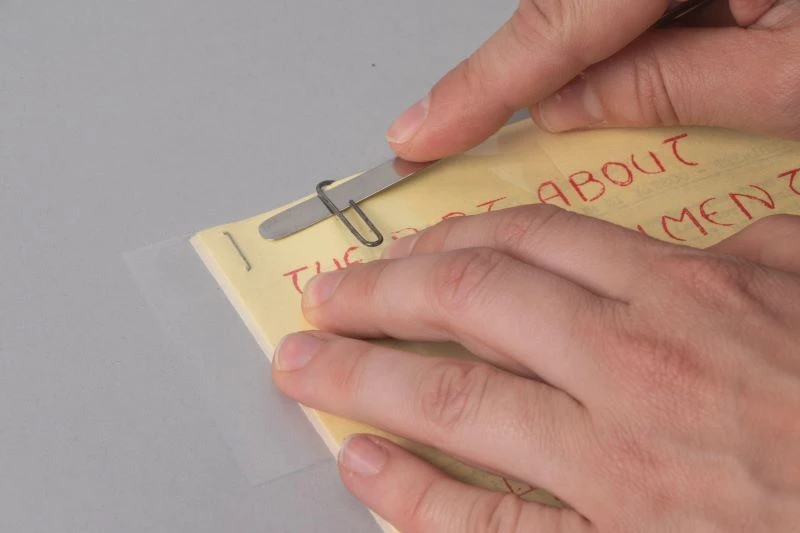
Lay the sheets flat on a table and insert a small piece of 3 mil polyester film (e.g., Mylar® or Melinex®) under the shorter end of the paperclip. If the paperclip is firmly adhered to the paper and the polyester film cannot be inserted, use the tip of a microspatula to gently scrape away the rust on the paperclip (not on the paper) and try the procedure again.
-
If necessary, use a soft, white brush, cosmetic sponge, or soot sponge to clear away any rust debris so it does not transfer and stain the paper.
-
For stability and to provide less stress on the paper, feel through the paper and gently press your finger on the longer end of the paper clip to hold it in place.
-
Use a microspatula to pry open the shorter end of the paperclip. In some cases, if the paperclip is very rusty it will break and require gentle prying action on the other side as well.
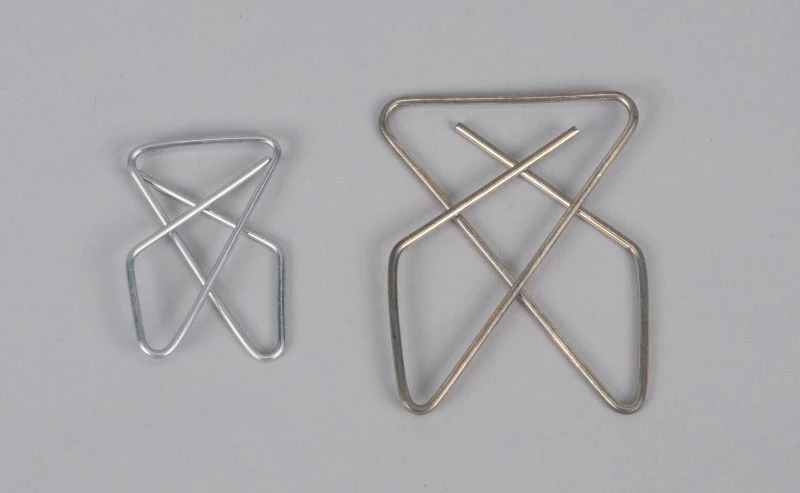
Plastic
Plastic paper clips were once seen as an alternative to metal clips because they do not corrode. Many are made with nonarchival forms of plastic and may break or become brittle over time. Once broken, sharp edges may damage paper and broken pieces can get trapped within the folder. Plastic paper clips also tend to easily slip off. This makes them simple to remove but is not desired when grouping for order is important.As with metal paper clips, plastic paper clips should only be removed as determined by the processing level. Those that have slipped off, are broken, or are removed for digitization should be replaced with an alternative method to maintain the physical and intellectual order.
Straight Pins and Staples
Removal is recommended if the staple or straight pin is rusty, the storage environment is not acceptable, and there are other compelling reasons for removal.
Straight Pins
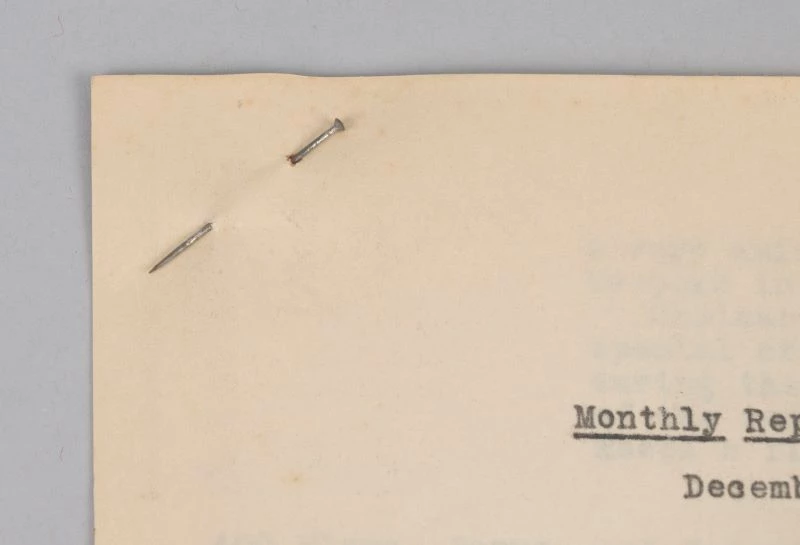
If the straight pin has rusted to the paper, insert a small piece of 3 mil polyester film (e.g., Mylar® or Melinex®) under the ends of the pin and use the tip of a microspatula to gently scrape through the rust layer to “free” the pin before attempting to pull the pin through the paper with fingers or a tweezer. Attempting to pull the pin through the paper without addressing the rust could cause further damage. Make sure to clean any rust debris with a soft, white brush, cosmetic sponge or soot sponge so it does not transfer and stain the paper.
Staples
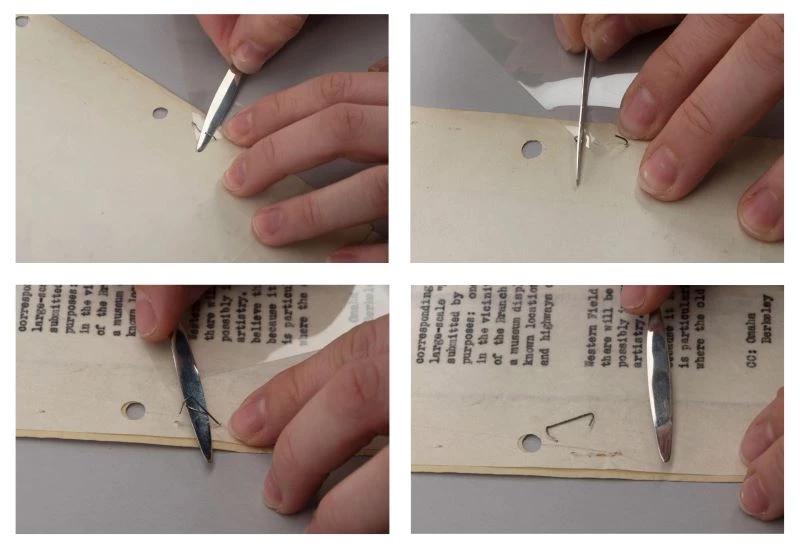
If the staple is rusty and potentially adhered to the paper, removal is advised but should be weighed against the overall processing goals. Note that older, smaller staples are less likely to corrode than modern staples but are often too small for easy removal.To remove a staple:
-
Lay the sheets face down on a table and insert a small piece of 3 mil polyester film (e.g., Mylar® or Melinex®) under the prongs of the staple.
-
Insert the tip of a microspatula between the film and one prong of the staple.
-
Unbend/straighten the prong with the microspatula, then repeat Steps 2 and 3 for the other prong.
-
When both prongs have been pried open, lay the sheets face up and insert the polyester film under the staple on the other side.
-
Use a microspatula between the staple and the polyester film to carefully pull the staple out of the paper.
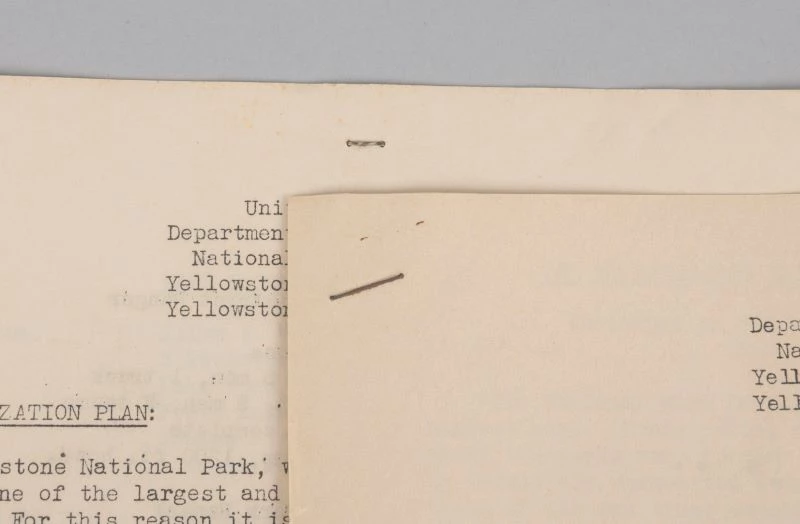
CAUTION: In some cases, a stack of papers can contain more than one staple. To avoid damage if an attempt is made to pull on the wrong staple, ensure proper identification of prongs that belong to the staple targeted for removal.
Removal of heavy-duty staples, particularly if attached to a very thin paper (e.g., onion skin paper) can easily result in damage and should only be performed when necessary. Consult a paper conservator as appropriate.
Rubber Bands
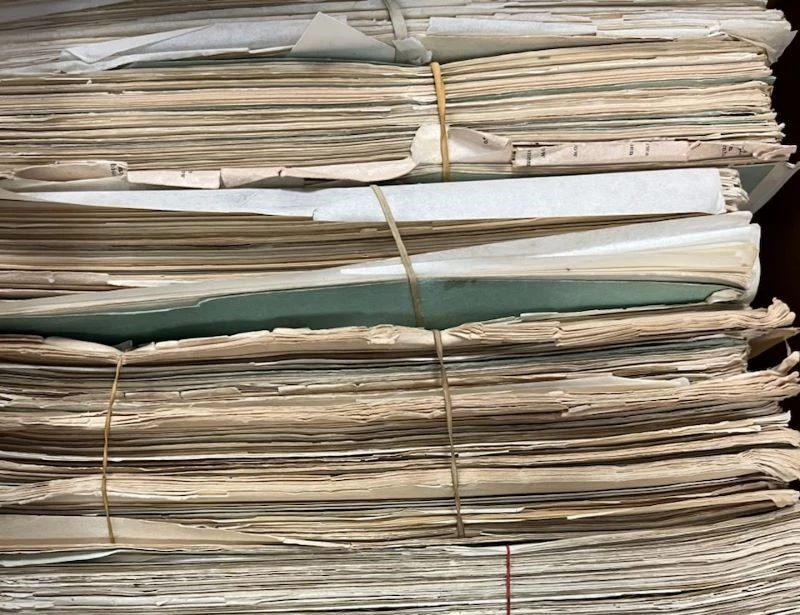
All rubber bands deteriorate over time and should be removed. To remove, carefully cut the rubber band with small scissors and lift it away. Do not pull them over the ends of a document. Rolling the rubber band along the surface of the documents increases the risk of creating or enlarging tears.
Desiccated sections of the rubber band that have adhered to the paper may be gently removed with a microspatula, taking care to avoid overly aggressive motions which may abrade the paper.
If the rubber band is pliable but sticky/tacky, take care to address any residue left on the paper. A sheet of stable polyester film may be used as interleaving to keep the sheets from sticking to each other or the enclosure. Use sparingly, as excessive use of polyester film will add weight and volume. Removing the sticky residue may be possible but it is not part of general processing work and should only be attempted by or under the advisement of a paper conservator due to the high potential to cause damage.
String or Ribbon Ties
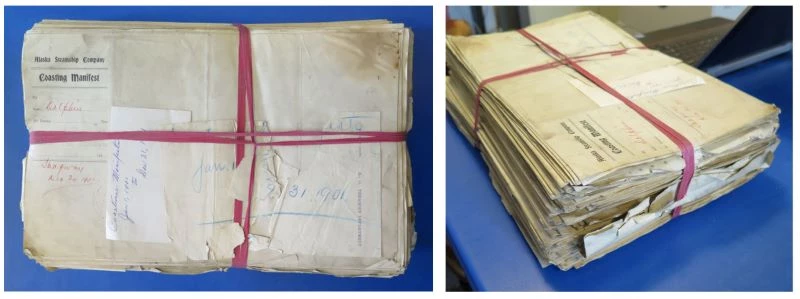
String or ribbon ties should be removed to access the objects. If the string or ribbon is historically significant, consider photographing it in situ before removing. First attempt to manually untie it. If this is not possible and the string or ribbon was not tightly wound around the documents carefully slide it off one end. If both of these methods are not possible, cut the string or ribbon with small scissors and lift it off. The ribbon or string may then be placed in a polyester sleeve and labeled appropriately to retain its provenance.
Spiral Bindings and Comb Bindings
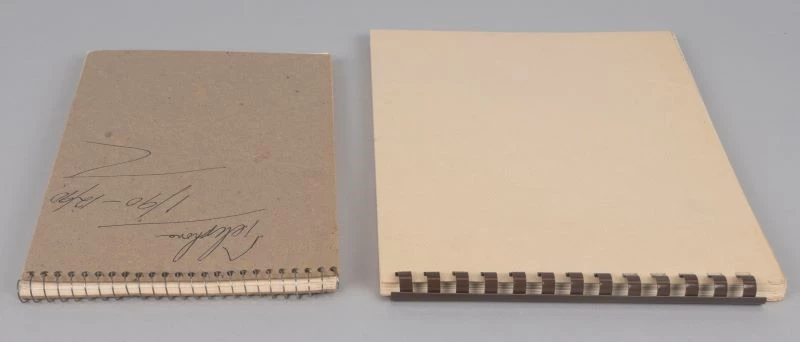
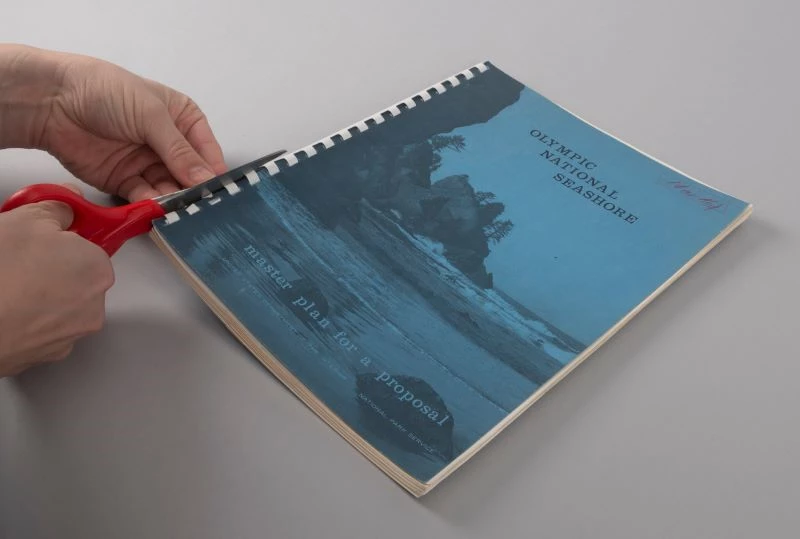
Bindings may be made from either plastic or metal and come in various types that attach documents along one edge. Plastic or metal spiral or comb bindings are sometimes removed to reduce bulk and prevent warping of documents but otherwise can be left in place unless the plastic has become brittle. These bindings can usually be cut off using scissors or wire cutters taking care to avoid the paper edge.
Other Types of Fasteners
Countless other types of document fasteners are found in archives, some of which are identified below and tips for removal are provided. This is not intended to be a comprehensive list, as less conventional fasteners often need to be considered on an individual basis, taking them beyond the scope of this document. When you encounter an unusual fastener, apply all the normal considerations for the level of processing. In most cases these should not be removed unless they are:
- Rusting/corroding
- Impeding digitization
- Causing damage such as tears or abrasion
When in doubt about how to attempt removal consult a paper conservator.
Prong Fastener
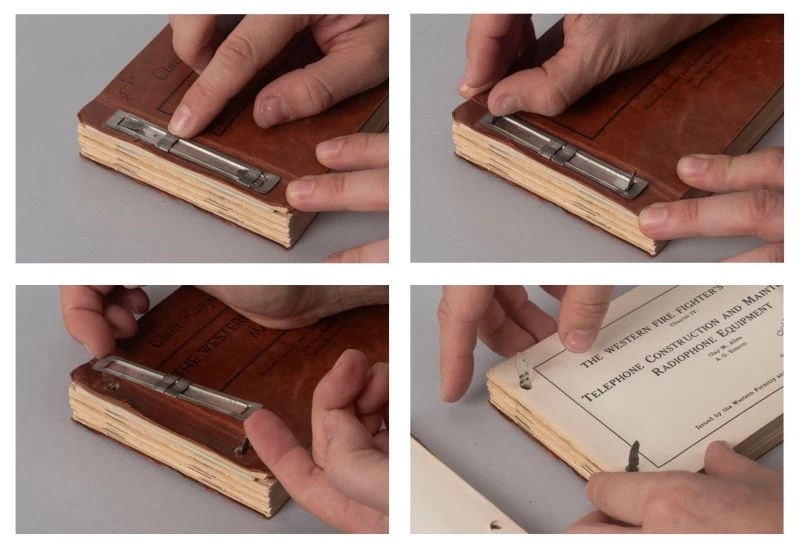
Prong fasteners consist of a metal bar with two prongs that extend through the documents from the back and are secured on front by placing a second metal bar over the prongs and bending the prongs so they are flush with the documents (metal tabs hold the ends of the prongs in place). The thicker the stack of documents is, the harder prong fasteners are to remove. To remove:
-
Slide the small metal tabs to the center of the binding, so they are no longer holding down the prongs.
-
Push the prongs upright so the top metal bar can be pulled up and off the binding.
-
If you can pull the prongs directly out from the paper at the back of the documents, this is the safest option. Sometimes, it is easier and safer to remove the paper from over the prongs instead. In this case, it is recommended to remove a few pages or a section at a time, as to not damage the paper on the metal edges of the prong.
Velobind ® Binding Strips
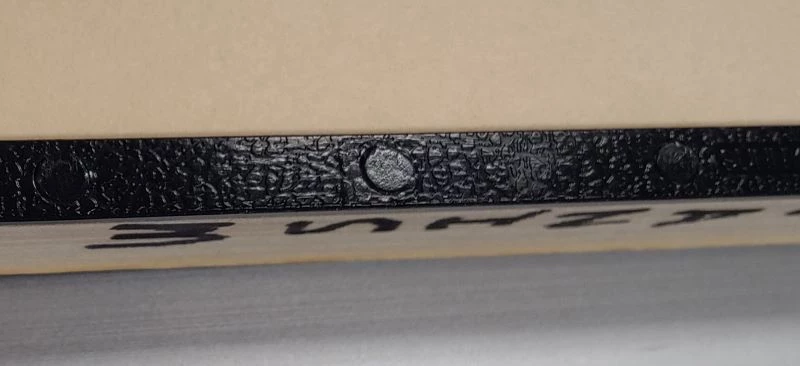
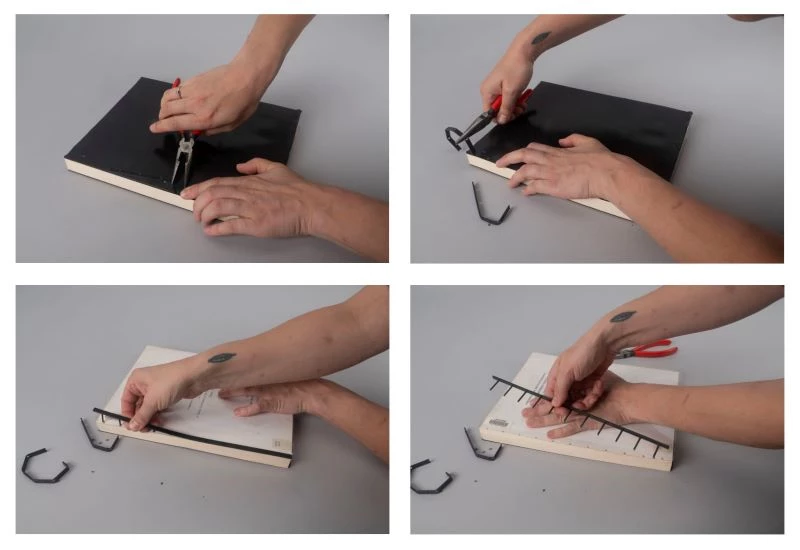
VeloBind ® binding strips are made of two components: the “pronged strip” with several prongs that enter and exit the hole-punched paper, and a second “flat strip” that secures the prongs on the opposite side. Velobind ® binding strips can be difficult to remove and require the use of needle-nosed pliers. To remove:
-
Position the material so that the posts can be seen exiting the flat strip from above (Figure 15). Using needle-nosed pliers, carefully pull the edge of the plastic binding away from you to release the posts from the flat strip.
-
Once the flat strip is removed, it is sometimes necessary to carefully trim back the prongs sticking out from the paper, then flip the document over so that they be safely slid from the paper without damaging the material.
-
Pull the remaining pronged strip from the hole-punched paper.
Binding Posts (Brass)
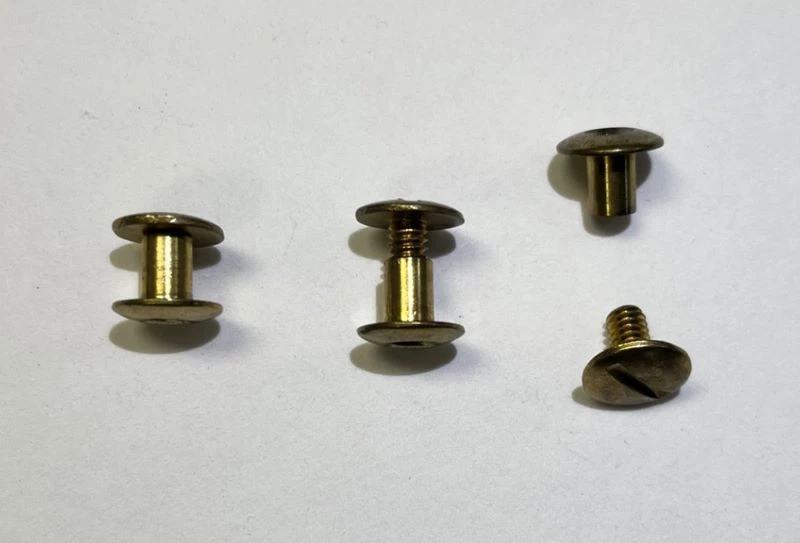
Binding posts consist of two parts, a threaded “rod” and a “cap” that screws down on rod. They are easy to remove by hand if the thread is not corroded. Use of a screwdriver can sometimes be helpful but is usually not necessary.
Split Pins
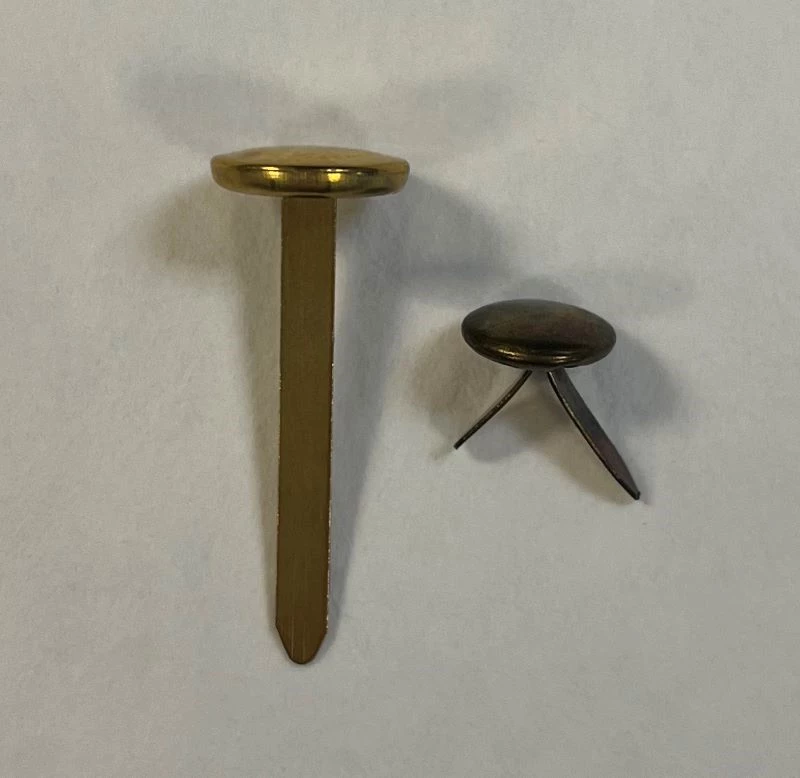
To remove, gently press the two prongs together to stand up straight, then pull the pin from the document. If you can pull the pin directly out from the paper, this is the safest option. Sometimes, it is easier and safer to remove the paper from over the pin instead. In this case, remove a few pages or a section at a time, as to not damage the paper on the metal edges of the split pin.
Binder Clips (a.k.a. Bulldog Clips, Gator Clips)
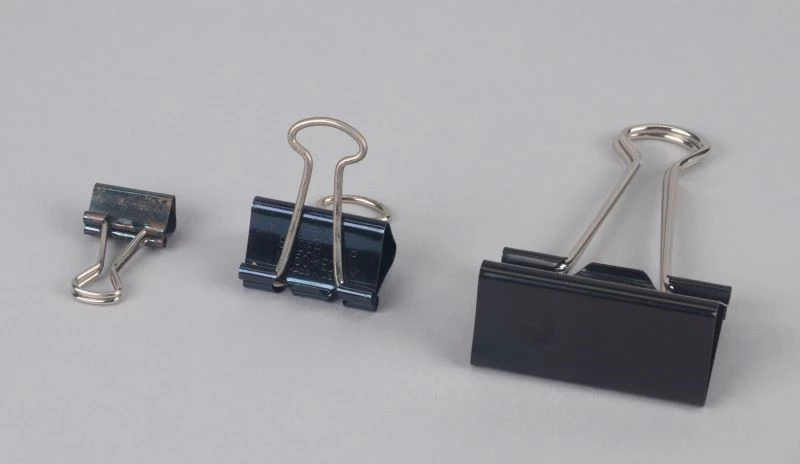
Binder clips are bulky and can easily cause physical damage. Consider removing when possible. To remove, bend both silver handles towards the clip and away from each other, so they can be used to leverage the opening of the clip.
Loose Leaf Binder Rings
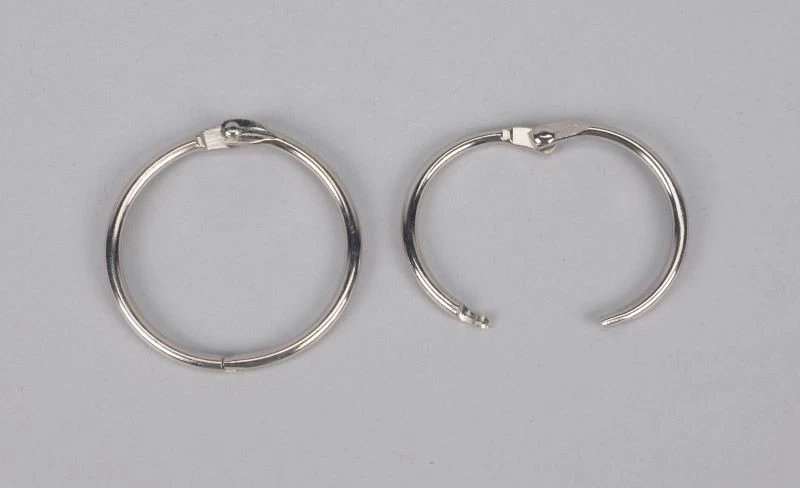
The rings can cause physical damage, as they move and spin around, snagging on the hole in the paper they are threaded through. To remove, simply unclasp the ring and slide from the hole punched paper.
Clam Clips
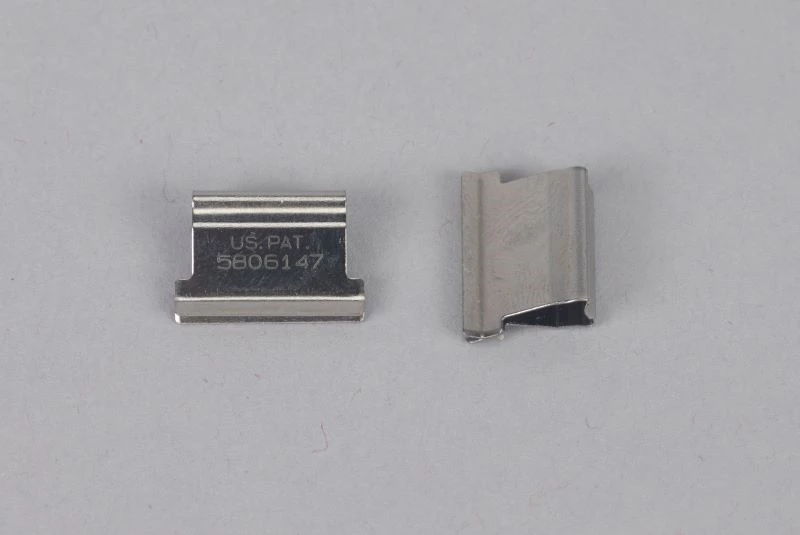
Clam clips are generally made from stainless steel and can remain attached to material during processing. If removal is necessary, carefully use needle-nosed pliers to open the mouth of the clip.
Selected References
Dundon, Kate, Laurel McPhee, Elvia Arroyo-Ramirez, et al. Guidelines for Efficient Archival Processing in the University of California Libraries (Version 4). UCLA Library, 2020. https://escholarship.org/uc/item/4b81g01z.
Theresa Voellinger, Supervisory Conservator
Eleanore Kohorn, Archivist
Raymond Mansfield, Conservation Technician
Kyle Bryner, Conserve O Gram Coordinator and Editor
Shay Henrion, Conserve O Gram Editor
Museum Conservation and Collections
Harpers Ferry Center, National Park Service
Formerly issued as Conserve O Gram 19/5, Replaces 1993 version
Jerri Newman (1993), Museum Specialist
Anne Jordan (1993), Museum Curator
National Park Service
Published September 2025
The Conserve O Gram series is published as a reference on collections management and curatorial issues. Mention of a product, a manufacturer, or a supplier by name in this publication does not constitute an endorsement of that product or supplier by the National Park Service. Sources named are not all inclusive. It is suggested that readers also seek alternative product and vendor information in order to assess the full range of available supplies and equipment.
The series is available on the National Park Service Museum Management Program's website.
