Last updated: July 2, 2025
Article
Conserve O Gram 13/5: Rolled Storage for Oversized Paper Materials

Many collections include oversized paper materials such as architectural drawings and maps. If possible, these collections should be housed in folders and stored in flat file drawers. However, if the items are larger than the inner dimensions of a flat file drawer or if there is no flat file available, rolled storage can provide safe and effective housing.
Appropriate materials and techniques will help ensure long-term preservation. However, all methods of storing objects rolled will impart some curl.
Caution! Do not use this technique on objects with friable media such as pastel or chalk drawings, brittle/rigid paper, or paper with extensive damage (numerous tears or losses). These materials must be stored flat, as described in NPS Museum Handbook, Part I, Appendix J: Curatorial Care of Paper Objects (nps.gov).
Materials for Rolling
- Tube with a minimum 1/8” thick wall, 4” to 6” diameter:
- Preferred option - acid-free and lignin-free paperboard - unbuffered or buffered as needed. Refer to the NPS Museum Handbook, Part I, Appendix J for guidance on when to use buffered or unbuffered materials.
- Budget option - non-archival paperboard wrapped in 3 mil polyester film (Mylar® or Melinex®) or Marvelseal®
- Bond paper on a roll (acid-free and lignin-free unbuffered or buffered as needed)
- 3 mil polyester film (Mylar® or Melinex®) on a roll
- Twill tape 1” wide (100% unbleached and undyed cotton)
- Label/Tag - constructed of acid-free and lignin-free folder stock or heavyweight paper (include at minimum object thumbnail image, catalog number, description, and condition concerns)
- Scissors/utility knife
- Measuring tape
- Ruler or straight edge
- Single hole punch
- Pencil
- Handsaw (if tube is not pre-cut to size)
- Optional - small weights to prevent the tube from rolling
- Optional - nitrile gloves (clean hands are fine as well)
- See “Storage” section for suggestions on long-term support
Preparation
The time to complete this task will vary but could take between two and four hours per roll.
- Assess the object. Examine the object, record condition information, and photograph prior to rolling. Look for small tears, creases, and folds as well as tape and adhesive that could be tacky. Be aware of these areas as there is the potential for complications when rolling.
- Determine the appropriate length of tube. Measure the object along its shortest side, add 8” to this measurement. Cut to size.
- Measure and cut the bond paper. Determine the size by calculating:
- Short edge of object plus 4” (width)
- Long edge of object plus 24” (length)
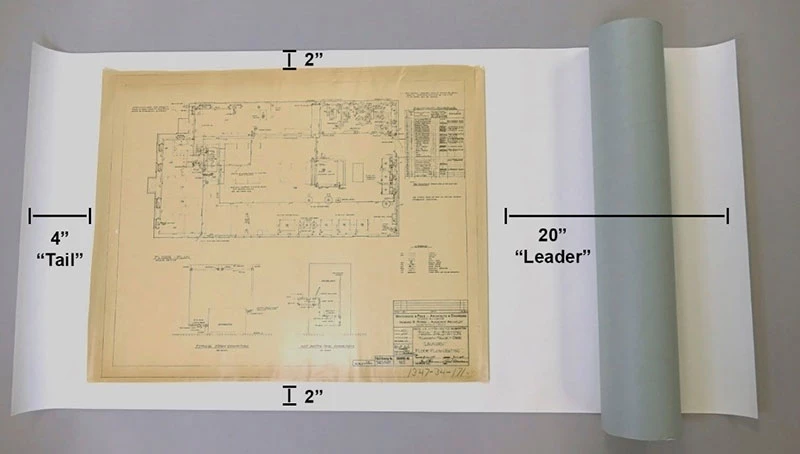
The bond paper serves to prevent media transfer. The extra length provides a “leader” of 20” to completely cover the tube and “tail” of 4” to fully protect the object.
- Measure and cut the polyester film. Determine the size by calculating:
- Short edge of the object plus 4” (width)
- Circumference of the tube plus 6” (length)
This polyester film serves to protect against handling and possible water intrusion. - Measure and cut two pieces of cotton twill tape. Measure the circumference of the tube and add 16”.
- Make the label and single hole punch the top left corner. Insert one piece of the cut cotton twill tape through the hole.
Rolling Process
Caution! Work slowly and carefully during the process. Work in a team for very large objects and have one person monitor each side to ensure a straight and even roll.
- Lay the bond paper on the work surface. Place the object face up on the bond paper, with a 20” “leader” on one end and a 4” “tail” on the other end.
- Center the tube on the “leader” end of bond paper. Align the tube so it is parallel with the end of the bond paper to avoid uneven rolling and potential overhang (Figure 1).
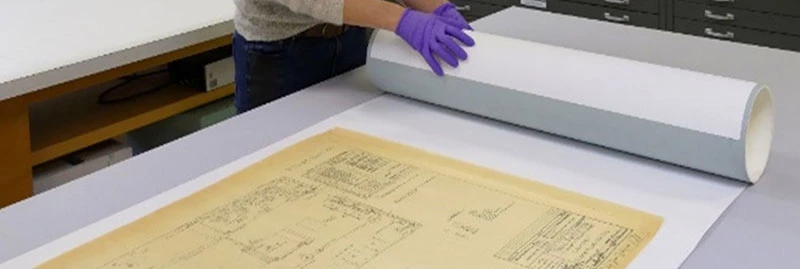
- Roll the “leader” end of bond paper around tube to cover the tube surface (Figure 2).
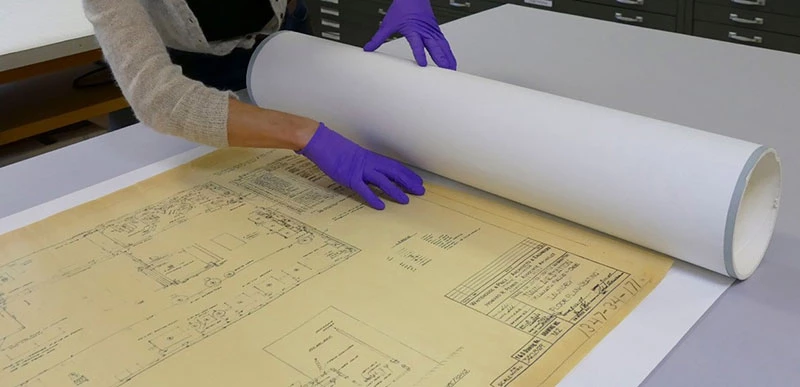
- Roll the object around the tube applying a bit of tension to ensure a tight roll. Make sure the object is rolling onto the tube as straight as possible. Check the outer edges for misalignment. Monitor the object during the rolling process and watch for creases and/or tears in the object or underlying bond paper. (Figure 3).
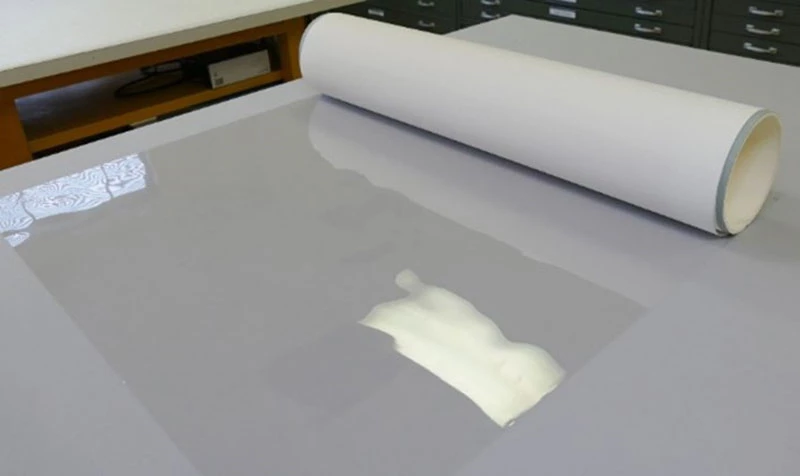
- Place the polyester film on the work surface. Center tube on the film. (Figure 4).
- Roll the film onto the tube, ensuring there is a 4” overlap.
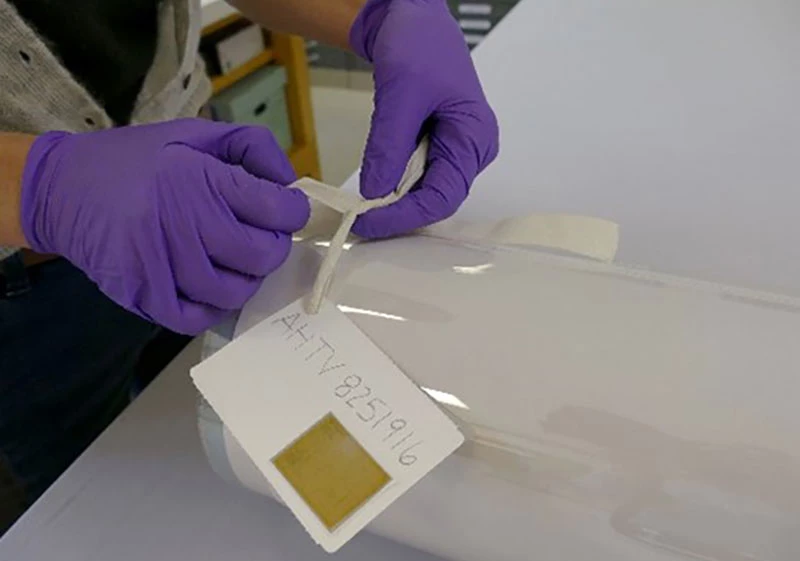
- Use the two pieces of cotton twill tape (one with the label) to secure the polyester film around the roll. Place one piece of twill tape near each end of the tube and tie the tape into bows. Do not pull ties so tight that the polyester deforms, creating creases. Tie the twill tape over the extra length of tube and not over the object (Figure 5).
Rolling Multiple Objects on One Tube
Caution! A maximum of five objects may be rolled together on one tube. Objects must be similar in size and media. Blueprints and diazotypes off-gas pollutants that can damage other materials. Do not roll them with other media or with each other.
- Use one piece of bond paper for each object. Cut bond paper as noted above (with the leader and tail) based on the dimensions of the largest object. All bond paper should be the same size.
- Lay one piece of bond paper on the work surface. Place one object face up on the bond paper with at least a 20” “leader” on one end and a 4” “tail” on the other (NOTE: length of tail and leader will vary if objects differ in size).
- Continue to layer bond paper and objects making sure to align the edges of the bond paper.
- Roll the entire group of objects and bond paper together at the same time. See notes on proper rolling technique in the steps above.
- Proceed with steps 5 through 7 above. Multiple labels (one for each object) may be tied together.
Storage
There are numerous options for the storage of rolled objects. Listing them all is beyond the scope of this document. Two options are presented below which cover the high and the low end in terms of cost commitment.
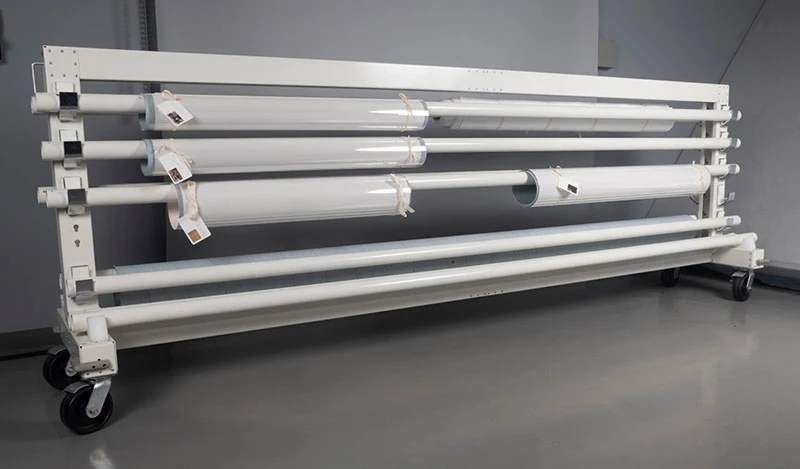
Whatever storage system is chosen it is imperative that the roll is suspended in some manner. To avoid uneven stress and pressure to one area of the object do not store the roll directly on a surface. Rolls must be stored horizontally and not placed standing vertically on one end. Orient the roll so that the outer end of the wrapper film (the overlapped seam) faces down. This helps direct water away in the event of a water emergency.
Hanging rolled storage
Construct or purchase a rolled storage unit with rods to suspend tubes (these are usually used for the storage of textiles such as rugs). There are a wide variety of sizes and shapes for this type of storage system depending on the available space in the collection storage area and number of rolled objects (Figure 6).
Cradled rolled storage
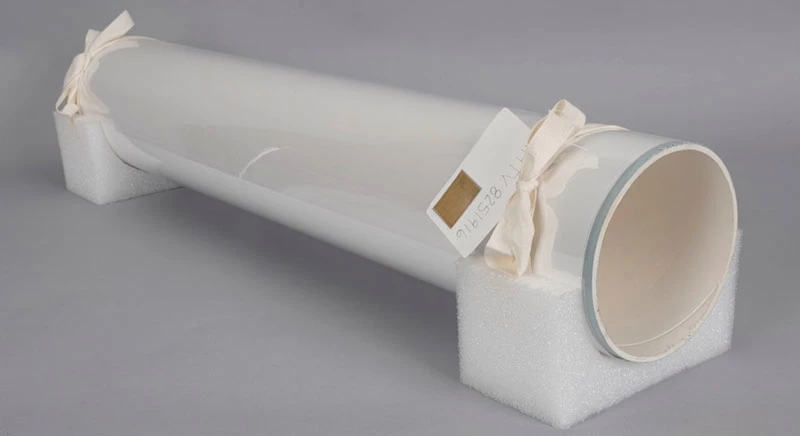
When hanging storage is not possible the tube may be suspended over a flat surface with cradles at both ends. Construct cradles from closed-cell polyethylene foam. Cut two polyethylene blocks to 8” x 4” x 4”. Trace the curve of the end of the tube on the side of the block and cut along the line to create a recess for the tube to sit (Figures 7 and 8).
Selected References
National Park Service. Museum Handbook, Part I, Appendix J: Curatorial Care of Paper Objects. Washington, DC: National Park Service.
______. Museum Handbook, Part II, Appendix J: Marking. Washington, DC: National Park Service.
Bellman, Deby. “Flag Rolling and Storage.” NPS Conserve O Gram 16/5. Washington, DC: National Park Service, 2009.
Kilby, Virginia. “Buffered and Unbuffered Storage Materials.” NPS Conserve O Gram 4/9. Washington, DC: National Park Service, 1995.
Vogt-O'Connor, Diane and Dianne van der Reyden. “Housing Archival Paper-Based Documents.” NPS Conserve O Gram 19/16. Washington, DC: National Park Service, 1996.
Allison Holcomb, Book/Paper Conservator
Theresa Voellinger, Supervisory Conservator
Kyle Bryner, Conserve O Gram Coordinator and Editor/Museum Specialist and Collection Manager
Julia Shelton, Clerk
Museum Conservation and Collections
Harpers Ferry Center, National Park Service
Published July 2024
The Conserve O Gram series is published as a reference on collections management and curatorial issues. Mention of a product, a manufacturer, or a supplier by name in this publication does not constitute an endorsement of that product or supplier by the National Park Service. Sources named are not all inclusive. It is suggested that readers also seek alternative product and vendor information in order to assess the full range of available supplies and equipment.
The series is available on the National Park Service Museum Management Program's website.
