Last updated: July 2, 2025
Article
Conserve O Gram 13/2: How to Flatten Folded or Rolled Paper Collections

Many paper materials that have been rolled or folded can be safely relaxed using a carefully controlled humidification process and then flattened. In most circumstances, flattening is preferred over rolling because it eases handling, storage, and access and puts less stress on the paper fibers. However, some papers are too large to be stored flat and must remain rolled (see Conserve O Gram 13/5 Rolled Storage).
Caution! The media and materials listed below require additional expertise and should only be treated by a professional conservator. If uncertain, consult with a paper conservator.
- architectural linen or drafting cloth
- coated papers
- composite items or items with attachments such as tape and labels
- easily disturbed media (chalk, charcoal, pastels)
- textured media (heavily applied paint)
- objects with embossed seals
- parchment or vellum
- photographic prints
- tracing or onion skin paper
- objects with iron gall ink
- objects in poor condition (large tears, embrittlement)
- prints with plate marks
In all the process will take approximately 24 hours. The humidification portion can take anywhere from two to four hours and requires periodic attention. Flattening takes place overnight and needs attention only during the first two hours.
Materials
The following materials were intentionally selected from a larger list of possibilities to balance cost and conservation standards.
Humidification Supplies
- Container (water-proof interior) – corrugated box (does not need to be archival) lined with polyethylene sheeting. The container should be large enough to accommodate the object. The walls should be at least 3” taller than the object when rolled or folded. The bottom should be at least 6” wider than the outer dimensions of the object when flat.
- Cover material - heavyweight (6 mil) polyethylene sheeting
- Binder clips - large, at least 16 (number depends on size of container)
- 100% cotton, unbleached and pre-washed muslin cut to fit interior dimensions of the container
- Distilled or deionized water
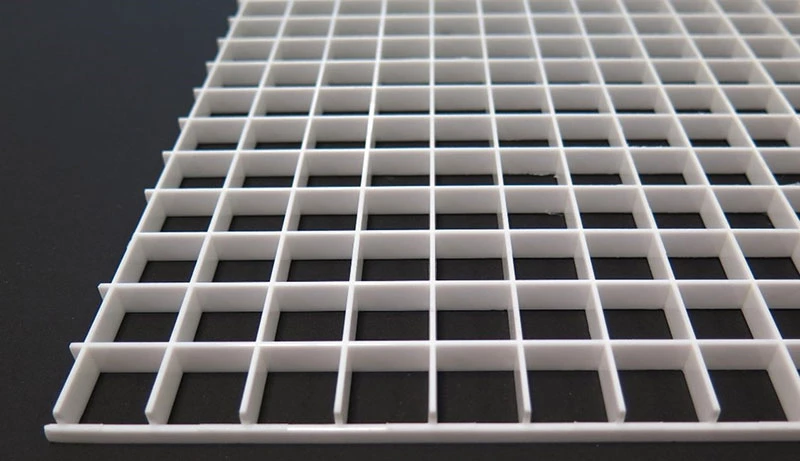
- Acrylic “egg crate” - lighting diffuser panels cut using pliers (break/snap each segment) to fit interior dimensions of the container (Figure 1)
- Non-woven spun polyester fabric such as Hollytex® or Reemay® cut 2” (or more) wider than the outer dimensions of the object, two pieces per object
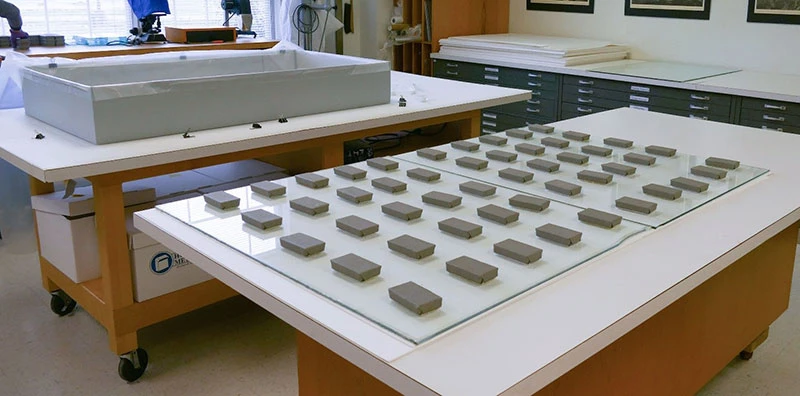
- Light weights (approximately 4 oz. such as pattern/sewing weights) enclosed in press-to-seal plastic bags (Figure 4)
- Microspatula
Flattening Supplies
- 100% cotton rag blotter paper (32” X 40”)
- Non-woven spun polyester fabric – see list above
- Acrylic sheet or plate glass - at least ¼” thick matching the size of the blotter (32” X 40”) or slightly larger
- Weights or heavy books/boxes (at least 20 pounds total)
Preparation
Clear large areas of flat, clean table or counter space. For safety, larger objects will require two people.
Carefully remove all rubber bands and fasteners such as clips, staples, or brads from the object.
Caution! Contact a paper conservator about surface cleaning prior to humidification if there is significant surface soil. Loose surface dirt may become more embedded in the paper fibers during humidification, making it difficult, if not impossible, to reduce in the future.
Gather all materials. As necessary, cut materials to size.
Humidification Process
The duration of the humidification process depends on the weight and type of paper of the object and airtightness of the chamber. In most cases, paper will relax completely in two to four hours.
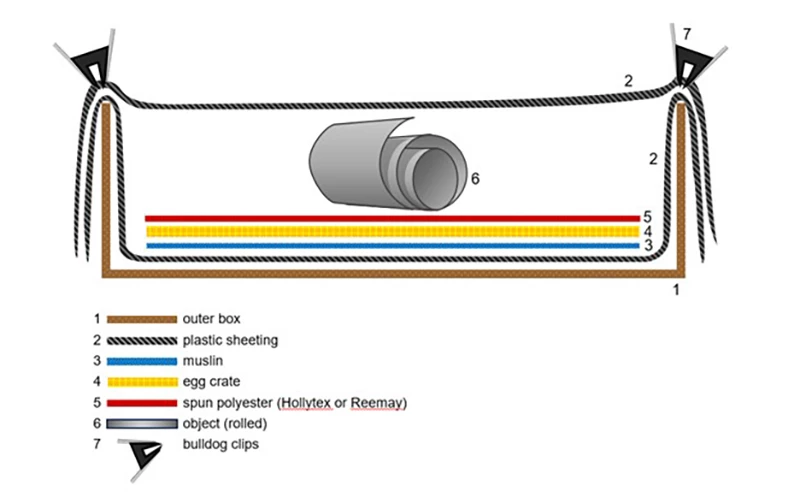
- Wet muslin with cool or room-temperature distilled or deionized water until saturated. Wring out muslin. Place flat in the bottom of the container.
- Place “egg crate” over the muslin.
- Place non-woven spun polyester fabric over the “egg crate.”
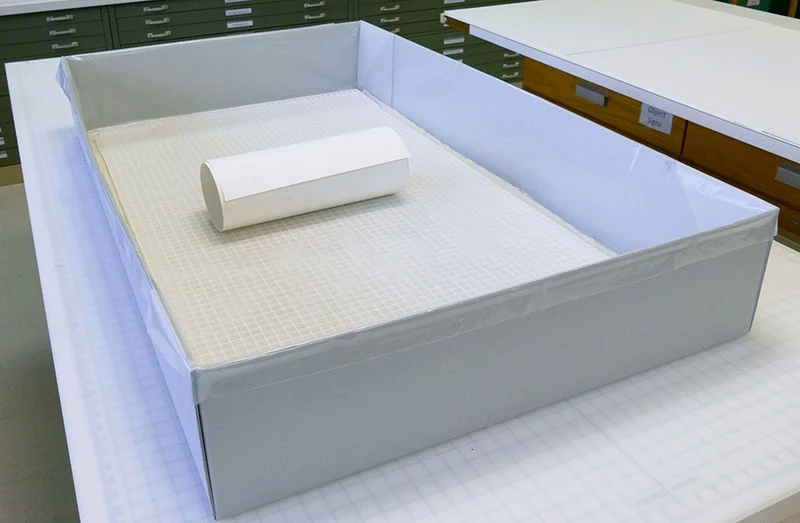
- Place object on top of the non-woven spun polyester fabric (Figures 2 and 3), but do not yet attempt to unfold or unroll.
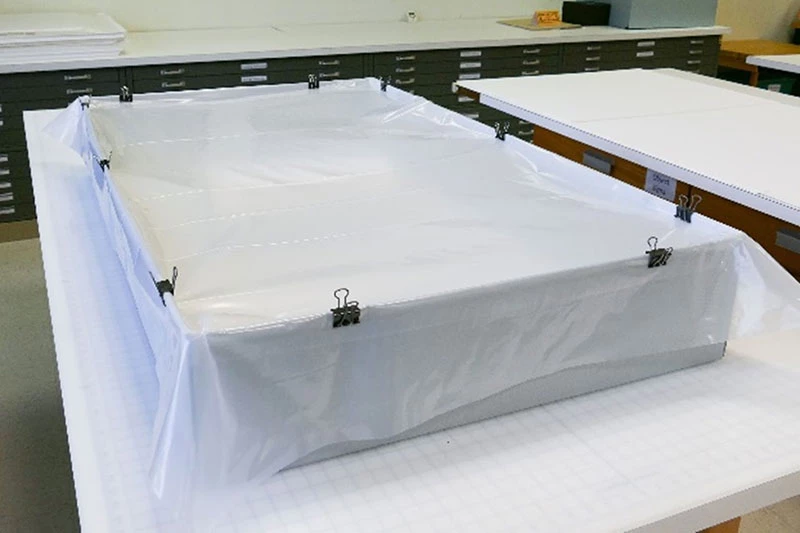
7. Gently and carefully unfold (using a microspatula as needed) or unroll and place pattern weights along edges to hold the object in place. If it does not unfold or unroll without resistance, stop and allow more time to humidify
(Figure 5).
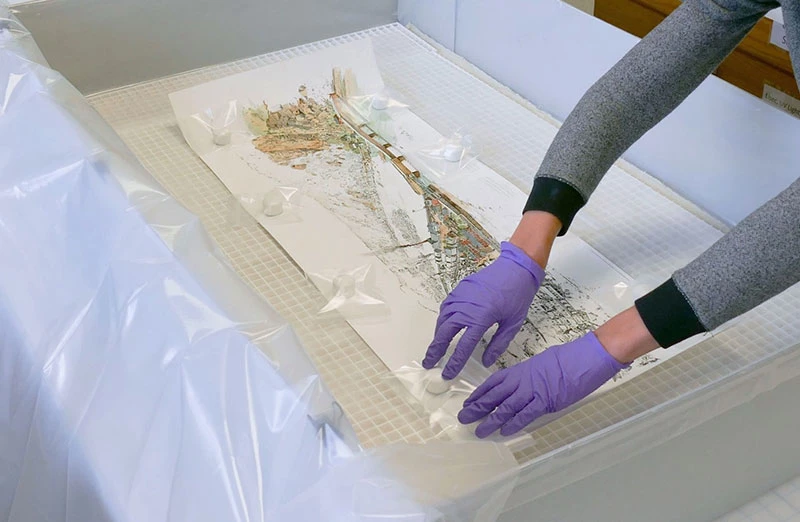
8. The humidification process is complete when the object feels damp and is pliable to the touch, and the roll, folds, or creases have relaxed. Once relaxed, follow the instructions for flattening.
Flattening Process
Caution! Humidified paper must be dried as described below. Air-drying will cause the paper to curl, warp, and distort. Have all flattening materials prepared prior to removing the object from the chamber.
-
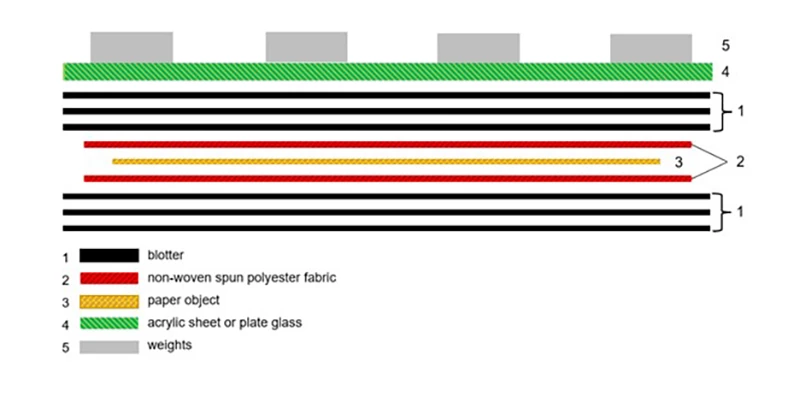
On a flat clean surface stack three sheets of blotter. Going by feel, blotter has one side that is smoother than the other. Place the smooth side up.
-
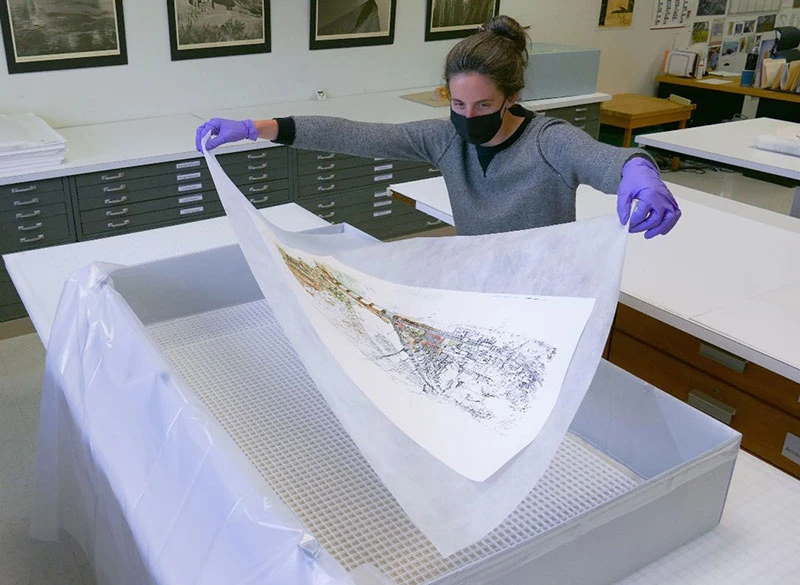
Open the chamber and use the non-woven spun polyester fabric already under the object as a support to move it to the stack of blotter paper (Figure 6). Lift from opposing corners of the non-woven spun polyester, letting the paper softly “drape” in the center to prevent folding or tearing. Larger objects may require two people to lift. Place the paper object on the blotter stack keeping the non-woven spun polyester fabric under the object.
4. Place the acrylic or glass sheet on top of the stack. Evenly place at least 20 pounds of weight on top of sheet (Figures 7 and 8).
Caution! Work quickly for the next few steps, to avoid rapid drying and distortion. The blotters closest to the object will be removed to encourage drying.
- After 30 minutes, open and reassemble the stack in the following manner
- Remove and set aside the weights, glass or acrylic sheet, and the top two blotters. Keep these materials close by to reuse when the stack is reassembled.
- Remove the blotter that was closest to the object and set it out to dry. This blotter will not be put back into the stack; however, it can be reused in the future once dry as long as it is not wavy/remains flat.
- Remove the object from the stack (using the “drape” method shown in Figure 5) keeping it between the spun polyester layers and set aside.
- Remove the blotter immediately below the object and set it aside to dry. This blotter will not be put back into the stack; however, it can be reused in the future once dry as long as it is not wavy/remains flat.
- Reassemble the stack with the object retaining the top two and bottom two blotters.
- Wait one hour and then repeat the process from step 5, removing the blotters closest to the object and setting them aside to dry. Reassemble the stack, one blotter should remain on top and bottom. Leave in place overnight.
- The next day, assess the object.
- Open the stack to expose the object. Lightly touch the flattened object with the back of your clean hand to check if it is dry. If it does not feel damp or cool the process is complete and the stack can be disassembled.
- If it is damp or cool to the touch, this indicates residual moisture, and it is not ready yet. Replace the blotters with dry ones and reassemble the stack. Leave the stack in place overnight. Continue to replace blotters as needed until object feels dry.
Selected References
National Park Service. Museum Handbook, Part I, Appendix J: Curatorial Care of Paper Objects. Washington, DC: National Park Service.
Newman, Jerri and Anne Jordan. “Removing Original Fasteners from Archival Documents.” NPS Conserve O Gram 19/5. Washington, DC: National Park Service, 1993.
Allison Holcomb, Book and Paper Conservator
Theresa Voellinger, Supervisory Conservator
Kyle Bryner, Conserve O Gram Coordinator and Editor/Museum Specialist and Collection Manager
Julia Shelton, Clerk
Museum Conservation and Collections
Harpers Ferry Center, National Park Service
Formerly issued as Conserve O Gram 13/4
Diana Alper (1993), Conservator
National Archives and Records Administration
Published July 2024
The Conserve O Gram series is published as a reference on collections management and curatorial issues. Mention of a product, a manufacturer, or a supplier by name in this publication does not constitute an endorsement of that product or supplier by the National Park Service. Sources named are not all inclusive. It is suggested that readers also seek alternative product and vendor information in order to assess the full range of available supplies and equipment.
The series is available on the National Park Service Museum Management Program's website.
