Site Selection

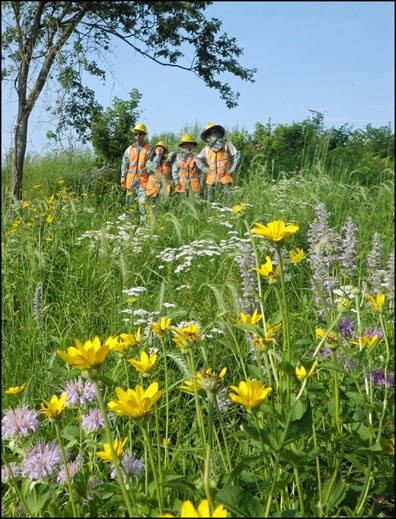
Prairie flowers with workers in the background

Beginning

A plan is an important part of planting your own prairie. A written plan, with a schedule that you can follow will be helpful. Keeping a written record of your own or your contractor’s activities is a good way to keep track of how your prairie is progressing.
Draw a map of your site, including any special features such as streams, buildings, roads, or fences. Also map what borders your site and any variations of slope or soil type which might affect the type of seeds you plant. As the prairie matures, it will come in handy to note changes that occur. It’s also a lot of fun to see how your prairie has matured and changed over the years!

Getting Seeds

After deciding where you want to have a prairie and evaluating the conditions of your site, it is time to buy seeds and plants. When starting out, there are two important points to consider: choosing the right types of plants and planting as many different plants as possible. The plants you choose must be well suited to the site in order for them to thrive. If you have an especially dry site, choose plants that are adapted to those conditions. The more diverse your prairie, the more healthy and successful it will be, so plant as many different species of plants as you can. As time goes on, you can add more species, but the more types of plants you can initially grow, the better. Many typical prairie plants and their characteristics are presented here.

When buying seed, be careful to avoid mixes that contain weed seed, straw, or non-native species. To ensure that you buy good quality seeds, go to a seed supplier who measures the seed by weight or percentage of Pure Live Seed (PLS). Pure Live Seed is a measure of how many of the seeds can be expected to germinate. Check content and viability ratings of the seeds so that you will know exactly what you are getting.
When looking at which seeds to buy, make sure that the scientific, or Latin names, are included. Common names are often different between areas, and sometimes the same name refers to two different species, one of which may be a pest.
In order to protect your local wildlife areas; buy locally grown seeds so that you don’t introduce any non-native species. Also make sure that the seeds are grown in a native plant nursery so that wild areas aren’t stripped of their seeds. The general rule is that seeds should originate within 40 miles of your site.

Seed Mixes

Seed mixes consist of forb and grass seed. Forbs are beautiful and ecologically important, and grasses are aesthetically pleasing in that they provide the height and the structure of the prairie. Grasses also supply fuel for burns, which forbs don’t do as well. Grasses also have deep root systems to stabilize the soil. Prairie seed mixes are usually between 40-50% grasses and 50-60% forbs by weight.
Some plants are aggressive and grow easily on new sites, and should therefore be seeded at lower rates. They definitely can be included, and some are very important to prairie communities, just use caution. Other plants have a hard time establishing themselves, so it is better to plant them from seedlings or to seed following a burn. Check with your seed supplier about specific plant characteristics.

Seeding Rates

How many seeds should you plant? First, determine how many square feet or acres you are planting. An acre is 43,560 square feet or a square approximately 210 feet on a side. Usually 10 pounds of Pure Live Seed (PLS) is used per acre, or 8 ounces per every 1,000 square feet. Lighter or heavier rates are not desirable because the plants will be too scattered or too dense. Get exact seeding rates for your seed mixture from your supplier.

Site Preparation

Site preparation is very important to the success of your prairie. It will help to develop a good seedbed which will improve the germination rate of your plants. Good site preparation also removes weeds that would otherwise undermine the success of your prairie. This step should be done carefully because it helps ensure the success of your planting. Without the proper preparation, weed infestations are much more likely to occur and the success of your planting could suffer.

Methods

A combination of herbicide treatment and mechanical cultivation is the most effective method for many sites, especially large areas such as old fields.

The following spring, till one inch deep into the soil after the first rain to kill germinating weeds, then plant immediately.

  • Herbicide and Mechanical Cultivation: The first step is to mow your site to encourage new growth and get rid of existing vegetation. A few weeks later, when the weeds are 10-12 inches high, apply herbicide. A solution of glyphosate is generally used; refer to the manufacturer’s directions for application rates. Glyphosate is sold under the brand names Roundup, Kleenup and others. Glyphosate breaks down into environmentally safe compounds such as water and nitrogen, and is routinely used in restoration efforts. It will kill any green plant it comes into contact with, so be careful in applying it and, as with any chemical, be sure to follow the package directions closely. After the herbicide treatment, remaining vegetation should be burned off. If regrowth occurs, apply another herbicide treatment when the weeds are again 10-12 inches high.

  • Mechanical cultivation alone may be used to prepare a site particularly if the site is prone to erosion or there are nearby trees that need protection. In this method, you would not use herbicide. If you choose to do this, you must be tireless, paying close attention to the site and cultivating it once every two weeks or so. Cultivate at a depth of four to five inches during the entire growing season to kill the perennial weeds.
  • No-Till Method: The no-till method is good for areas with sparse plant growth, for planting around trees, or for areas where erosion is likely to occur. If you had planted a cover crop, the no-till method is good to use. Mow the cover crop before it goes to seed, then burn or rake the site to prepare the seedbed.
    Apply glyphosate as in the other method, but do not cultivate. A special seed drill is required to use the no-till method. Check with your local agricultural implement dealers or cooperatives.
    Seedbed Preparation
    On larger sites use a cultivator to break up the soil into smaller chunks, then rake or harrow out irregularities. If the soil is loose at all, use a cultipacker or roller to compress the soil so that the seeds won’t be planted too deeply to germinate. Weeds will still be present in your seedbed. You can apply herbicide again if you choose. Wait about a month and then apply the glyphosate. You can also mow the weeds when your prairie begins to grow.

Cover Crops

A cover crop is a good idea if you have a site that may erode, or if you prepared your soil in the fall. A cover crop will kill many weeds while holding the soil in place.

it is important not to let the cover crop go to seed. If you planted in the fall, the frost will kill the plants before they seed. If you planted in the summer, be sure to mow the site before the plants seed, approximately when the plants are 10-12 inches tall. Your prairie plants can be planted directly into the soil along with the remnants of the cover crop. The cover crop will hold the soil firmly in place until the prairie plants establish themselves.

  • Wheat and Oats: 96-128 pounds/acre
  • Annual Rye: 35-50 pounds/acre
  • Perennial rye is allelopathic, which means that it kills surrounding plants, and should be avoided.

Time to Start Planting or Seedings...

Prairie Restoration

Restoration Projects

Last updated: December 26, 2017

Park footer

Contact Info

Mailing Address:

111 E. Kellogg Blvd., Suite 105
Saint Paul, MN 55101

Phone:

651-293-0200
This is the general phone line at the Mississippi River Visitor Center.

Contact Us