Last updated: November 17, 2025
Thing to Do
The Union Advance Trail at Antietam
NPS Antietam
The Union Advance Trail starts at Auto Tour Stop 9. The trail crosses Burnside Bridge (also known as the Rohrbach or Lower Bridge) and makes a loop on the east side of Antietam Creek. The trail is one mile in length and should take about an hour to complete. The trail is easy except for two hills. However, the surface can be slightly uneven, so good walking shoes are recommended.
You will be exploring the area where the Confederates defended the Burnside Bridge, and then crossing over Antietam Creek to see where the Union Ninth Corps, commanded by Gen. Ambrose Burnside, made their advances to capture the bridge. To get the full story of all of the fighting on the south end of the battlefield, this hike is best combined with the Final Attack Trail.
Hike Description and Interpretation
Directions: Walk across the Burnside Bridge and turn left (north) and follow the trail along the stone wall, a few hundred yards, to Stop 1.
Stop 1 - Union Plan of Attack
At 10:00 a.m., as the fighting raged at the Sunken Road, Burnside received orders to commence his attack against the bridge. Burnside sent Gen. Isaac Rodman with 3,200 soldiers downstream where they were to cross Antietam Creek and outflank the Confederates.
While Rodman’s men moved south, Burnside ordered diversionary attacks against the bridge. Over the course of the next three hours, at least three separate attacks were launched against the bridge, each one resulting in heavy loss.
Directions: Follow the trail up the hill to the right, turning south to Stop 2. As you face the Burnside Bridge, you are looking west-southwest and are standing in the center of the three Union attacks on the bridge.
Stop 2 - Burnside Bridge Overlook
The first attack was led by the 11th Connecticut Infantry followed by Crook’s Brigade. Crook mistakenly advanced upstream and was pinned down by Confederate fire. The 11th Connecticut pushed towards the bridge from the left. This uncoordinated first assault was just one example of how confusion, difficult terrain, and Confederate firepower broke down the Union attacks.
The second attack on the bridge also came from the left. General Nagle’s Brigade was
ordered forward at 11:00 a.m. and they were also turned back by incoming Confederate fire. Brig. Gen. Edward Ferrero’s veteran brigade was selected for the third, and eventually successful, attack on the bridge. The 51st New York and the 51st Pennsylvania Infantry Regiments with about 650 men charged right down the hill towards the bridge. At first the Confederate resistance was still strong enough to force them to a halt, but with ammunition running low and Rodman’s men finally crossing downstream, Toomb’s men retreated and Union soldiers finally captured this crucial Antietam crossing.
Directions: Continue on the trail along the edge of the field, with the creek to your right, back down the ridge to Stop 3.
Stop 3 - 11th Connecticut Monument
This monument to the 11th Connecticut Volunteer Infantry was dedicated on October 8, 1894. Veterans of a difficult and costly charge at Antietam returned thirty- two years later to memorialize their fallen comrades. Colonel Henry Walter Kingsbury and the men of the 11th Connecticut led the first attack on the bridge at 10:00a.m. Kingsbury, Confederate General D.R.Jones’s brother-in-law, urged his men on, until he was shot down by what Pvt. Tillinghast of Company D described as “the hottest fire we ever received.” Fighting desperately, the 11th CT made a gallant effort, but after losing a third of their men, including their commander, the Connecticut soldiers fell back.
Directions: Backtrack on the trail and continue toward the fence and historic road that parallels the creek.
Stop 4 - Fence Opening
It was through this fence, along the stream, and up the road towards the bridge that many of Burnside's men charged, only to be shot down by the Confederates on the high ground on the other side of Antietam Creek.
Directions: Walk towards the Bridge for Stop 5. Then finish the trail by crossing the historic bridge and head up the hill back to your car.
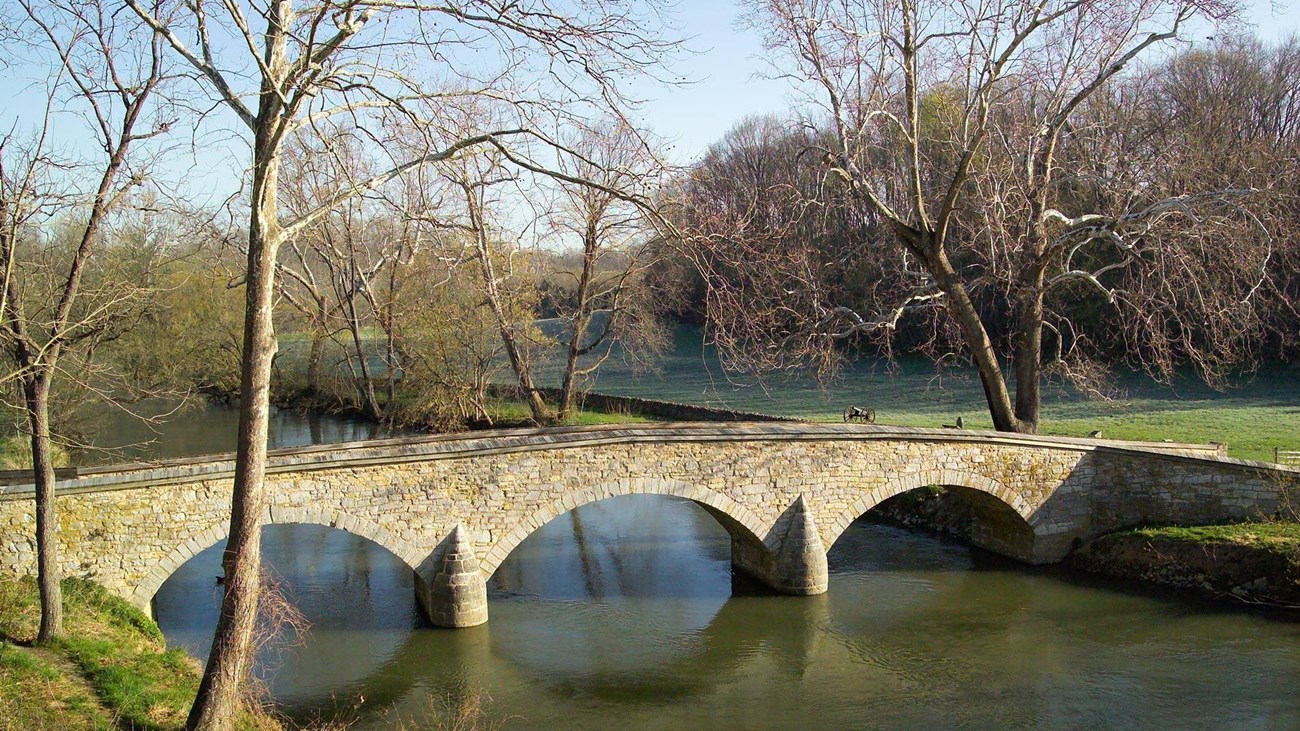
Stop 5 - The Burnside Bridge
You will be exploring the area where the Confederates defended the Burnside Bridge, and then crossing over Antietam Creek to see where the Union Ninth Corps, commanded by Gen. Ambrose Burnside, made their advances to capture the bridge. To get the full story of all of the fighting on the south end of the battlefield, this hike is best combined with the Final Attack Trail.
Hike Description and Interpretation
The Confederate Defense
It was Confederate Gen. D.R. Jones's division who defended the right flank of Lee's line. Here, the Confederates had the terrain advantage, however, they were terribly outnumbered. Jones’s Division numbered about 3,300, Burnside had available close to 12,000. The bridge crossing itself was secured by Gen. Robert Toombs small brigade of about 500 soldiers. Toombs placed the 2nd and 20th Georgia Infantry at the bridge. The rest of his small command spread out along the hill sides up and down stream where they poured their fire into Burnside’s men as they approached the bridge.Directions: Walk across the Burnside Bridge and turn left (north) and follow the trail along the stone wall, a few hundred yards, to Stop 1.
Stop 1 - Union Plan of Attack
At 10:00 a.m., as the fighting raged at the Sunken Road, Burnside received orders to commence his attack against the bridge. Burnside sent Gen. Isaac Rodman with 3,200 soldiers downstream where they were to cross Antietam Creek and outflank the Confederates.
While Rodman’s men moved south, Burnside ordered diversionary attacks against the bridge. Over the course of the next three hours, at least three separate attacks were launched against the bridge, each one resulting in heavy loss.
Directions: Follow the trail up the hill to the right, turning south to Stop 2. As you face the Burnside Bridge, you are looking west-southwest and are standing in the center of the three Union attacks on the bridge.
Stop 2 - Burnside Bridge Overlook
The first attack was led by the 11th Connecticut Infantry followed by Crook’s Brigade. Crook mistakenly advanced upstream and was pinned down by Confederate fire. The 11th Connecticut pushed towards the bridge from the left. This uncoordinated first assault was just one example of how confusion, difficult terrain, and Confederate firepower broke down the Union attacks.
The second attack on the bridge also came from the left. General Nagle’s Brigade was
ordered forward at 11:00 a.m. and they were also turned back by incoming Confederate fire. Brig. Gen. Edward Ferrero’s veteran brigade was selected for the third, and eventually successful, attack on the bridge. The 51st New York and the 51st Pennsylvania Infantry Regiments with about 650 men charged right down the hill towards the bridge. At first the Confederate resistance was still strong enough to force them to a halt, but with ammunition running low and Rodman’s men finally crossing downstream, Toomb’s men retreated and Union soldiers finally captured this crucial Antietam crossing.
Directions: Continue on the trail along the edge of the field, with the creek to your right, back down the ridge to Stop 3.
Stop 3 - 11th Connecticut Monument
This monument to the 11th Connecticut Volunteer Infantry was dedicated on October 8, 1894. Veterans of a difficult and costly charge at Antietam returned thirty- two years later to memorialize their fallen comrades. Colonel Henry Walter Kingsbury and the men of the 11th Connecticut led the first attack on the bridge at 10:00a.m. Kingsbury, Confederate General D.R.Jones’s brother-in-law, urged his men on, until he was shot down by what Pvt. Tillinghast of Company D described as “the hottest fire we ever received.” Fighting desperately, the 11th CT made a gallant effort, but after losing a third of their men, including their commander, the Connecticut soldiers fell back.
Directions: Backtrack on the trail and continue toward the fence and historic road that parallels the creek.
Stop 4 - Fence Opening
It was through this fence, along the stream, and up the road towards the bridge that many of Burnside's men charged, only to be shot down by the Confederates on the high ground on the other side of Antietam Creek.
Directions: Walk towards the Bridge for Stop 5. Then finish the trail by crossing the historic bridge and head up the hill back to your car.
Stop 5 - The Burnside Bridge
Known as the Rohrbach Bridge before the battle, the bridge was designed and built by John Weaver at a cost of $2,300. It was completed in 1836 and was actively used for traffic until 1966. In an effort to preserve the bridge, a bypass was built to take cars on to a new bridge upstream. Today, visitors can once again quietly stroll across what has become the icon of Antietam Battlefield. The peaceful, bucolic setting belies the terrible struggle that took place where you have just walked.
Details
Duration
30-90 Minutes
The trail is about one mile in length with two hills and a combination of grass and dirt trail bed. More than half the trail is shaded by trees.
Activity
Hiking
The Confederate Defense
It was Confederate Gen. D.R. Jones's division who defended the right flank of Lee's line. Here, the Confederates had the terrain advantage, however, they were terribly outnumbered. Jones’s Division numbered about 3,300, Burnside had available close to 12,000. The bridge crossing itself was secured by Gen. Robert Toombs small brigade of about 500 soldiers. Toombs placed the 2nd and 20th Georgia Infantry at the bridge. The rest of his small command spread out along the hill sides up and down stream where they poured their fire into Burnside’s men as they approached the bridge.Directions: Walk across the Burnside Bridge and turn left (north) and follow the trail along the stone wall a few hundred yards, to Stop 1.
Stop 1 - Union Plan of Attack
At 10:00 a.m., as the fighting raged at the Sunken Road, Burnside received orders to commence his attack against the bridge. Burnside sent Gen. Isaac Rodman with 3,200 soldiers downstream where they were to cross Antietam Creek and outflank the Confederates.While Rodman’s men moved south, Burnside ordered diversionary attacks against the bridge. Over the course of the next three hours, at least three separate attacks were launched against the bridge, each one resulting in heavy loss.
Directions: Follow the trail up the hill to your right, south to Stop 2. As you face the Burnside Bridge, you are looking west-southwest and are standing in the center of the three Union attacks on the bridge.
Stop 2 - Burnside Bridge Overlook
The first attack was led by the 11th Connecticut Infantry followed by Crook’s Brigade. Crook mistakenly advanced upstream and was pinned down by Confederate fire. The 11th Connecticut pushed towards the bridge from the left. This uncoordinated first assault was just one example of how confusion, difficult terrain, and Confederate firepower broke down the Union attacks.
The second attack on the bridge also came from the left. General Nagle’s Brigade
was ordered forward at 11:00 a.m. and they were also turned back by incoming Confederate fire. Brig. Gen. Edward Ferrero’s veteran brigade was selected for the third, and eventually successful, attack on the bridge. The 51st New York and the 51st Pennsylvania Infantry Regiments with about 650 men charged right down the hill towards the bridge. At first the Confederate resistance was still strong enough to force them to a halt, but with ammunition running low and Rodman’s men finally crossing downstream, Toomb’s men retreated and Union soldiers finally captured this crucial Antietam crossing.
Directions: Continue on the trail along the edge of the field with the creek to your right, hike back down the hill to Stop 3.
Stop 3 - 11th Connecticut Monument
This monument to the 11th Connecticut Volunteer Infantry was dedicated on October 8, 1894. Veterans of a difficult and costly charge at Antietam returned thirty- two years later to memorialize their fallen comrades. Colonel Henry Walter Kingsbury and the men of the 11th Connecticut led the first attack on the bridge at 10:00a.m. Kingsbury, Confederate General
D.R. Jones’s brother-in-law, urged his men on, until he was shot down by what Pvt. Tillinghast of Company D described as “the hottest fire we ever received.” Fighting desperately, the 11th CT made a gallant effort, but after losing a third of their men, including their commander, the Connecticut soldiers fell back.
Directions: Backtrack on the trail and continue toward the fence and historic road that parallels the creek.
Stop 4 - Fence Opening
It was through this fence, along the stream, and up the road towards the bridge that many of Burnside's men charged, only to be shot down by the Confederates on the high ground on the other side of Antietam Creek.
Directions: Walk towards the Bridge for Stop 5. Then finish the trail by crossing the historic bridge and head up the hill back to your car.
Stop 5 - The Burnside Bridge
Known as the Rohrbach Bridge before the battle, the bridge was designed and built by John Weaver at a cost of $2,300. It was completed in 1836 and was actively used for traffic until 1966. In an effort to preserve the bridge, a bypass was built to take cars on toa new bridge upstream. Today, visitors can once again quietly stroll across what has become the icon of Antietam Battlefield. The peaceful, bucolic setting belies the terrible struggle that took place where you have just walked.Pets Allowed
Yes
On leash and owner must clean up after their pet.
Activity Fee
Yes
Included in park admission.
Location
Burnside Bridge Overlook Patio
Park your car at Auto Tour Stop 8 and walk down the sidewalk to the patio overlooking Burnside Bridge.
Reservations
No
Season
Year Round
Time of Day
Day
Accessibility Information
The trail is a combination of grass and dirt trail bed. There are two hills to navigate that are about 100 feet tall.