Last updated: August 14, 2020
Lesson Plan
Make Your Own Astrolabe

- Grade Level:
- High School: Ninth Grade through Twelfth Grade
- Subject:
- Science
- Lesson Duration:
- 60 Minutes
- Additional Standards:
- (HS-ESS1-4)
Essential Question
How did early astronomers measure the stars and planets?
Objective
Have you ever wondered about how astronomers learned about the movement of Earth and the placement of constellations throughout the galaxy? Early astronomers used a tool called an astrolabe to measure the angle of stars in the night sky. This tool taught early astronomers many different things about our galaxy including the amount of time it takes for the Earth to revolve around the sun, the hours in a day, and how to track constellations and eclipses.
Background
Early astronomers used a tool called an astrolabe to measure the angle of stars in the night sky. This tool taught early astronomers many different things about our galaxy including the amount of time it takes for the Earth to revolve around the sun, the hours in a day, and how to track constellations and eclipses.
You Will Need:
- A plastic protractor and/or cardstock or cardboard
- One plastic straw
- A piece of string 7-12 inches long
- A small washer, bolt, or another weight that can be tied to a string
- Tape
- If you are using a protractor, tie one end of the string to the hole in the middle flat-edged side of the protractor. If there is not a hole, carefully drill one.
- If a protractor is not available to you, make your own using cardstock or cardboard, marking each 10-degrees between 0 and 180. Hole punch or cut a hole in the center of the straight edge and tie one end of the string to the hole.
- Attach the metal weight to the other end of the string.
- Tape the straw to the flat edge of the protractor.
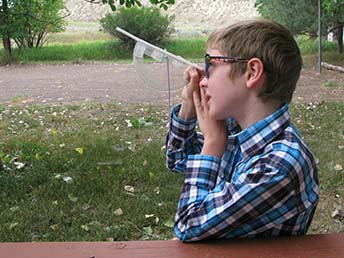
Once your astrolabe is assembled, take it outside! This activity is best done at nighttime to track the stars. Locate a star or planet, using the straw as a viewfinder. Once the star or planet is located, hold the string in place against the protractor and take note of the angle where the star was seen. After about an hour, return to the same position and relocate the same star or planet using the process above. Is it in the same position in the sky as it was previously?
Preparation
This activity is most successful when students understand Earth’s location in the solar system, the movement of Earth around the sun, and that stars are relatively stationary.
Materials
Download Printable - Make Your Own Astrolabe
Procedure
- Gather materials (protractor, straight straw, 7 inches or string, a small weight, and tape)
- Assemble astrolabe
- Tape the straw to the flat edge of the protractor
- Tie a string through the hole in the center of the straight edge of the protractor and tie a weight to the loosely hanging end of the string
- If a protractor is not available to you, make your own using cardstock or cardboard, marking each 10-degrees between 0 and 180. Hole punch or cut a hole in the center of the straight edge and tie one end of the string to the hole.
- Take the astrolabe outside (recommended at nighttime) and locate a star, planet or other astronomical feature through the straw of the homemade astrolabe. Record the angle towards the star.
- About an hour later, return to the same spot, find the same feature, and repeat the previous step at least three times.
- Note any changes in angle throughout the night and discuss.
- For advanced students following High School standard HS-ESS1-4, use this data to calculate and predict the motion of orbiting objects in the solar system.
Contact Information
Email us about this lesson plan
