|
Cowpens
Administrative History |

|
Chapter One:
THE BATTLE OF COWPENS
Colonial South Carolina
After earlier attempts by Spanish and French settlers, English colonists from Barbados founded Charleston as South Carolina's first permanent European settlement in 1670. Settlers gradually moved out from Charleston into other areas of the colony's coastal plain. During the 1760s, Scotch-Irish colonists traveled down wagon roads from Virginia and Pennsylvania to settle South Carolina's backcountry. [1]
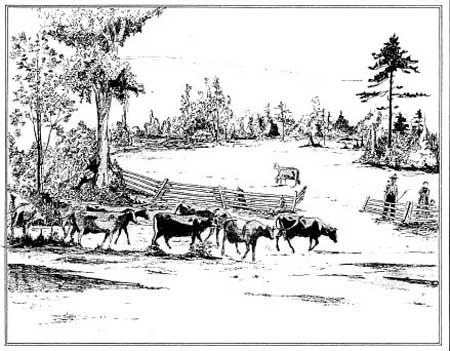
An important component of colonial South Carolina's economy was cattle raising. Only ten years after the founding of Charleston, colonists had established cattle operations on the coastal plain. Cattlemen began moving into the backcountry following the Yamassee War and the growth of plantations in the coastal areas during the early 1700s. Many backcountry areas first developed as open ranges where cattle roamed freely and only houses, gardens, and crop fields were fenced in. These open ranges were known as "cowpens." [2]
The Revolutionary War Comes to the Southern
Colonies
In 1763 the French and Indian War came to an end. France was largely expelled from North America by British and American forces that had spent decades pursuing that goal. Subsequently, and perhaps ironically, the removal of this French threat reduced colonial dependence and thus the need for direct Crown governance of colonial affairs. When Britain imposed a series of poorly crafted reforms of its imperial system, including several new and deeply resented colonial taxes, relations between Britain and her North American subjects rapidly deteriorated to the point of war. In the North the first battles of the American Revolution began at Lexington and Concord in April 1775, followed by Bunker Hill in May and a Patriot invasion of Canada late in the year. By early 1776, Britain was preparing to strike into the southern colonies on the belief that the region contained many Crown supporters, known as Loyalists. The primary target in the South was Charleston, the region's largest and wealthiest city. [3]
For the first southern campaign, British commander Sir Henry Clinton planned to have a British fleet meet a Loyalist army on the coast of North Carolina before proceeding to Charleston. On February 27, Patriot militia defeated the Loyalist army at the Battle of Moores Creek Bridge. When the British fleet attempted to enter Charleston's harbor, it was turned back by a Patriot force on Sullivan's Island. After this initial British failure, the Crown waited several years before launching another major campaign in the region. In the meantime, a British force captured Savannah, Georgia, in 1778 and held the city against a joint Patriot and French attack the following year. By 1780, Britain was planning its second southern campaign. [4]
The Second Southern Campaign
As the war in the northern colonies stalemated during the late 1770s, British strategy again focused upon the strong Loyalist base in the South. Military leaders hoped that these Loyalists could secure Georgia, the Carolinas, and Virginia while keeping the northern colonies blockaded until the rebellion lost momentum. On February 11, 1780, a British fleet began landing troops under Clinton on Simmons Island, thirty miles south of Charleston. By May 12 this force had marched to the outskirts of the city, cut off escape routes for the Patriot army under General Benjamin Lincoln, besieged the city, and forced its surrender. It was one of the worst Patriot losses of the entire war. Within a month, the British had established outposts at Camden, Ninety Six, and Augusta in the backcountry of South Carolina and Georgia. On August 16 a Patriot army made up of Continentals and militia under General Horatio Gates met a British army under Lord Charles Cornwallis at Camden. After the militia fled in the face of British regulars, the battle turned into a Patriot disaster. With two major victories in three months and South Carolina largely subdued, Britain's southern campaign appeared to be going well. [5]
In the wake of these Patriot defeats came the first in a series of important battles that would ultimately trigger the collapse of Britain's effort to suppress the colonial rebellion. On October 7, 1780, Patriot militia from the backcountry, including mountain men from Appalachia, surrounded and defeated a Loyalist army of over one thousand men at Kings Mountain, South Carolina. Although only one British soldier was present, the battle was a serious blow to southern Loyalists and a setback for British strategy. [6]
|
| Figure 1: A depiction of an early cattle pen from the 1939 cover of the NPS master plan for Cowpens National Battle Site |
In December General Nathaniel Greene took command of Patriot forces in the southern colonies. Both he and Cornwallis established winter quarters in South Carolina. Greene divided his army and sent half of it with Brigadier General Daniel Morgan to attack the rear of the British force if it entered North Carolina. Cornwallis feared that Morgan might attack the British outpost at Ninety Six. To meet this threat, Cornwallis sent his fast-moving light troops under the command of Lieutenant Colonel Banastre Tarleton in search of Morgan. On January 17, 1781, the two armies met in the South Carolina piedmont. [7]
The Battle of Cowpens
On the evening of January 16, 1781, Morgan planned for battle with the pursuing Tarleton. At the suggestion of his militia leaders, he chose a road junction, known as "the Cowpens," as the location to fight. The place was the same spot where Patriot militia had gathered before the Battle of Kings Mountain and was a well-known landmark to local frontiersmen. To do battle against Tarleton's eleven hundred troops, Morgan had at his disposal approximately two thousand men, including six hundred experienced Continentals and long-serving Virginia militiamen, eighty cavalrymen, and over a thousand militia troops from North Carolina, South Carolina, and Georgia. [8] In arranging his troops for battle, Morgan developed a three-tier, in-depth defense as was standard in eighteenth-century European warfare. The first position of his battle formation was to be a skirmish line of over a hundred militia men. After contact with British troops, this force was to fall back 150 yards to the second position, which consisted of the North Carolina, South Carolina, and Georgia militia under Colonel Andrew Pickens. After firing two volleys into the British formations at fifty yards, the entire militia force was to fall 150 yards to the rear of the Continentials to serve as a reserve. The militia was ordered to pass through the Continential line at various points as opposed to passing around a flank. The Continentials, with Maryland and Delaware regulars and long-serving Virginia militia all under the command of Colonel John Eager Howard, were posted as the main line of battle. To the rear of the Continentals was Colonel William Washington, commanding cavalry ready to defend the militia as it fell back. [9]
Morgan's battle plan involved several creative tactics. His three-tier defense reversed the usual order of battle so that his positions became progressively stronger, instead of weaker, as the enemy encountered them. This strategy had the potential to trick the enemy into believing that a breakthrough had occurred whereas, in fact, planned withdrawals from forward positions only strengthened resistance. In addition, Morgan's strategy provided for the militia to fire and then retreat to the rear. This ingenious tactic allowed him to use the firepower and marksmanship of the militiamen without expecting them to stand against a bayonet charge by British regularsan expectation that had proved devastating for Patriot forces at Camden. Besides the arrangement of his battle formations, Morgan's tactics took advantage of the terrain at Cowpens. By placing his men downhill from the advancing British lines, Morgan accentuated the British tendency to fire too high in battle. Furthermore, the downhill position of his forces allowed the British forces to be silhouetted against the morning sunlight, providing easy targets for Patriot troops. With a ravine on their right flank and a creek on their left flank, Morgan's forces were protected against British flanking maneuvers at the beginning of the battle. In developing his tactics at Cowpens, as historian John Buchanan wrote, Morgan may have been "the only general in the American Revolution, on either side, to produce a significant original tactical thought." [10]
|
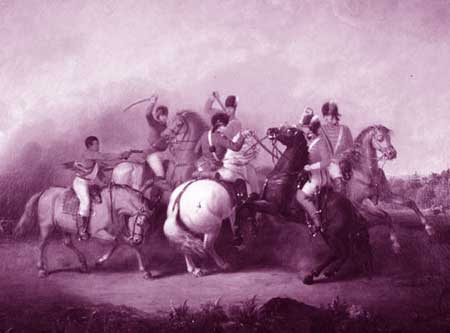
| Figure 2: Painting entitled The Battle of Cowpens, by William Ranney (1845), from the Collection of the State of South Carolina |
Just before dawn on the morning of January 17, Morgan deployed his forces for battle as planned. Upon finding Morgan ready for battle, Tarleton quickly ordered his troops into formation. His main line was formed from the 16 th Foot Infantry, Fraser's Highlanders, the British Legion, and the Royal Fusiliers. In addition, Tarleton's formation included dragoons on both flanks of the main line, a battalion of Fraser's Highlanders in reserve, and two field artillery pieces. [11]
In accordance with Morgan's plan, both the skirmish and militia lines fired and fell to the rear of the Continentals. When Tarleton sent the Highlanders to outflank the right wing of the Continental line, Howard responded by ordering his Virginia troops to turn and confront the Highlanders. However, his orders were misunderstood and the troops instead began a disciplined withdrawal. Seeing this retreat, the British main line assumed that a rout was in progress and charged. Then, as Howard's Continentals withdrew, Morgan ordered them to turn and fire into the charging British line. The volley at close range proved devastating. The Continentals then began a bayonet charge into the disorganized British troops, who began to surrender or flee en masse. The British artillery position fell next. With the Highlanders still fighting, Pickens's militia and the Continentals surrounded and subdued them in a classic "double envelopment" maneuver. [12]
Seeing his army shattered, Tarleton led forty dragoons in an attempt to recapture the artillery, but Washington responded to Tarleton's challenge. After a brief cavalry engagement, Washington's horsemen dispersed Tarleton's dragoons, but only after Washington's life was saved by an African-American body servant. During the brief forty-minute engagement, Tarleton's army had lost eighty-six percent of its men, including 110 killed, two hundred wounded, and 512 additional soldiers captured. Morgan's losses included at least twenty-four killed and one hundred wounded. For the Patriots, it was an overwhelming victory that destroyed Cornwallis's light troops. After hearing of the Patriot success, Congress voted to give a gold medal to Morgan, silver medals to Howard and Washington, and a silver sword to Pickens. The medals accounted for three of the total eleven medals awarded by Congress during the American Revolution. [13]
The Aftermath and Significance of The Battle
of Cowpens
Eager for revenge, Cornwallis pursued Morgan into North Carolina. Meanwhile, Greene marched from his winter headquarters to meet Morgan. After combining his divided army into one force, Greene clashed with Cornwallis at Guilford Courthouse on March 15, 1781. The British held the field after the battle but suffered heavy casualties. With the losses at Cowpens and Guilford Courthouse, Cornwallis saw his army reduced from thirty-two hundred men able to fight to fourteen hundred. He was now forced to withdraw to safety at Wilmington, North Carolina. Between April and May, Cornwallis led his army into Virginia, where it was eventually surrounded at Yorktown by a combined Patriot and French force under General George Washington. [14]
With Cornwallis out of the way, Greene focused on retaking South Carolina. While partisan groups under Francis Marion and other leaders disrupted British communication and supply lines, Greene's army fought the British at Hobkirks Hill outside Camden on April 25, 1781, and laid siege to Ninety Six in May and June. Although Greene lost both of these battles, once again, heavy losses forced British withdrawals. The last major fighting in South Carolina occurred at Eutaw Springs on September 8. After one of the war's bloodiest battles, Greene abandoned the field to a British army that subsequently retreated to Charleston. In Virginia, with no hope of reinforcements, Cornwallis surrendered his army to Washington at Yorktown on October 19, effectively ending the American Revolution. Although the British had won most of the major battles of the second southern campaign, attrition had cost them victory and, with it, thirteen of their colonial possessions in North America. [15]
The outcome of the American Revolution was ultimately determined by British failure during the second southern campaigna failure due in large part to the Battle of Cowpens. Together with Kings Mountain, Guilford Courthouse, and Ninety Six, Cowpens was an important link in the chain of events that crippled British operations in the South and led to the surrender of Cornwallis. Coming in the wake of major Patriot defeats at Charleston and Camden, Cowpens boosted sagging Patriot morale. Cowpens was perhaps the greatest Patriot victory of the war. A combined force of Continentals and militia overwhelmingly defeated a British army on its own termsthe formal warfare of eighteenth-century Europe. [16] As historian John Buchanan has observed, Cowpens was "the tactical masterpiece of the war." [17]
| <<< Previous | <<< Contents >>> | Next >>> |
http://www.nps.gov/cowp/adhi/adhi1.htm
Last Updated: 10-Dec-2002