
To preserve search engine rankings for renamed or moved pages, CommonSpot automatically creates 301 (permanent) redirects. To help you control the number of redirect records generated when renaming a subsite, you have the option of automating redirects for all subsite pages when you Rename a Subsite.
The Manage URL Redirects function adds to these features by enabling manual creation of 301or 302 redirects, as well as options to search, view, edit, and centrally manage all redirects at your site. Use this dialog to enable marketers to easily create and manage redirects for search engine optimization (SEO) or marketing campaigns. Expand the Utilities left panel of the Site Administration dashboard and select Manage URL Redirects to access this dialog. The dialog displays as shown below for sites not using redirection or for which redirection is currently disabled.
Manually create 301 redirects to route incoming links to obsolete URLs to the correct location, to create permanent targets for frequently changing URLs (to preserve visitor bookmarks, for example), or to create long-term "Vanity" URLs for branding, or to substitute short URL aliases for long URLs.
You can also create temporary (302) Vanity redirects for short-term marketing campaigns, for example, or for other redirects you do not want permanently registered with search engines.
You can make manually created redirects temporary, or vice-versa, change redirect targets, and optionally set or change expiration dates. At the page level, authors of redirect targets can modify temporary/permanent settings, add expiration dates, remove redirects, or add new redirects to their pages through the Manage Page URLs dialog. Authoring and page creation rights apply to redirect pages and subsites. See Redirect Permissions below.
CommonSpot tracks all redirected links at your site and manages them through a 404 (file not found) handler. Before you can create or view records for 301 or 302 redirects at your site, your site must register a 404 handler within the 404 error section of your web server's configuration file and add it to the field in ColdFusion Settings to support redirection through CommonSpot.
Review the instructions and comments in the sample file contained in the commonspot/samples/404handler directory and review Important Notes below. See also the CommonSpot Developer's Guide for example file description and implementation details.
Click the Enable Redirects for this Site button. CommonSpot prompts you to confirm that the 404 configuration file exists.
Once you confirm, the Manage Site Redirects dialog displays as shown below. Once you register redirects this dialog lists each one, with the original URL, the new URL target, any automatic expiration dates defined, and edit and delete options.
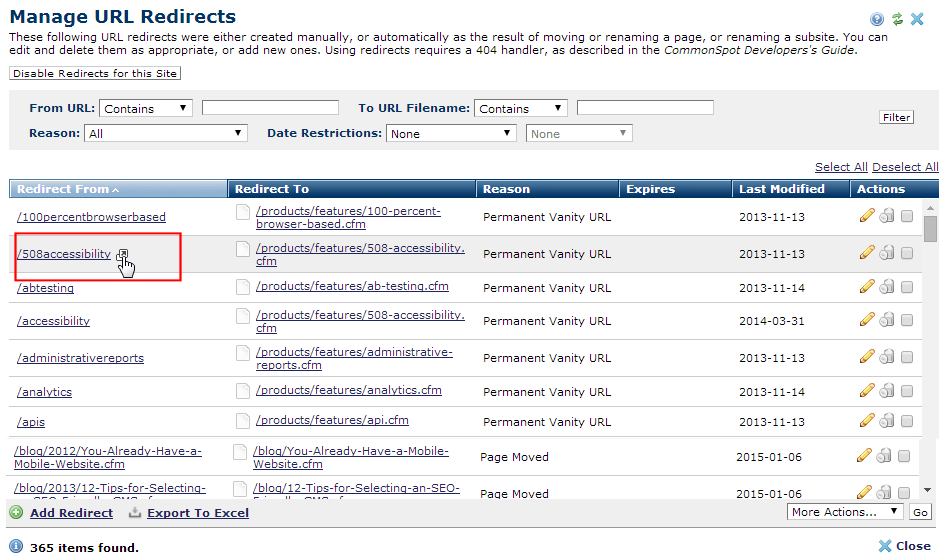
This dialog presents a set of filtering options. For sites with many redirected pages, restrict results by entering all or part of a URL in the text field for the From URL (former URL) or To URL Filename (replacement URL) fields, pick from the dropdowns, then click Filter to locate redirect records.
Optionally filter using the Reason dropdown. You can restrict results by these types:
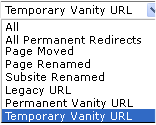
Moved, Renamed, Legacy, and Permanent Vanity URLs are all permanent (301) types. You can selectively filter for each, or choose All Permanent Redirects to return results for all permanent types. Choosing Temporary Vanity URL displays only records for manually created redirects defined as temporary (302). Choosing All displays all automatically and manually generated permanent redirects and all manually generated temporary URL redirects.
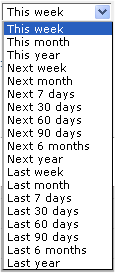
You can additionally search by Date Restrictions - Select from the dropdown:
Note: Once a redirect expires, CommonSpot removes the redirect record from this dialog.
Once you set a date restriction, you can further refine your search with options in the second date field. Picking a date restriction based on past events displays past time periods only. Picking a date restriction for future events displays future times only. Optionally refine date restrictions. The options below display for Expiration date.
Click to sort by column head.
You can conveniently test the redirect by clicking the link in the Redirect From column.
Click the edit icon  to modify redirect records. You cannot modify the From URL for the redirects that CommonSpot automatically generates for moved or renamed pages. See Add URL Redirects.
You can optionally set an expiration date for the redirect.
Remove individual items by clicking the associated delete icon  , or select multiple items, click Delete Selected from the More Actions dropdown, then click Go. CommonSpot confirms deletion to enable you to manage any links to this file. You can optionally Select/Deselect all.
Deleting a redirect record disables redirection for the From URL and serves a 404 (File Not Found) error to visitors to that URL.
To add a new redirect record, click Add Redirect at the bottom of the dialog.
Creating, deleting, and modifying redirects requires author and create page rights as follows. Menu items for which you don't have rights are disabled.
To create, you need:
To edit, you need:
To delete, you need:
 Important Notes
Related Links
You can download PDF versions of the Content Contributor's, Administrator's, and Elements Reference documents from the support section of paperthin.com (requires login).
For technical support:
