Last updated: June 19, 2018
Article
Should I Replace My Plaster Ceiling?

Photo courtesy of Mary Feitz, National Park Service.
A Brief History
The term “plaster” when used in an architectural sense (historically there were medicinal plasters), covers a long chronology dating back to cave-dwellers who covered interior surfaces of caves with mud. Later, simple stick shelters were plastered with mud. Today the term “plaster,” and its derivations, is synonymous with a very specific architectural finish for interior and/or exterior applications. Medicinal plasters have gone by the wayside – except as used over layers of gauze in “casting” - leaving the term mostly to building construction; or in some cases, overindulgence. Aside from ancient mud mixtures, plasters were produced from lime, gypsum, and most recently, cement. Because of plaster’s smooth, very hard surface, the sanitary value of plastered interiors was apparent. Plaster was also an excellent fire retardant. Due mainly to the many fires that ravaged London in the thirteenth century, the king decreed that all buildings were to have plastered walls.Early plasters were lime-based, the processed (burned) lime obtained either from crushed limestone or certain chalks. A “lime cycle” was introduced later by which lime (calcium carbonate) is converted to quicklime by heating, then slaked by adding water which returns it naturally to its original chemical makeup. Mortar is produced by adding sand to the slaked lime. Around 7500 B.C. artisans in Jordan used lime mixed with crushed limestone to cover walls, floors and hearths. Mixed with water, the paste was applied to varying surfaces – mostly reeds or twigs; and probably also over stones.
Plasterwork has been found in the Egyptian pyramids dating at least four thousand years back. These plastered surfaces are some of the most long-lasting -testifying to plaster’s strength and durability. The Egyptians used a plaster made from calcined (heated) gypsum – much like modern Plaster of Paris [1]. Animal hair was added to increase strength. Very early Greek architecture employed the use of fine white lime stucco, and their techniques reached unequalled perfection in the use of this type of plasterwork.
It is from Greece, that we get the word “plaster.” In the ancient Greek language, the word emplastron meant “to daub on.”
Lime plasters took approximately two weeks to completely set up. Gypsum plasters set up faster, but the early mining and processing of gypsum was expensive and time-consuming. As a result, gypsum plasters were used primarily for ornamental work and for various imitation marble finishes called scagliola – techniques developed in Italy in the 15th century. Modern processing methods introduced in the early 20th century guaranteed that gypsum would replace lime as the primary binding agent for most plasters. Combined with sand and water, gypsum plasters can be built up in layers that take hours (rather than days for lime plasters) to dry.

Photo courtesy of Mary Feitz, National Park Service.
A skilled plasterer could produce a finished coat of plaster that took on a shine.
With the introduction of mechanized saws, wood lath was eventually produced in uniform sizes. In the late 19th century, metal lath, made up of a lattice of ribbed metal and/or wire was introduced. Gypsum lath – much like modern “sheetrock” – was introduced in the 1930s and modern iterations are still in use today. Contemporary plastered interior surfaces are generally accomplished with a very thin, or “skim,” coat of fine plaster over gypsum lath. Wood lath has gone to the history books.
Repairs
Entering a building which has been vacant or poorly maintained and contains historic plaster surfaces can be a visual nightmare: uneven surfaces, multiple cracks, and missing plaster may be very apparent. With “modern sensitivities” to “perfection,” the knee-jerk reaction might be to take everything down to the studs and install very flat, very precise sheetrock and paint the surfaces. This compromises historic integrity and wholesale replacement of historic plaster with new plaster is also very expensive. Historic plastered surfaces may look unattractive, but they represent a very special part of a building’s “fabric” and history. There are many time-honored building techniques which are quickly becoming lost arts; plastering is one of those.
Historic preservation guidelines and standards such as the Secretary of the Interior’s Standards strongly recommend repairs rather than wholesale replacement with modern techniques/materials, but sometimes replacement is warranted. Such cases would involve buildings that moved prior to stabilization, and buildings that have been exposed to long-term moisture problems (buildings left vacant and whose interiors are exposed to the elements).
But even in these extreme circumstances, it is not necessary to expose the studs: the damaged plaster alone could be removed and the lath (usually wood) exposed and cleaned up. New multiple-coat plastering could then be accomplished. A typical three-coat plaster system is very practical in that it is extremely durable, fire resistant, and reduces sound transmission.
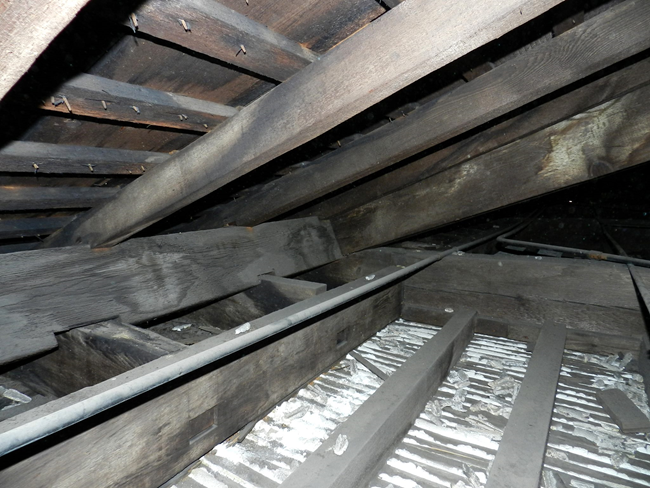
If the wood lath is too deteriorated, sections of new wood lath can be installed and if extensive lathing is required, metal or gypsum lath could be used. A skilled plasterer can proceed with a multiple-coat plaster finish. A severely damaged ceiling could be also be replastered by installing 1 x 3 wood furring strips and metal lath right atop the historic plaster – without removing the older finish and substrate. Replastering in this way saves time, produces much less demolition debris and dust, and gives added fire protection.
In specialized circumstances where plaster surfaces are pretty much intact, but the plaster has pulled loose from the lath, a technique requiring highly skilled craftspeople can be employed to establish new plaster keys. This requires access to the back sides of the wood lath, and the services of a very skilled conservator. The technique is described in Preservation Brief No. 21:
After dampening the old lath and coating the damaged area with a bonding agent, a fairly liquid plaster mix (with a glue size retardant added) is applied to the backs of the lath, and worked into the voids between the faces of the lath and the back of the plaster. While this first layer is still damp, plaster-soaked strips of jute scrim are laid across the backs of the lath and pressed firmly into the first layer as reinforcement. The original lath must be secure, otherwise the weight of the patching plaster may loosen it.[2]
Due to the high cost of this technique, it is employed primarily when the goal is to conserve decorative surfaces or historic wallpapers while leaving the plaster intact. Ceilings are probably the most accessible, but sometimes a wall can be similarly accessed (such as from a closet). First the existing plaster surfaces are very gently pushed back to the lath. Wood blocking/bracing with dense foam to protect the finish surfaces is employed to push and then stabilize the plaster while repairs are made.
Cracks (hairline or larger) are the easiest to repair, but the building must be stabilized first. Hairline cracks are repaired with a patching compound. For cracks that keep reappearing due to seasonal humidity changes, the crack is widened with a sharp metal tool, then the crack is filled. If movement is more persistent, the crack can be bridged with a fiberglass mesh tape embedded in wet plaster, and plastered over. Additional information on these types of repairs, and additional repair methods may be found in National Park Service Preservation Brief No. 21: Repairing Historic Flat Plaster Walls and Ceilings at: http://www.nps.gov/tps/how-to-preserve/briefs/21-flat-plaster.htm.
Originally published in "Exceptional Places" Vol. 9, 2014, a newsletter of the Division of Cultural Resources, Midwest Region. Written by Mark Chavez.
[1]. A large gypsum deposit at Montmartre in Paris resulted in the widespread use of this term.
[2]. National Park Service Preservation brief No. 21: Repairing Historic Flat Plaster Walls and Ceilings, p. 6.
