Taking photos is a great way to make the memories of your national park trip last. Whether you share them on social media or compile them in a photo album or scrapbook, having great photos of your adventure is the best souvenir. But how do you get great photos? Well, it’s a lot simpler than it may seem.
The Camera
Obviously, not all cameras are created equal. However, whether you’re using a DSLR, a point-and-shoot, or a phone camera, this guide will help you take better photos. The photos in this tutorial were taken with a Canon Powershot sx510 hs - a point-and-shoot with some manual features, 12.1 MP, and 30x optical zoom.
Composition
Credit: Torie Hawn
Regardless of your camera, keeping in mind good composition will make your photos stand out. Here are a couple of things to consider:
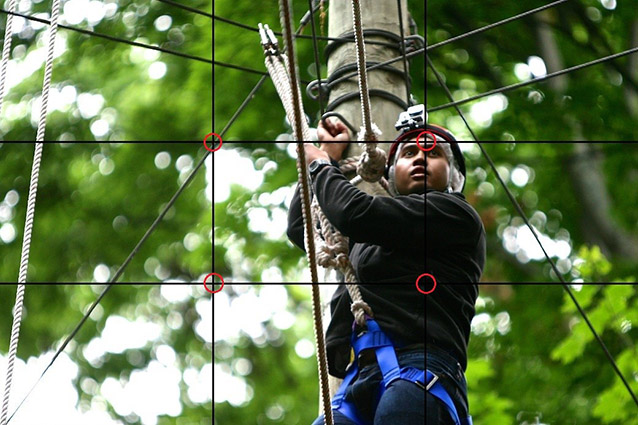
- Rule of Thirds: If your camera doesn’t do it for you, visually divide your frame vertically and horizontally into thirds. The four intersections of those thirds (indicated by the red circles) are the rule-of-thirds sweet spots. In the image above, we can see that the subject lines up with the right third, and that the subject’s face falls into a rule-of-thirds sweet spot.
Credit: Torie Hawn
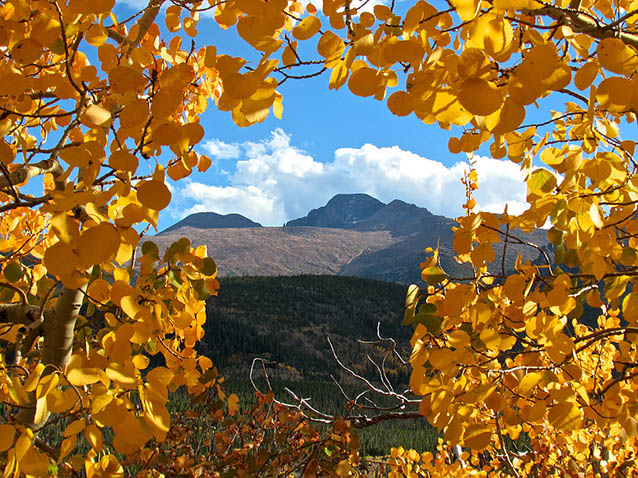
- Framing: Framing uses other items at the scene to act as a frame around the central subject. In the example above, Longs Peak is framed by an array of aspen leaves in autumn, putting a focus on the mountain.
Credit: Torie Hawn
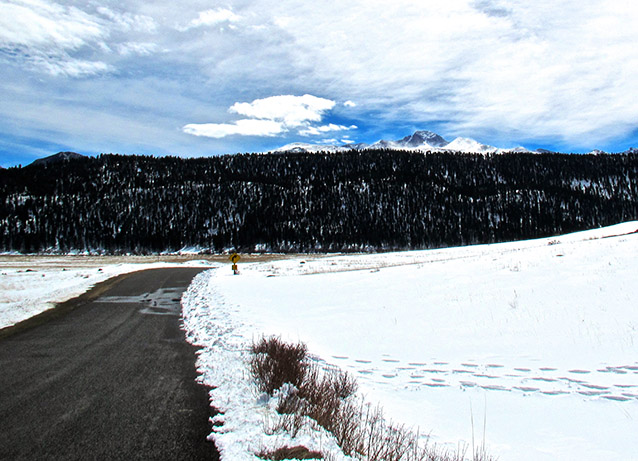
- Lines: Use lines to your benefit when shooting outdoors. Lines can help draw attention to a focal point or create an intriguing pattern. Leading lines are a good example of how to use lines to enhance your image. Leading lines draw the viewer’s eye to a subject in the image. In the image above, the subject of Longs Peak is used again, but this time it is drawn attention to with a road as an example of a leading line.
Adjust Your Settings
Credit: Torie Hawn
If your camera has manual settings, switching out of Auto mode can do some magical things. There are three main settings to mess around with on your camera:
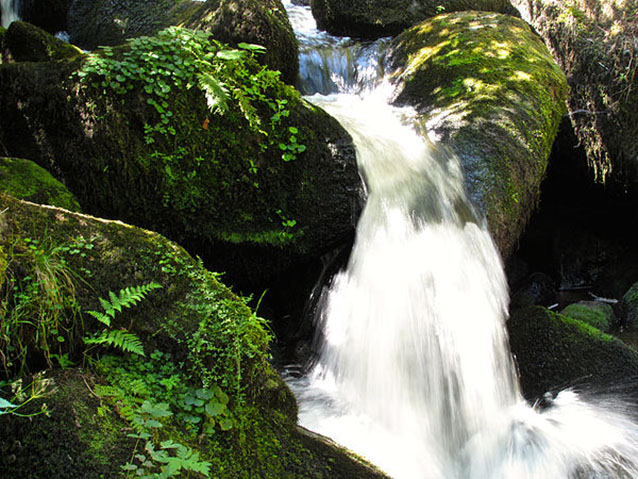
- Shutter speed (Tv or S): Shutter speed is my favorite setting to mess around with. Lower shutter speeds will give your image more blur, while higher shutter speeds will make things more crisp. For example, if you are trying to take an image of something in motion - an animal moving perhaps - you will want a high shutter speed to capture the action without a blur. This often makes the image dark, but that can be counteracted by making changes to the aperture and ISO, namely by increasing the aperture (lowering the f-stop) or increasing the ISO. Another cool situation in which you may want to play with your shutter speed is in shooting moving water, like a waterfall. Lower the shutter speed and keep the camera as steady as possible (using a tripod is best) and you can add a peaceful motion effect to waterfalls. Take the image above, for example. I shot this with at a shutter speed of 1/15th of a second. Low shutter speeds can also be used to shoot time lapse photos, such as in the case of starry skies or moving light.
Credit: Torie Hawn
-
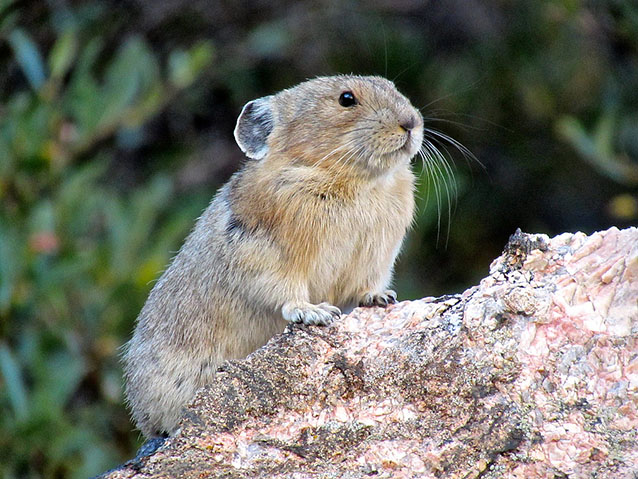
Aperture (Av or A): Aperture affects the depth of field in photography. Aperture is a bit counterintuitive in that a higher aperture is a lower number. So a high aperture would be, say f2.8 whereas a low aperture would be something like f16. The higher the aperture, the more light that the lens lets in, and the shallower the depth of field. Take the image above for example. The background is blurred because a high aperture was used, giving it a very shallow depth of field. If this was taken with a higher f-stop (lower aperture), the background would be more clear. The same effect can be done using a camera’s zoom. If I stand far away from a subject and zoom in, the background behind them will become blurred, just as if I had increased the aperture.
-
ISO: ISO is reflective of light sensitivity. A high ISO will be more sensitive to light, where a low ISO will be less so. A high ISO setting will lead to a grainy, noisy image, whereas a low ISO will be more crisp. So, why would you want to use a high ISO? Well, since a high ISO is more sensitive to light, it makes the image brighter. This is a perfect setting to use in low light or nighttime situations, such as when you’re camping or star gazing!
When to Shoot
Credit: Torie Hawn
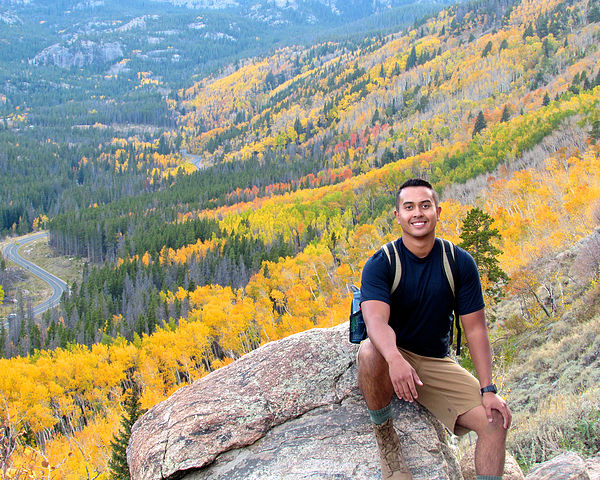
Sometimes the answer to your photography woes can be solved with a simple change in time. The following provide suggestions of when you should and should not shoot:
-
Golden Hour: Do shoot at the golden hour. The golden hour is the time shortly after sunrise or before sunset. At these times, the sun casts a warmer glow and the lighting is soft.
-
High noon: Do not shoot at high noon. Direct sunlight casts harsh lighting on the image. When shooting people at this time, the sun will cast a shadow from their nose and eyes, and will likely be unflattering.
-
Cloudy day: It depends. With slightly overcast weather, the lighting in your images becomes much softer, making it much easier to shoot when people are involved. Also, you avoid the risk of overexposure from bright sunlight. However, a lack of light makes it more difficult to capture motion shots of wildlife.
-
Sunny day: It depends. While bright, sunny days often result in overexposed images, this can be counteracted with the right camera settings. The biggest issue in shooting on a sunny day is trying to shoot people because of shadows on their face. Again, this can be counteracted with the right equipment, such as a diffuser. However, sunny days provide the best opportunity to shoot moving subjects or landscapes.
Applying the Guidelines
This is far from a comprehensive guide on photography, but it’s a starting point. Using the guidelines above, try applying some of these new techniques to your photos the next time you head outdoors! Find some leading lines or creative ways to frame your image, play with your manual settings (if you have them), and take beautiful pictures during the golden hour. Ultimately, while these will help improve your photographic skills, the best rule of thumb is to just keep shooting. Like with anything else, practice makes perfect.
Last updated: April 17, 2017
