Last updated: May 15, 2023
Article
Ocracoke Lighthouse Crochet Pattern
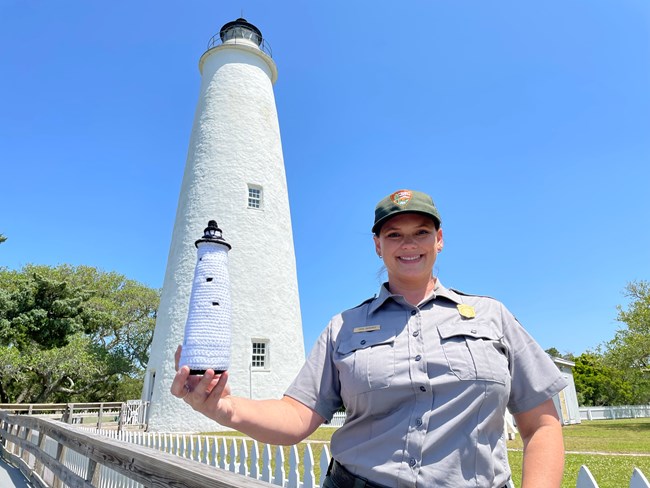
NPS Photo
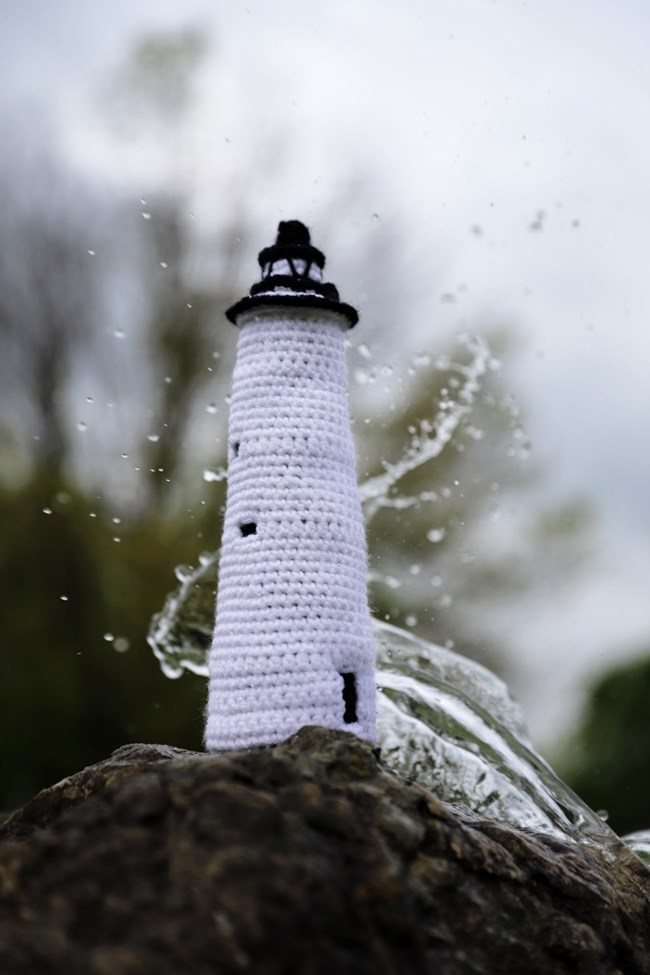
Megan Lapp
Materials List:
Yarn, in worsted weight (4/medium), all amounts are approximate:**Note: You may want to favor a stiffer yarn vs. a softer yarn for this project. A stiffer yarn will have structural benefits for the architecture of the lighthouse.- Black yarn: 80 yds
- White yarn: 75 ydsG (4.0mm)
- Hook: Darning Needle
- Fiber fill
- Optional: Stitch Markers for Part 3 when working in Spiral
- Optional: Weighted substance (i.e. glass gems) for the bottom of the inside of the lighthouse for stability
- Optional: Flat, circular base (i.e. jar lid, bottle cap, plastic canvas, etc) for the bottom of the inside of the lighthouse for stability.
This pattern is dedicated and donated to the National Park Service by Megan Lapp.
Glossary of Terms:
| [Brackets] | Brackets [like this] are used to indicate that these stitches are BLO or FLO. Ex.: BLO [SC 6] |
| BLO [ ] | Back Loop Only**Pro-Tip: The rows with FLO or BLO stitches will be structured with brackets [ ]. The brackets will enclose any and all stitches that the FLO or BLO instruction should apply to. EG: FLO [SC 3], SC 3 would mean three Single crochet stitches in the FLO and then three normal SC. |
| Ch | Chain |
| Dec | Decrease: One stitch combining two spaces. All decreases are single crochet decreases unless otherwise stated. |
| FLO [ ] | Front Loop Only**Pro-Tip: The rows with FLO or BLO stitches will be structured with brackets [ ]. The brackets will enclose any and all stitches that the FLO or BLO instruction should apply to. EG: FLO [SC 3], SC 3 would mean three Single crochet stitches in the FLO and then three normal SC. |
| HDC | Half Double Crochet |
| Inc | Increase, 2 stitches in one space. Assume all increases are SC increases, unless otherwise specified |
| Magic Circle | A magic circle or a magic ring is a way to begin crocheting in the round by crocheting the first row into an adjustable loop and then pulling the loop tight. |
| SC | Single CrochetI: nsert the hook into the next available stitch, YO, Pull upYO, Pull through 2 Loops |
| Sk St | Skip Stitch |
| Sl St | Slip Stitch |
| Sl St to beginning Stitch, Ch 1 | JOINING: Most of this pattern is written with a Slip Stitch, Chain 1 joining method for each row. This means that you will end each row with a slip stitch into the first stitch of the row, and then you will chain 1 before beginning the next row. The first stitch of the next row should be worked into the same stitch you slip stitched into. The Sl St, Ch 1 join is not counted in the stitch count. This DOES affect the shape of each piece, but in a minor way, as the piece was written with the seam shift in mind. If you prefer to crochet in spiral/in the round you are welcome to try it but I do not guarantee that all asymmetrical sections will come out exactly as shown. |
| St | Stitch |
| YO | Yarn Over |
Ocracoke Lighthouse: Part 1
Tools:
Black Color Yarn (worsted weight/4/medium yarn)
‘G’ (4 mm) hook
Make 1
| **Note: Make sure that the Black and White yarn you are using are the same brand. The yarn weights need to be the same for both colors. | Stitch count | |
| 1. | SC 6 in a Magic Circle, Sl St to beginning Stitch, Ch 1 | [6] |
| 2. | Inc x 6, Sl St to beginning Stitch, Ch 1 | [12] |
| 3. | (SC, Inc) x 6, Sl St to beginning Stitch, Ch 1 | [18] |
| 4. | (SC, Inc, SC) x 6, Sl St to beginning Stitch, Ch 1 | [24] |
| 5. | (SC 3, Inc) x 6, Sl St to beginning Stitch, Ch 1 | [30] |
| 6. | (SC 2, Inc, SC 2) x 6, Sl St to beginning Stitch, Ch 1 | [36] |
| 7. | BLO [SC 36], Sl St to beginning Stitch, Ch 1 | [36] |
| 8. – 10. | (3 Rows of) SC 36, Sl St to beginning Stitch, Ch 1 | [36] |
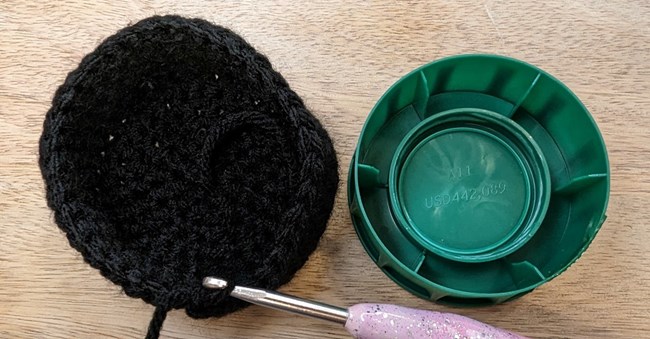
| 11. | (SC 8, Dec, SC 8) x 2, Sl St to beginning Stitch, Ch 1**Note: You can place something flat and smooth in the bottom of the lighthouse base to serve as a secure base for the lighthouse. I was able to use a re-purposed bottle cap, you can check jar lids or anything flat, smooth, and round. For added stability you may also want to consider including something to add some weight to the bottom of your lighthouse base, on top of the flat base (jar lid) surface, inside the lighthouse. I used “glass gems” aka “flat glass marbles”. | [34] |
| 12. – 15. | (4 Rows of) SC 34, Sl St to beginning Stitch, Ch 1 | [34] |
| 16. | (SC 15, Dec) x 2, Sl St to beginning Stitch, Ch 1 | [32] |
| 17. – 20. | (4 Rows of) SC 32, Sl St to beginning Stitch, Ch 1 | [32] |
| 21. | (SC 7, Dec, SC 7) x 2, Sl St to beginning Stitch, Ch 1 | [30] |
| 22. – 25. | (4 Rows of) SC 30, Sl St to beginning Stitch, Ch 1 | [30] |
| 26. | (SC 13, Dec) x 2, Sl St to beginning Stitch, Ch 1 | [28] |
| 27. – 30. | (4 Rows of) SC 28, Sl St to beginning Stitch, Ch 1 | [28] |
| 31. | (SC 6, Dec, SC 6) x 2, Sl St to beginning Stitch, Ch 1 | [26] |
| 32. – 35. | (4 Rows of) SC 26, Sl St to beginning Stitch, Ch 1 | [26] |
| 36. | (SC 11, Dec) x 2, Sl St to beginning Stitch, Ch 1 | [24] |
| 37. – 40. | (4 Rows of) SC 24, Sl St to beginning Stitch, Ch 1 | [24] |
| 41. | (SC 5, Dec, SC 5) x 2, Sl St to beginning Stitch, Ch 1 | [22] |
| 42. – 45. | (4 Rows of) SC 22, Sl St to beginning Stitch, Ch 1 | [22] |
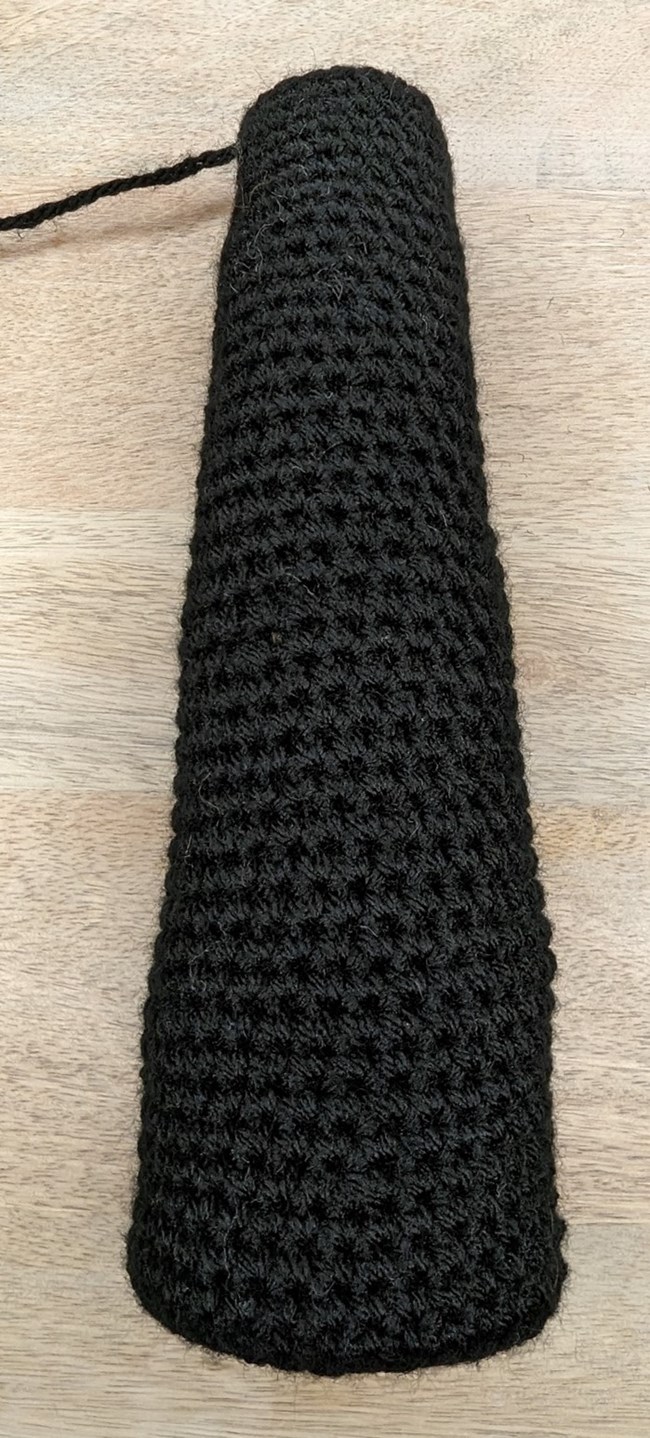
| 46. | (SC 9, Dec) x 2, Sl St to beginning Stitch | [20] |
| Fasten off with a long enough yarn tail to weave in later. |
Ocracoke Lighthouse: Part 2
Tools:
Black Color Yarn (worsted weight/4/medium yarn)
White Color Yarn (worsted weight/4/medium yarn)
‘G’ (4 mm) hook
Make 1
| **Note: Make sure that the Black and White yarn you are using are the same brand. The yarn weights need to be the same for both colors. | Stitch count | |
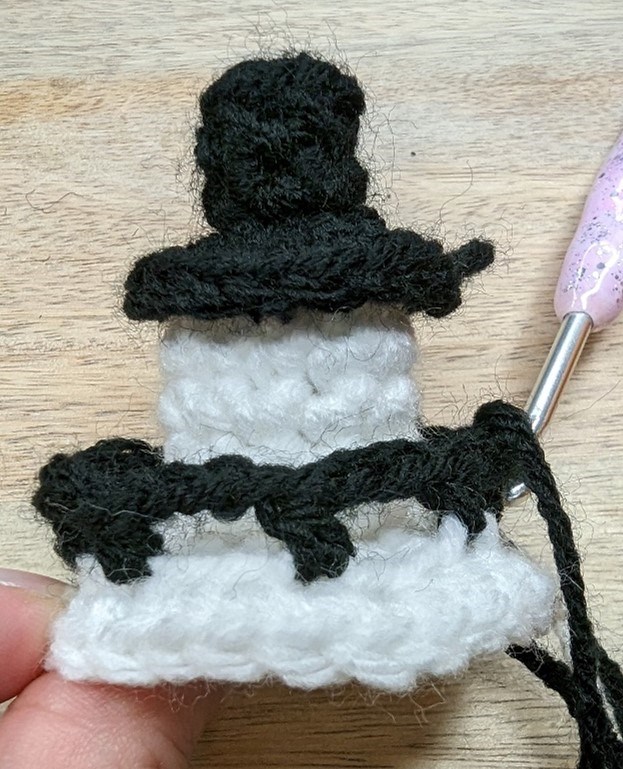
| 1. | Using Black Yarn, starting with a short yarn tail, SC 6 in a Magic Circle, Sl St to beginning Stitch, Ch 1 | [6] |
| 2. | BLO [SC 6], Sl St to beginning Stitch, Ch 1 | [6] |
| 3. | SC 6, Sl St to beginning Stitch, Ch 1 | [6] |
| 4. | FLO [Inc x 6], Sl St to beginning Stitch, Ch 1 | [12] |
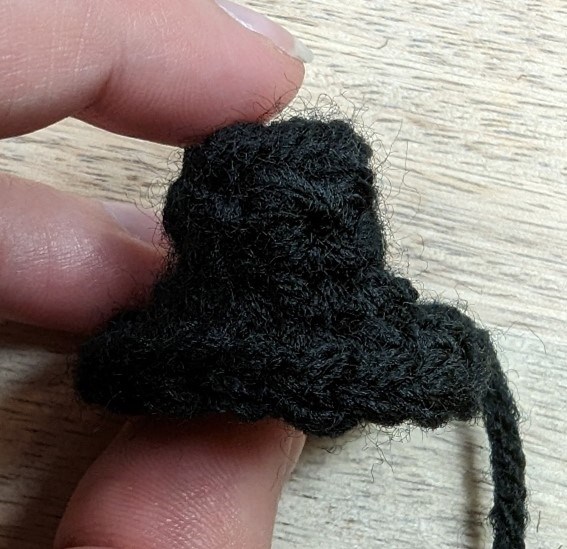
| 5. | FLO [(SC, Inc) x 6], Sl St to beginning Stitch | [18] |
| Fasten off with an 18” yarn tail to use later | ||
| Starting with a short yarn tail, Attach the White color yarn to a Leftover Back Loop from Row 4**Note: It is option to use a Yellow yarn for a “lighted” lighthouse effect for the first 2 rows (Row 6 and Row 7) and then switch to a white yarn. | ||
| 6. | BLO [SC 12], Sl St to beginning Stitch, Ch 1 | [12] |
| 7. – 10. | (4 Rows of) SC 12, Sl St to beginning Stitch, Ch 1 | [12] |
| 11. | FLO [(SC, Inc) x 6], Sl St to beginning Stitch, Ch 1 | [18] |
| 12. | (SC, Inc, SC) x 6, Sl St to beginning Stitch, Ch 1 | [24] |
| 13. | BLO [(SC 3, Inc) x 6], Sl St to beginning Stitch | [30] |
| Fasten off with an 18” yarn tail | ||
| Starting with a long enough yarn tail to weave in later, Slip Stitch to Attach the Black yarn to the leftover Front Loop from Row 12 | ||
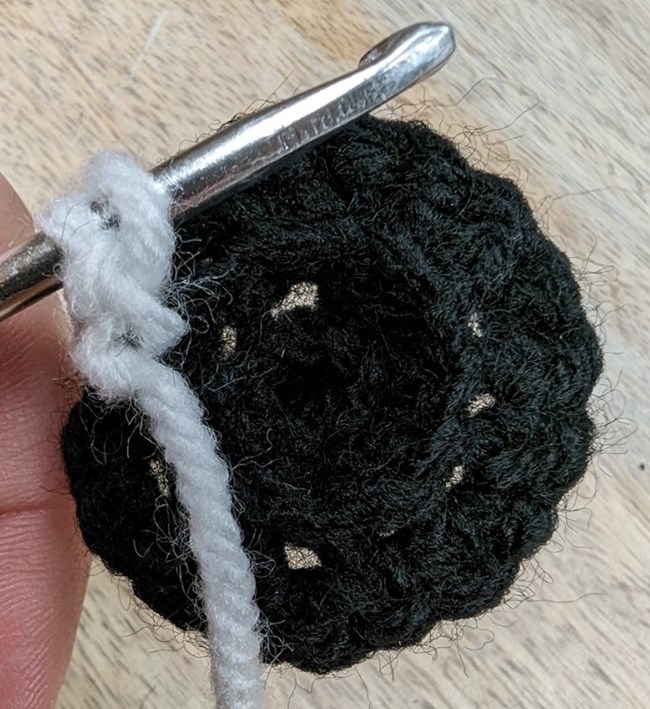
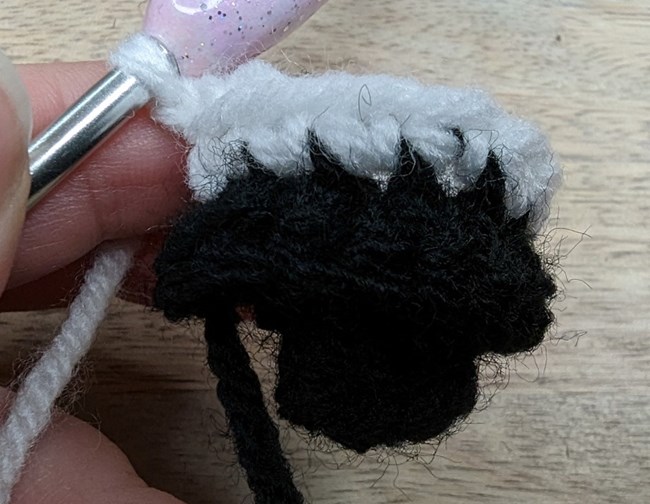
| 14. | Working into the leftover Front Loops from Row 12, Ch 5, Skip 2 Stitches, HDC, (Ch 3, Skip 2 stitches, HDC) x 6, Ch 3, Sl St in the 2nd Ch from the starting Ch 5 instruction in this row **Note: There are 7 HDC stitches in this row, there are 26 chain stitches in this row, and there is one finishing slip stitch at the end, for a total of 33 stitches. | [7] |
| Fasten off with a 24” yarn tail to use later.**Note: In the Assembly section you will be adding window details. |
Ocracoke Lighthouse: Part 3
Tools:
White Color Yarn (worsted weight/4/medium yarn)
‘G’ (4 mm) hook
Make 1
| **Note: Make sure that the Black and White yarn you are using are the same brand. The yarn weights need to be the same for both colors. | Stitch count | |
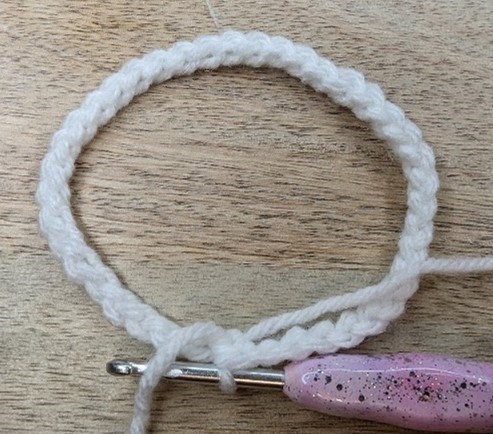
| 1. | Starting with a 36” yarn tail, Ch 40, Sl St to beginning Stitch, Ch 1**Note: Be careful not to twist this chain, it needs to be straight when creating a circle of chain stitches without twists. Additionally, if/when you count the rows later on, keep in mind that Row 1 was a starting chain only. Alternatively, you can also start with a single crochet foundation chain (this may be particularly helpful if you experience dexterity issues. | [40] |
| 2. | Working into each Chain stitch, SC 40, Sl St to beginning Stitch, Ch 1 | [40] |
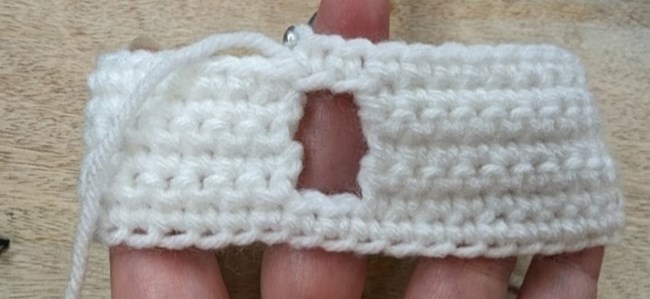
| 3. | SC 19, Ch 1, Turn | [19] |
| 4. | SC 38, Ch 1, Turn**Note: After the first 19 stitches in this row, you will work past the beginning of Row 3, into Row 2. Be careful to not work into the Sl St, Ch 1 join from Row 2. | [38] |
| 5. | SC 27, Dec, SC 9, Ch 1, Turn | [37] |
| 6. | SC 26, Dec, SC 9, Ch 1, Turn | [36] |
| 7. | SC 36, Ch 2 | [36] |
| 8. | Continuing into the next available stitch (the first stitch of Row 7), SC 36, SC in each of the next 2 Chain Stitches, Continue in Spiral (Use stitch markers to keep track of your stitches) | [38] |
| 9. | HDC 17, Ch 2, Skip 2 Stitches, HDC 7, Ch 2, Skip 2 Stitches, HDC 8, SC 2**Note: The chain stitches are counted in the stitch count in this row and following rows. | [38] |
| 10. | SC 38**Note: In this row, and rows following chains with skipped stitches in this section, you will work one SC into each chain stitch. | [38] |
| 11. | (SC 17, Dec) x 2 | [36] |
| 12. – 14. | (3 Rows of) SC 36 | [36] |
| 15. | (SC 8, Dec, SC 8) x 2 | [34] |
| 16. – 18. | (3 Rows of) SC 34 | [34] |
| 19. | (SC 15, Dec) x 2 | [32] |
| 20. | HDC 10, Ch 2, Skip 2 Stitches, HDC 14, Ch 2, Skip 2 Stitches, HDC 4 | [32] |
| 21. – 23. | (3 Rows of) SC 32 | [32] |
| 24. | (SC 7, Dec, SC 7) x 2 | [30] |
| 25. – 26. | (2 Rows of) SC 30 | [30] |
| 27. | HDC 13, Ch 2, Skip 2 Stitches, HDC 15 | [30] |
| 28. | SC 30 | [30] |
| 29. | (SC 13, Dec) x 2 | [28] |
| 30. – 32. | (3 Rows of) SC 28 | [28] |
| 33. | (SC 6, Dec, SC 6) x 2 | [26] |
| 34. | HDC 17, Ch 2, Skip 2 Stitches, HDC 7 | [26] |
| 35. – 38. | (4 Rows of) SC 26 | [26] |
| 39. | (SC 11, Dec) x 2, Sl St to the beginning stitch, Ch 1 | [24] |
| 40. | FLO [(SC 3, Inc) x 6], Sl St to the next available stitch | [30] |
| Fasten off with a 24” yarn tail to use later. |
1st Assembly:
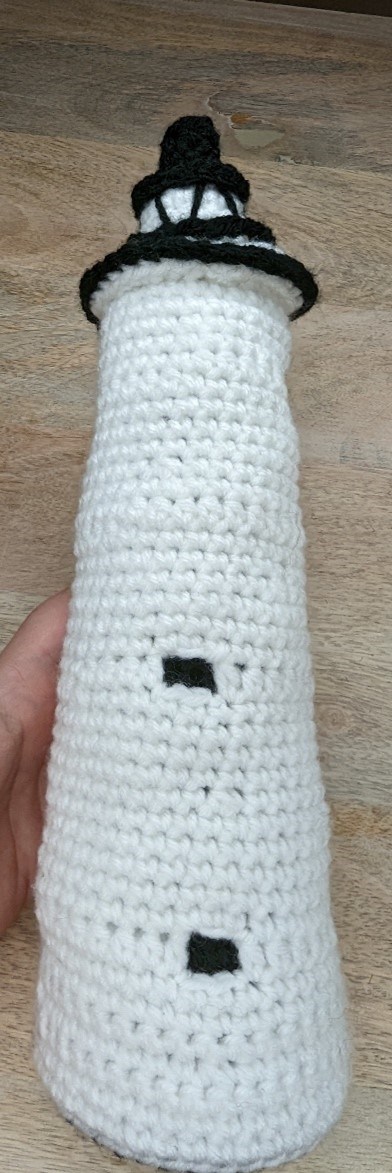
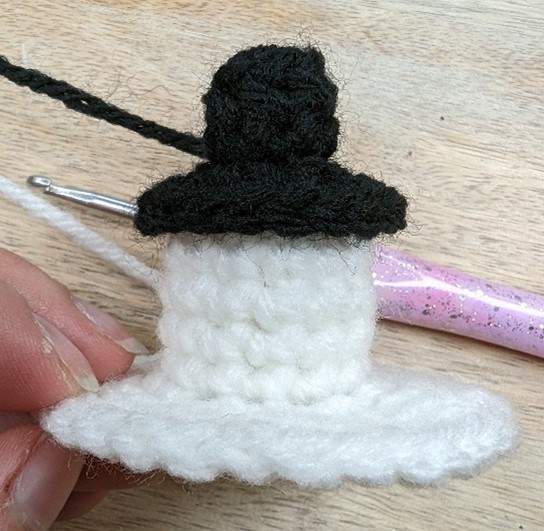
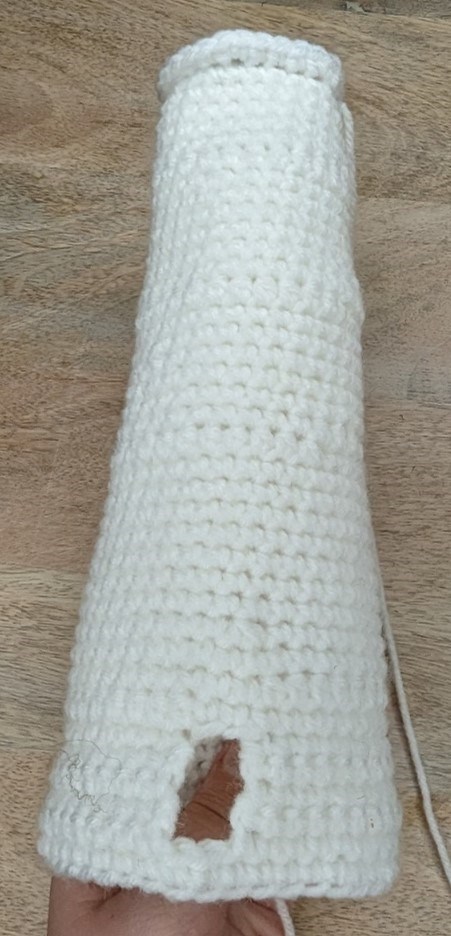
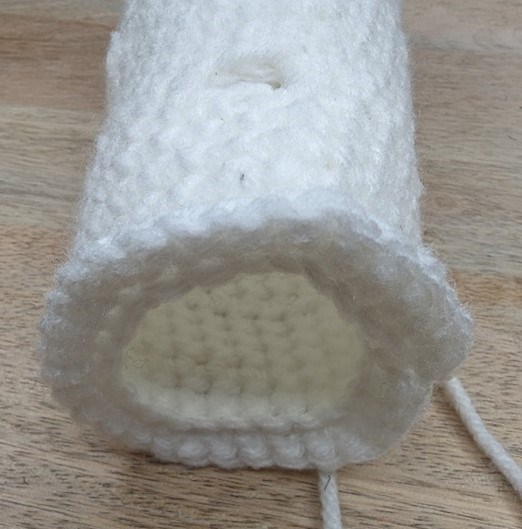
| 1. | Slide Part 3 down over Part 1 so that the white part is on the outside. The opening created in Row 5 – 7 is the front door of the lighthouse. | |
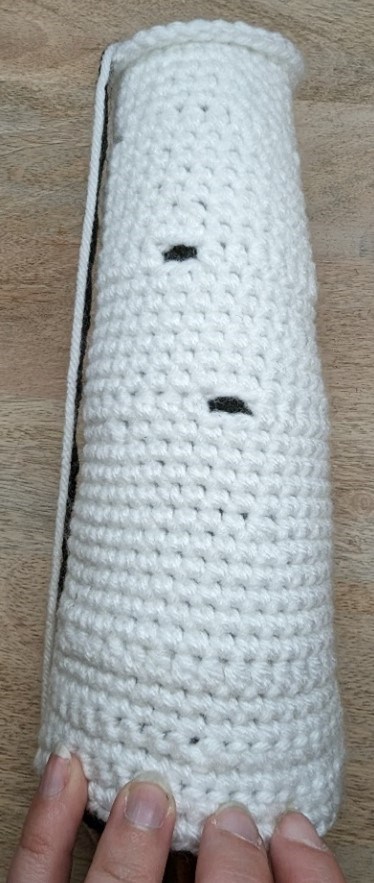
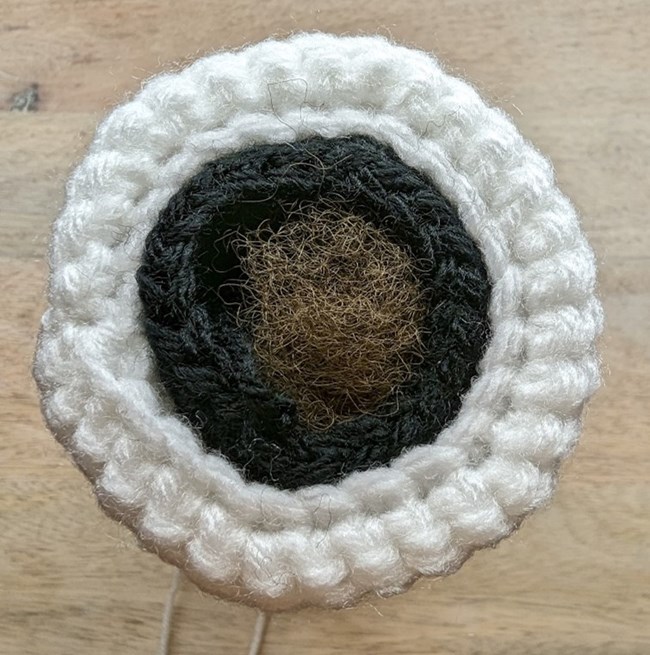
| 2. | Stuff the inside of Part 1 with fiberfill to fill out the shape. It is possible that it will be easier to slide Part 1 inside Part 3 if Part 1 is at least lightly stuffed with fiberfill. Make sure not to overstuff Part 1, as if it is overstuffed it will be difficult to fit together with Part 3. **Note: IF Part 1 (The black inner lighthouse) is too long/too tall in comparison to Part 3, you can undo/frog back as many rows as necessary on the black Part 1. Part 1 is meant to fill out the inner shape of the lighthouse and give the suggestion of windows and doors, it’s height should match the white Part 3. | |
| 3. | Once you are satisfied with the smooth, cylindrical shape of Part 3 over Part 1, and Part 1 is fully stuffed, proceed to Part 4. | |
| 4. | Weave in or tuck in Part 1’s ending yarn tail inside Part 1. |
Ocracoke Lighthouse: Part 4
Tools:
Black Color Yarn (worsted weight/4/medium yarn)
‘G’ (4 mm) hook
Make 1
| **Note: Make sure that the Black and White yarn you are using are the same brand. The yarn weights need to be the same for both colors. | Stitch count | |
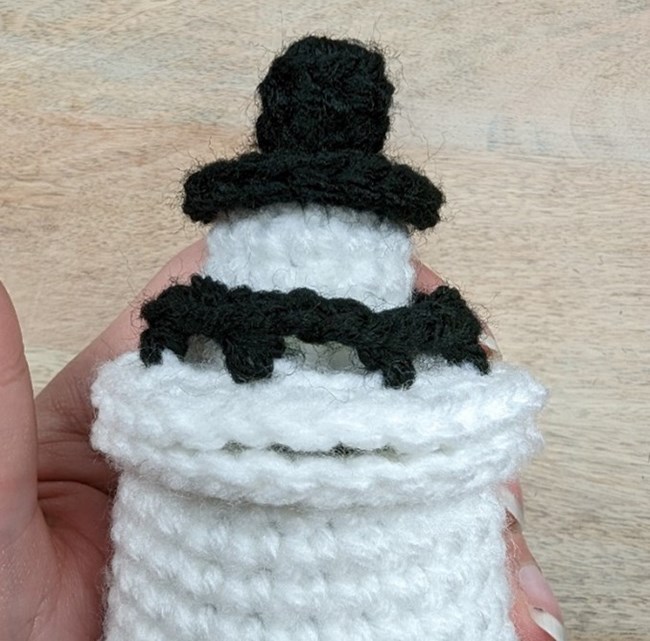
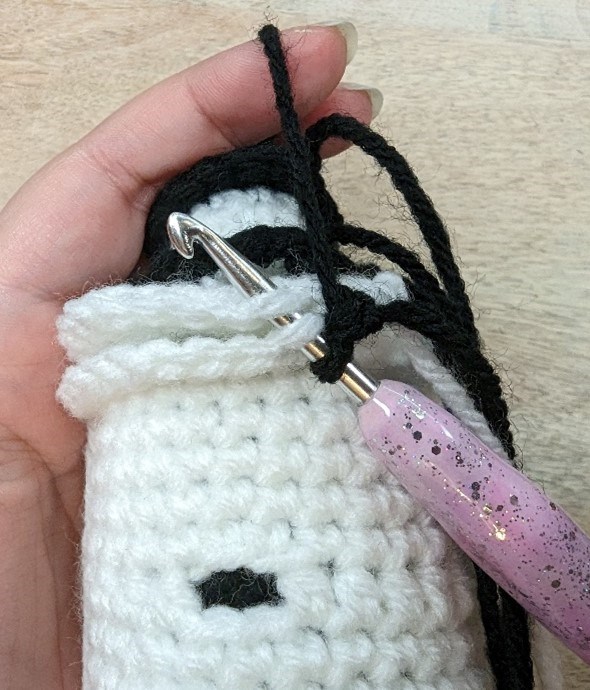
| 1. | Hold Part 2 against the top of Part 3. The final Row of Part 2 and Part 3 have the same number of stitches. | |
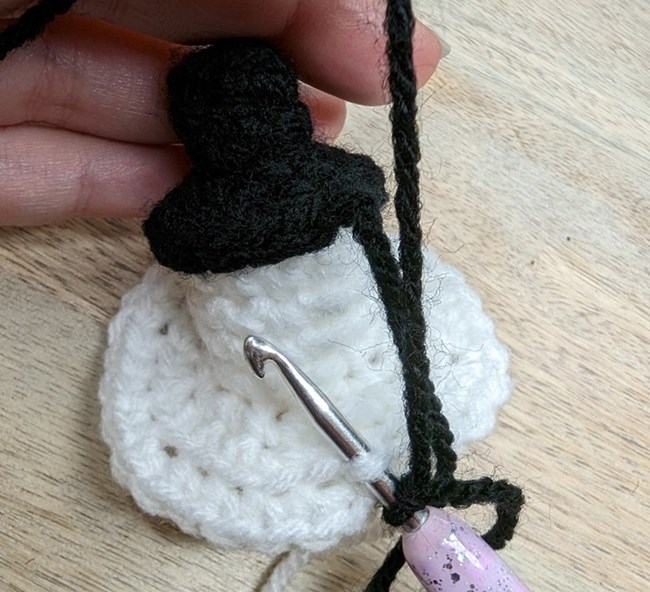
| 2. | Starting with a long enough yarn tail to weave in later, Using Black yarn, attach the black yarn with a slip stitch to the Back Loop of the final Row of Part 3 and the Front Loop of a stitch on Part 2, (You will continue to hold the lighthouse right-side-up through this process) | |
| 3. | Starting into the same stitch you attached the black yarn to, working through each Back Loop on Part 3 and Each Front Loop on Part 2 simultaneously, (SC 2, Inc, SC 2) x 6, Sl St to beginning Stitch**Note: As you work these instructions and get close to completing this row, stuff the top inside of Part 2 with fiberfill. Part 2 should sit flat against Part 3, but the inside of Part 2 and Part 3 should be medium-firmly stuffed with fiberfill. | [36] |
| Fasten off with a long enough yarn tail to weave in. |
Ocracoke Lighthouse: Final Assembly
Tools:
Darning Needle
Scissors
| Stitch count | ||
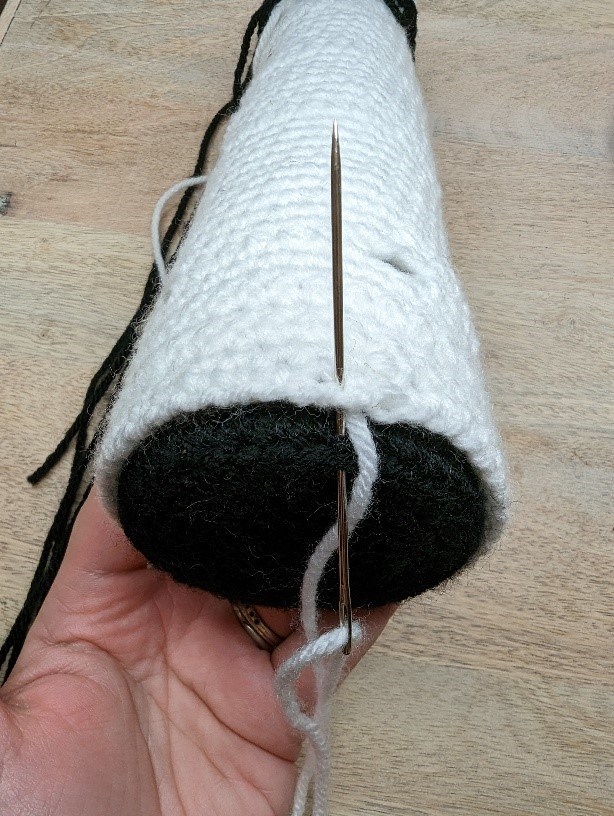
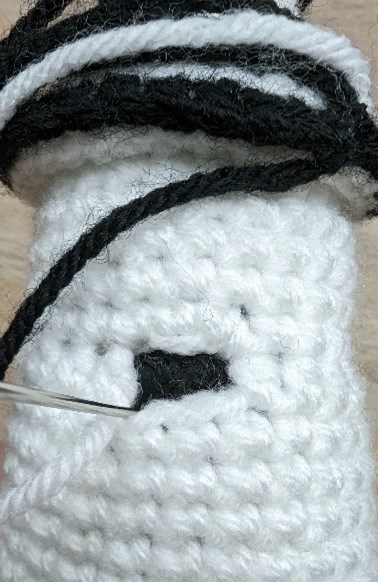
| 1. | Using a white yarn tail from the start of Part 3 (the white outside of the lighthouse building), whipstitch it in place along the bottom edge where Part 3 meets the base of Part 1. Then use the remaining Part 3 white yarn tail to tack the windows and door in place against the black inside/Part 1. Weave in the end | |
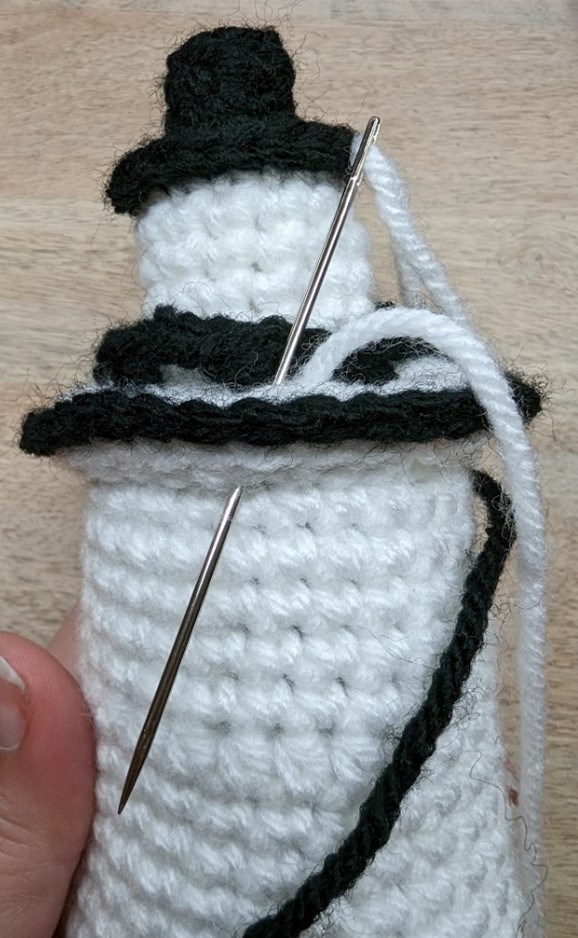
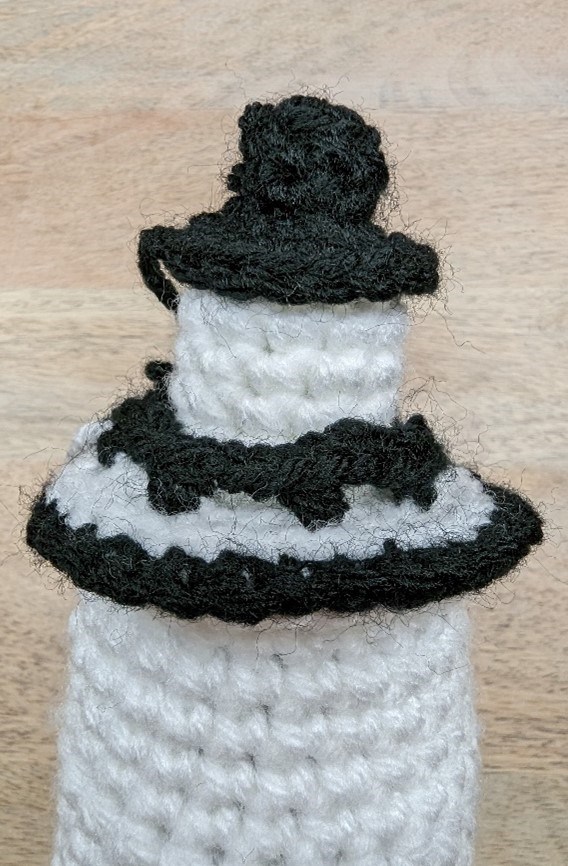
| 2. | Use the white yarn tail from the finish of Part 3 (at the top of the building) to stitch back and forth through Part 2 and Part 3 to flatten the top deck of the lighthouse and pull those parts close to each other. You’ll be stitching through the final Row (40) of Part 3 and Row 13 of Part 2. Weave in the end.**Note: You can also, as back-up, use the final white yarn tail of the Part 2 piece to do the same. When finished, weave in this end also. | |
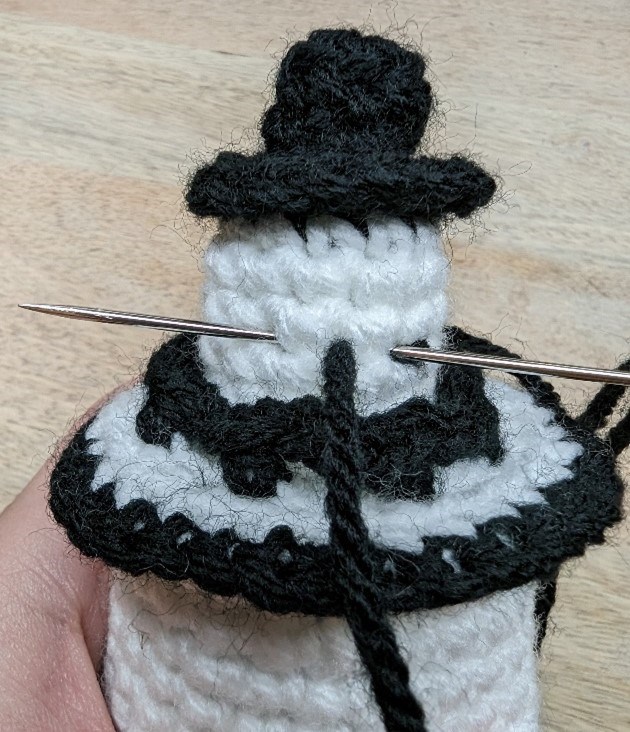
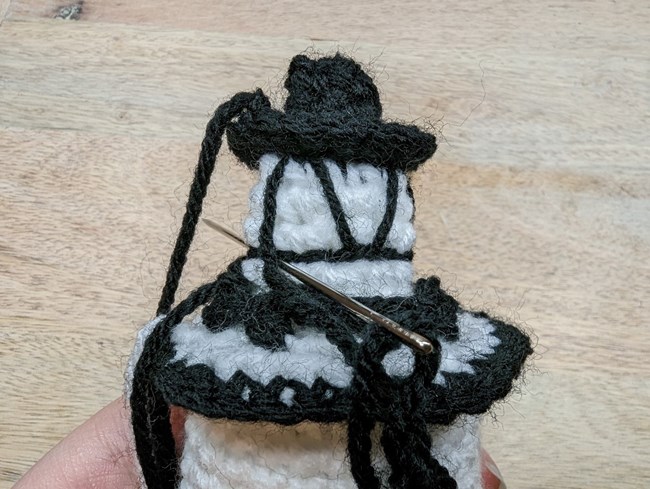
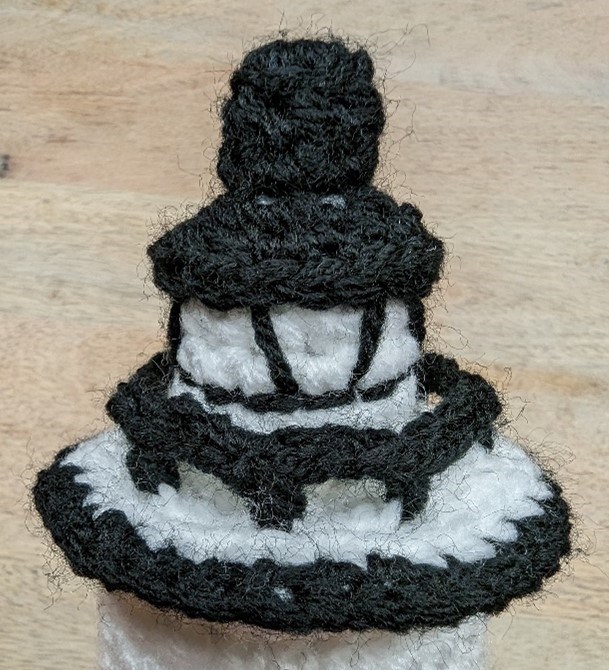
| 3. | Use the black yarn tail from the start of the Part 2 piece to embroider a straight line 2 rows down from the top on the white part of Part 2, as shown below.Use the same black yarn tail to then embroider triangular windows above this embroidered straight line, as shown. Reference photos of the Ocracoke Lighthouse if needed. The triangular windows should be about 2 stitches apart on the base of the triangles.Use a remaining black yarn tail to sew the black top roof line of Part 2 down and in place so that it remains angled downward and doesn’t pop-up like a broken umbrella. To do this, use the darning needle to sew through the top of the tower and that edge of the roof line, back and forth all the way around the edge of the roof.It is optional to use another yarn tail to weave in and out through the top of the railing to help stiffen the railing slightly. Weave in the ends.**Note: You can also, as back-up, use the final black yarn tail of the Part 2 railing piece or the black yarn tails from Part 4 to do the same. When finished, weave in these ends also. |
