Last updated: May 15, 2024
Article
Mountain Goat Crochet Pattern

Pattern by Ranger Hailey Burley
Difficulty: Intermediate
Size:
Can be made to any size. Ranger Hailey used DK weight yarn and a 3.25 mm hook.
Material:
1. Crochet hook (use 1 size down from recommended size for your chosen yarn)
2. Yarn: White/cream and black
3. Fiber fill
4. Sewing needle
5. Safety eyes
Abbreviations:
ch – chain
R – round
st - stitch
sc – single crochet
Number x sc – the number tells you how many times you make a single crochet in each stitch
inc - make two single crochet in one stitch
dec - crochet two stitches together with a sc
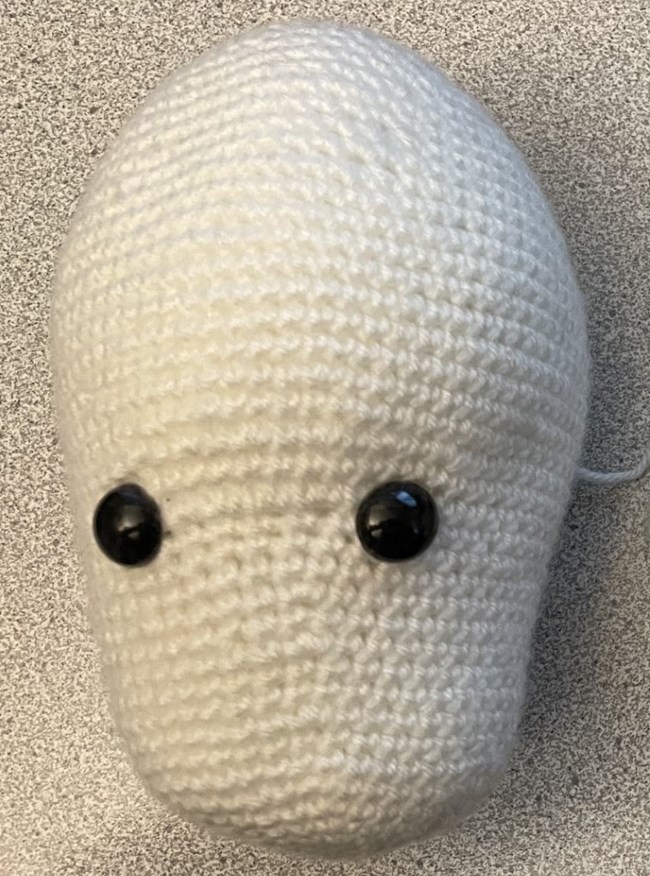
Head
R1: 6 sc in a magic ring (6)
R2: inc x 6 (12)
R3: (sc, inc) x 6 (18)
R4: (sc in next 2, inc) x 6 (24)
R5: (sc in next 3, inc) x 6 (30)
R6: (sc in next 4, inc) x 6 (36)
R7: (sc in next 5, inc) x 6 (42)
R8-9: sc in all st (42)
R10: (sc in next 20 st, inc) x 2 (44)
R11-12: sc in all sts (44)
R13: (sc in next 21 st, inc) x 2 (46)
R14: sc in all sts (46)
R15: (sc in next 22 st, inc) x 2 (48)
R16-18: sc in all sts (48)
R19: sc in next 21 st, inc 6 times, sc in last 21 sts (54)
R20: sc in all sts (54)
R21: sc in next 21 st, (sc in next st, in) x6, sc in last 21 st (60)
R22: sc in all sts (60)
R23: (sc in next 9 st, inc) x 6
R24-28: sc in all sts (66)
Attach the eyes between rounds 18 & 19 with around 6 spaces between the eyes. Feel free to space the eyes as you see fit.
R29-30: sc in all sts (66)
R31: (sc in next 9 st, dec) x 6 (60)
R32: sc in all sts (60)
R33: (sc in next 8 st, dec) x 6 (54)
R34-35: sc in all sts (54)
R36: (sc in next 7 st, dec) x 6 (48)
R37: sc in all sts (48)
R38: (sc in next 6 st, dec) x 6 (42)
R39: (sc in next 5 st, dec) x 6 (36)
R40: (sc in next 4 st, dec) x 6 (30)
R41: (sc in next 3 st, dec) x 6 (24)
Stuff the head with fiberfill and continue stuffing as you go.
R42: (sc in next 2 st, dec) x 6 (18)
R43: (sc, dec) x 6 (12)
R44: dec x 6 (6)
Fasten off and weave in ends.
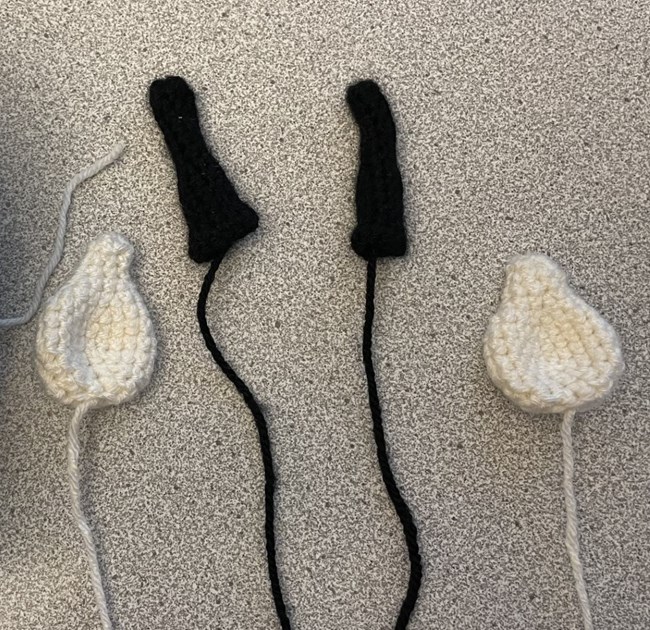
Ears (make 2)
Using White yarn
R1: 4 sc in magic ring (4)
R2: sc in all 4 st (4)
R3: inc x 4 (8)
R4: sc in all st (8)
R5: (sc in next st, inc) x 4 (12)
R6: (sc in next 2 st, inc) x 4 (16)
R7: (sc in next 3 st, inc) x 4 (20)
R8-9: sc in all st (20)
R10: (sc in next 3 st, dec) x 4 (16)
R11: (sc in next 2 st, dec) x 4 (12)
R12: (sc in next st, dec) x 4 (8)
Fasten off, leaving a tail for sewing. Flatten the ears. Use pins to decide exact placement of the ears. Sew the ears to the head about 15 rows behind the eye and line up the inside of the ear to the outside of the eye (see image).
Horns (make 2)
Using black yarn
R1: 4 sc in magic ring (4)
R2: (sc, inc) x 2 (6)
R3-7: sc in each st (6)
R8: (sc, inc) x 3 (9)
R9-12: sc in each st (9)
R13: (sc, inc) x 4 (13)
Fasten off. Use pins to decide on placement. Horns should be equally spaced between the ears.
Nose
Use the black yarn and a sewing needle to sew stitching fanning out from rounds 1-4.
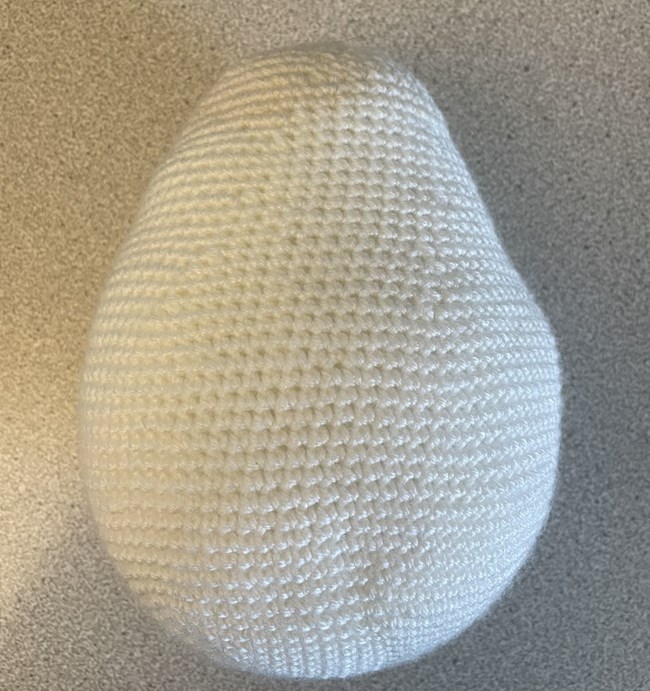
Body
Using white yarn
R1: 6 sc in magic ring (6)
R2: inc x 6 (12)
R3: (sc, in) x 6 (18)
R4: (sc in next 2 st, inc) x 6 (24)
R5: (sc in next 3 st, inc) x 6 (30)
R6: (sc in next 4 st, inc) x 6 (36)
R7: (sc in next 5 st, inc) x 6 (42)
R8: (sc in next 6 st, inc) x 6 (48)
R9: (sc in next 7 st, inc) x 6 (54)
R10: (sc in next 8 st, inc) x 6 (60)
R11: (sc in next 9 st, inc) x 6 (66)
R12: (sc in next 10 st, inc) x 6 (72)
R13: (sc in next 11 st, inc) x 6 (78)
R14: (sc in next 12 st, inc) x 6 (84)
R15: (sc in next 13 st, inc) x 6 (90)
R 16-30: sc in all sts (90)
R31: (sc in next 13 st, dec) x 6 (84)
R32: (sc in next 12 st, dec) x 6 (78)
R33: (sc in next 11 st, dec) x 6 (72)
R34: (sc in next 10 st, dec) x 6 (66)
R 35-37: sc in all sts (66)
R38: (sc in next 9 st, dec) x 6 (60)
R 39-41: sc in all sts (60)
R42: (sc in next 8 st, dec) x 6 (54)
R43: sc in all st (54)
R44: (sc in next 7 st, dec) x 6 (48)
R45: sc in all sts (40)
R46: (sc in next 6 st, dec) x 6 (42)
R47: sc in all sts (42)
R48: (sc in next 5 st, dec) x 6 (36)
R49: (sc in next 4 st, dec) x 6 (30)
R50: (sc in next 3 st, dec) x 6 (24)
Begin stuffing the body with fiberfill and continue stuffing as you go.
R51: (sc in next 2 st, dec) x 6 (18)
R52: (sc, dec) x 6 (12)
R53: dec x 6 (6)
Fasten off. Using a yarn needle, weave the tail of the yarn through the front loop of each remaining stitch and pull it tight to close off the bottom of the body. Position the head with pins and sew it to the body.
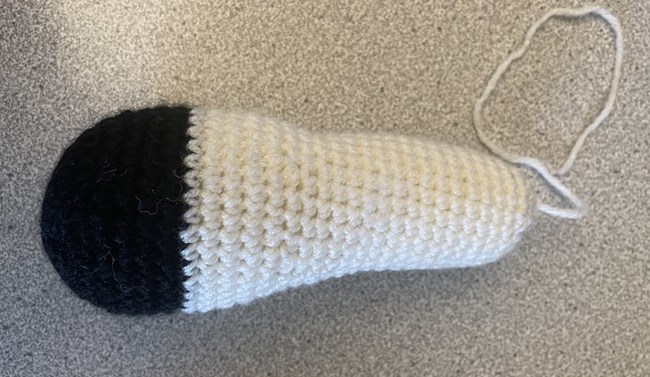
Legs (make 2)
Start with black yarn
R1: 6 sc in a magic ring (6)
R2: in x 6 (12)
R3: (sc, in) x 6 (18)
R4: (sc in next 2 st, inc) x 6 (24)
R5: (sc in next 3 st, inc) x 6 (30)
R6: (sc in next 4 st, inc) x 6 (36)
R7-11: sc in a sts (36)
Switch to white yarn
R12: (sc in next 4 st, dec) x 6 (30)
R13-16: sc in all sts (30)
R17: (sc in next 3 st, dec) x 6 (24)
R18-27: sc in all sts (24)
Begin stuffing leg with fiberfill.
R28: (sc in next 2 st, dec) x 6 (18)
R29: (sc, dec) x 6 (12)
R30: dec x 6 (6)
Fasten off. Using yarn needle, weave the tail of the yarn through the front loop of each remaining stitch and pull it tight to close the bottom of the leg. Use pins to decide on the placement of the legs.

Arms (make 2)
Start with black yarn
R1: 6 sc in magic ring (6)
R2: inc x 6 (12)
R3: (sc, inc) x 6 (18)
R4: (sc in next 2 st, inc) x 6 (24)
R5: (sc in next 3 st, inc) x 6 (30)
R6: (sc in next 4 st, inc) x 6 (36)
R 7-11: sc in all sts (36)
Switch to white yarn
R12: (Sc in next 4 st, dec) x 6 (30)
R13-16: sc in all sts (30)
R17: (sc in next 3 st, dec) x 6 (24)
R18-32: sc in all sts (24)
Begin stuffing the arm with fiberfill.
R33: (sc in next 2 st, dec) x 6 (18)
R34: (sc, dec) x 6 (12)
R35: dec x 6 (6)
Fasten off. Using yarn needle, weave the tail of the yarn through the front loop of each remaining stitch and pull it tight to close the bottom of the arm. Use pins to decide on the placement of the arms.
