Last updated: December 1, 2020
Article
Christmas Crafts From Fort Vancouver
The people who lived at Fort Vancouver hand-made their Christmas cheer! With only a ship or two arriving from England per year, and a limited selection of items available at the Hudson's Bay Company shops in the fort, they made their own holiday decorations, and even gifts. Read on to learn how to follow in their footsteps and make your own!
Click here to learn more about the history of Christmas at Fort Vancouver.
Click here to learn more about the history of Christmas at Fort Vancouver.

NPS Photo
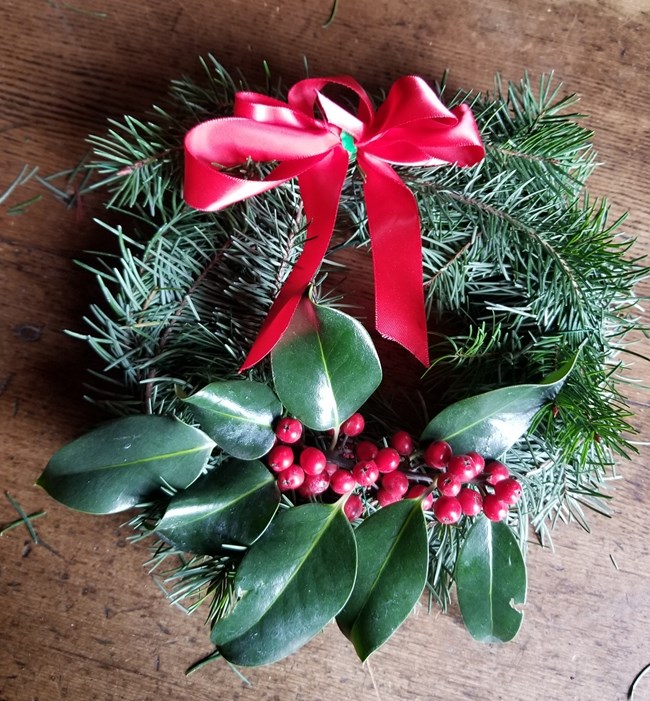
Holiday Wreaths
Decorating one's home with greenery during the holidays has a long tradition. Many believe that wreaths were originally tied to Winter Solstice celebrations, symbolizing the circle of the year and the endurance of life with evergreen boughs. Certainly in the Victorian era in England, lavish arrangements with ivy, holly, hemlock, and bay became popular. Today, making your own wreath is a fun and easy way to bring a holiday look and scent indoors!
Please remember to only cut greenery from places you have permission to do so, and work safely as you craft your wreath.
Click here to see a step-by-step photo gallery
Supplies
- wreath form or wire coat hanger
- green floral wire or another thin wire
- small branches of greenery, such as fir, spruce, cedar, holly, ivy, etc.
- ribbon
Steps
- Use a metal wreath frame or bend a wire coat hanger into a rough circle.
- Using the thin wire, attach pieces of greenery to the ring. Try to overlap each time you move around the circle, so your new piece covers the wire holding the last one on.
- Add some holly or another colorful plant.
- Tie a bow with the ribbon and attach it to the wreath using the thin wire.
- Hang your wreath with wire, ribbon, thick string, or the hook from your coat hanger.

NPS Photo
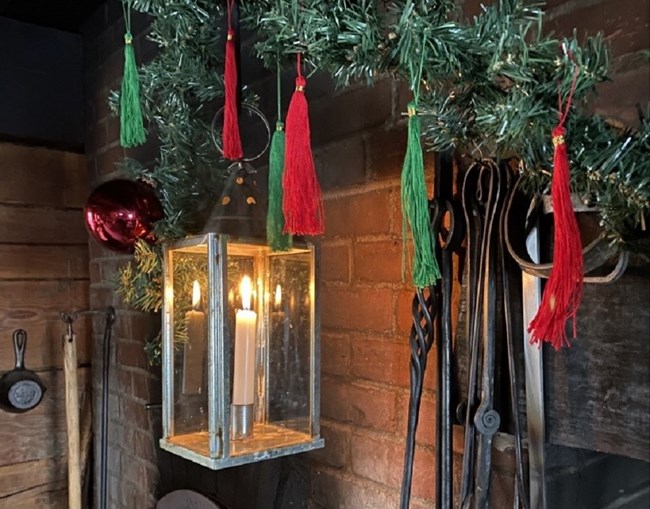
Tassels
These tassels can be made into colorful decorations to brighten up the dark days of winter!
Click here to see a step-by-step photo gallery
Supplies
- yarn or embroidery floss
- cardboard
- tape
- glue
- scissors
Steps
- Choose some yarn or embroidery floss. You can make tassels out of just about anything, but this method works best with yarn or embroidery floss. You can also use other types of string, such as twine, cording, or very thin rope.
- Cut a square or rectangular piece of cardboard. The longer your cardboard is, the longer your tassel will be. For a standard tassel, start with a 4"x4" piece of cardboard. You can always trim the tassel shorter when you are done, if it is too long.
- Cut a piece of yarn or floss 8 inches long (or double the length of your cardboard) and fold it in half. Tape it across the top of the cardboard, with the loop on one side and the loose ends on the other. This will be the piece your tassel hangs from. You can use the same color as the rest of your tassel, or a contrasting color.
- Start wrapping your yarn or floss around the cardboard, lengthwise. Make sure you are wrapping across/over the string you taped to the top of your cardboard. The more you wrap, the fuller your tassel will be. Wrap at least 30 times. Cut the yarn or floss when you reach the bottom of the cardboard on the final wrap. Don't cut it any higher, or your tassel will be uneven.
- Tie the top piece of yarn or floss, the one that will be your hanger, into a slip knot by pulling the loose ends through the loop end. Make sure that it is as close to the top edge of the cardboard as possible when you tighten it.
- Cut the wrapped yarn or floss along the bottom and take it off the cardboard. Your tassel is almost ready. Don't worry if a few strings fall out.
- Cut a 10-inch piece of string. You can match the color to your tassel or use a contrasting color. Tie the string around the tassel, ½ inch down from the top. Wrap the string around the tassel 8 to 10 times, then tie the ends of the string into a tight double knot. Make the knot as tight as you can without breaking the string. If you are worried about the knot coming loose, you can secure it with a drop of glue.
- Trim the bottom of your tassel if desired.

NPS Photo
Pomanders
Pomanders - oranges studded with cloves - have been used for centuries to add a citrusy-spicy scent to rooms. If kept dry, pomanders can last through the winter, making a lovely decoration as well.
Click here to see a step-by-step photo gallery
Supplies
- 1 orange (thin-skinned is best)
- whole cloves
- ribbon, tassels, or metallic cord
- pen (optional)
- fork or toothpick (optional, to prepare holes for cloves)
- 1 tablespoon ground cinnamon (optional)
- 1 tablespoon ground nutmeg (optional)
- 1 tablespoon ground allspice (optional)
Steps
- Wash and dry the orange.
- If desired, mark a pattern for the cloves on the orange peel with a pen. You may want to make holes with a fork tine, toothpick, or awl to make it easier to insert the cloves. Just make sure that your holes are not too large, or the cloves will fall out.
- Starting at the stem end, insert rows or a design of whole cloves. Avoid inserting the cloves close together in a straight line to prevent the peel from splitting.
- Optional: Combine cinnamon, nutmeg, and allspice, and roll the clove-studded orange in this spice mixture.
- Set the pomander ball on a plate or tray and allow to dry, about two weeks.
- Dust off excess spices, if used.
- Tie your pomander with ribbon or decorate with tassels and metallic cord.

NPS Photo
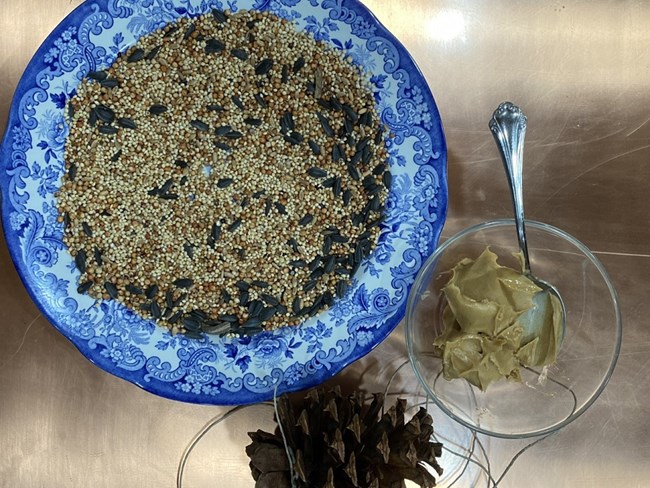
Bird Feeders
Historically, the residents of Fort Vancouver did not make bird feeders like these ones, but these are a great way to help local wildlife!
Birds have always been an important part of life at Fort Vancouver. In 1834, naturalist John Kirk Townsend used Fort Vancouver as a base for his study of animals and birds in the area. Townsend observed and recorded many birds in his travels, including Audubon's warbler, the California condor, Townsend's warbler, the mountain plover, sage thrasher, and Vaux's swift. Like many naturalists here, Townsend relied on Indigenous peoples for guidance and knowledge; they jokingly called him the "bird chief." Learn more about naturalists at Fort Vancouver here.
Supplies
- pinecone (do not use scented, glittered, or painted ones since they can be harmful to birds)
- peanut butter, SunButter, or any type of nut or seed butter
- spoon
- bird seed
- scissors
- twine
Steps
- Cut a piece of twine long enough to tie around the pinecone and attach to a branch.
- Pour bird seed onto a plate.
- Spoon out some peanut butter (or peanut butter alternative) into a small bowl. This works best if it is at room temperature.
- Using the spoon, coat the pinecone with peanut butter.
- Roll the peanut butter-covered pinecone in the bird seed. You can also spoon bird seed onto the pinecone.
- Tie the homemade bird feeder in an outdoor place where the birds can easily access it, like a tree branch.

NPS Photo
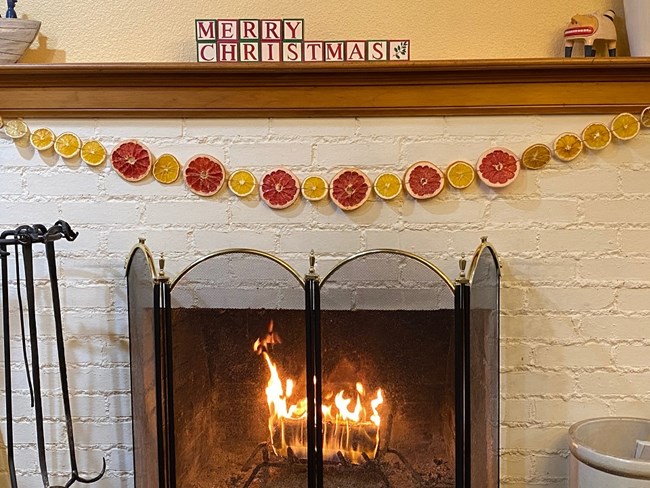
Citrus Garland
This colorful garland adds a touch of nature indoors!
Supplies
- a mix of oranges, grapefruits, and lemons
- twine
- paper towels
- parchment paper
- scissors
- sharp knife (to be safe, an adult should cut the fruit)
- embroidery needle (optional)
Steps
- Preheat oven to 250 degrees Fahrenheit.
- Carefully cut fruit crosswise into slices 1/8 inch to 1/4 inch thick.
- Pat the citrus slices with paper towels to soak up as much moisture as possible.
- Place the citrus slices in a single layer on a parchment covered baking sheet.
- Bake for 1½ hours, then flip the slices over. Continue baking for another 1½ hours. Keep an eye on the slices and remove any that are beginning to brown.
- Bake for a total of about 3 to 4 hours. Slices need not be fully dried and can continue drying once strung.
- Once the slices have cooled, use scissors or an embroidery needle to poke two holes at least 1/2 inch apart on the slices.
- String the citrus slices on the twine using a needle or by just pushing the twine through the holes carefully.
- Display the beautiful garland you have created!
- Note: A food dehydrator can be used instead of the oven. Just follow the directions provided with your dehydrator.
