
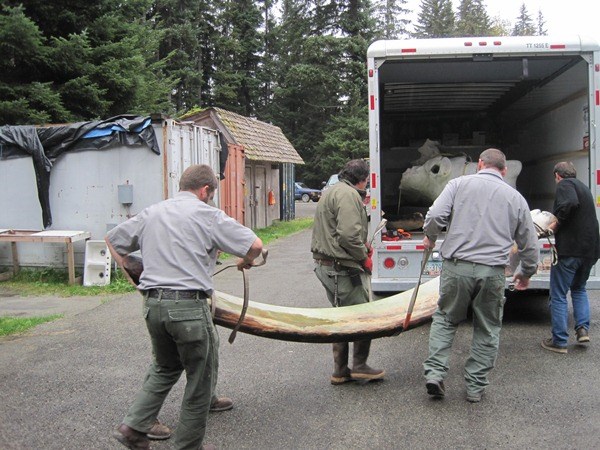
Getting Started An Overland Migration In July 2012, the park hired Articulation Specialist, Dan DenDanto of Whales and Nails to clean, repair and articulate Snow's massive 45 1/2 foot skeleton in his Seal Cove, Maine workshop. The job required Snow to migrate via the Alaska Marine Highway from Gustavus, AK to Bellingham, WA, then via interstate 2600 miles from Bellingham, WA to Seal Cove, ME. This may have been the first documented overland humpback whale migration! For more information on Snow's incredible journey, please visit the project blog: The Return of Whale #68 Upon returning to Maine, Whales and Nails took on the biggest challenge of the project - cleaning and repairing Snow's massive, oily skeleton. Every bone, repair and/or replacement had to withstand year-round outdoor exposure in a harsh marine climate. Even more important, the bones had to be odor free as not to attract bears, rodents or other animals. The park preferred not to have "ribs" on a brown bears' lunch menu! Coming from a coastal marine environment himself, Dan was up for the challenge right from the start.
NPS Photo How Do You Clean a Whale? The answer to that question is, "very carefully."
NPS Photo 
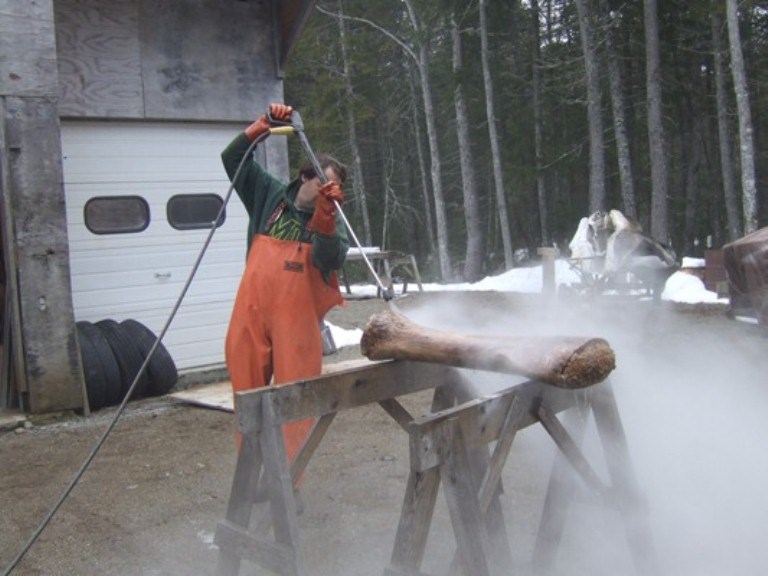
NPS Photo Cleaning Basics Whales and Nails used many different techniques to clean Snow's bones. Each was dependent upon the condition, amount of oil, and type of bone. They started with the oiliest bones first, which included the flipper bones and some of the vertebrae. All of the bones received an initial steam cleaning with a hot water pressure washer to remove superficial surface mold and dirt. Once pre-treated, Dan sorted the bones according to their prescribed treatment. The Hot Soak Tank To begin the degreasing process, the bones were soaked in a hot 180 degree hot water tank using a degreasing agent. An individual soak would last from 2 to 5 days, depending on the severity of the oil contamination, size of the bone, or the tank being used. Some bones had to be heat soaked three or four times before oils were completely released from the bone marrow. Immediately following a detergent soak, the bones were mechanically washed using a hot pressure washer or scrubbed by hand using a brush.
NPS Photo 
Cleaning the Skull In order to accommodate the enormous skull, the Whales and Nails team constructed a cleaning tank that was five times larger than any other tank built for this project. The extra large tank was built AROUND the skull with 4 ft. high walls! It was a big job, but necessary. Once the tank was filled with hot water, the skull was immersed for four days. Dan had to move the tank outside in order to access the heavy equipment he needed to remove the skull. This task was done using an excavator and a very skilled driver! If you look closely, you can see out how Dan moved the enormous tank from the shop to the driveway . . . . think Ancient Egypt!

NPS Photo The Peroxide Tank Most of the bones that underwent a detergent soak were then soaked for a period of time in a peroxide tank. Using a specially formulated hydrogen peroxide solution, the bones were immersed and allowed to soak from 1 to 7 days. The length of the soak depended on the severity of the stains and the density of the bone - bigger bones soaked as long as 5 days, the smaller bones 1 to 3 days. Every few days the bones were rolled over to check their progress. The solution started out clear and turned dark as the bones released more oil. At the end of the soak, each bone was removed from the solution, dried, and then evaluated for further treatment. Occasionally, a bone went back in the tank several times to remove stubborn oils. Sun Bleaching The final step in cleaning required a touch of mother nature! Clean, dry bones were placed in the sun to undergo natural bleaching. Exposure to natural light over a period of time homogenizes bones, giving them all the same creamy color. After a few weeks, the bones were ready for the next phase - repair and fabrication.
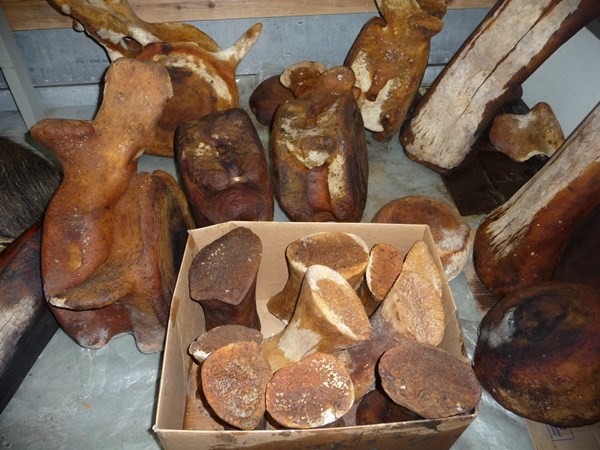
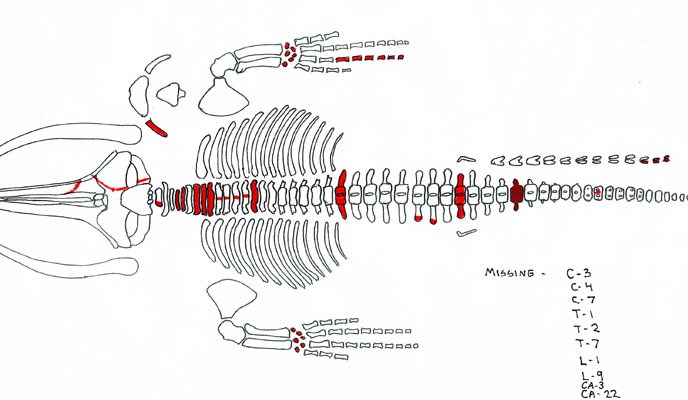
How Do You Repair a Whale? At this stage, Lee Post's 2010 bone inventory became an essential piece of the articulation project. It highlighted missing bones and evaluated the condition of the entire skeleton. Considering the skeleton had been left on the beach for fifteen months it was in relatively good condition, but many of the bones had suffered some damage from long term exposure and retrieval and/or excavation.
NPS Photo 
NPS Photo Replacing Missing Bones Replacements for missing bones were made using several different techniques, including: modeled prosthetics, cast prosthetics, and molding and casting. Whales and Nails spent hundreds of hours creating new bones for Snow's skeleton. Modeled prosthetics were used to form contralateral pieces (same bone on the opposite side of the body) or for unique pieces such as the two missing vertebrae. It took over 45 hours to make one vertebrae! How did they do it? First, a foam plug was made from closed cell urethane foam. Once solid, it was carved into the desired bone shape and coated with a "Shell Shock" plastic - a self-thickening, impact resistant coating. Finally, the form was sanded, tooled, sculpted and hand painted to resemble the original bone.

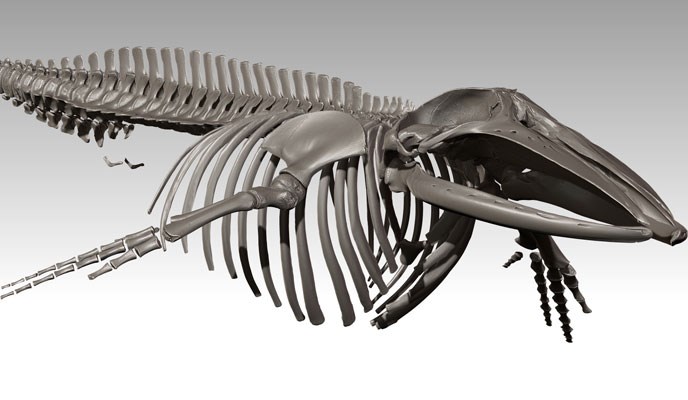
NPS Photo Repairing Broken Bones Cast prosthetics were used to repair several of the tips (spinous processes) of the vertebrae. Dan started by making a mold of a broken tip, which was then used to cast a new tip for each broken vertebrae. With some sanding, sculpt epoxy and paint, they were able to fit the cast to the vertebral stump to make a seamless repair. Whenever possible, the team tried to use original bone in their repairs. This required them to be quite versatile in their approach. They used a combination of glue and epoxy putty to repair cracks in many of the phalanges (finger bones in the flipper). A type of waterproof taxidermy putty called "All Game" was used to fill cracks and restore bones to their original integrity. The gray putty was sanded and painted to match the original bone before the repair was complete. The Biggest Challenge As a result of trauma from the 2001 cruise ship strike, Snow's skull was broken into three major pieces. There were also dozens of loose fragments. Some of the fragments were as large as a shoe box and others were small enough to fit in the palm of your hand. When Dan unpacked the skeleton in his Maine workshop, he counted over 58 individual skull fragments in varying condition. In addition to perimortem (before death) trauma, Snow also had various degrees of postmortem trauma that occurred after her death. Some was the result of bone abrasion while the carcass was adrift or after it was beached and some was the result of forces exerted on the bones during retrieval from heavy equipment or lifting straps. Scavenger damage by rodents had also occurred. Making these repairs to the skull required a lot of patience, creativity, flexibility and the application of many different techniques. Snow Gets 3D Scanned At the completion of Phase I (cleaning and repair), Snow was ready for her first photo shoot! In April 2013, technicians from the Idaho Virtualization Lab (IVL) traveled the Whales and Nails workshop to 3D scan Snow's entire skeleton. Due to her large size, she had to be moved to a different facility in order to allow for easier manipulation and rotation of her bones. Every surface of every bone had to be scanned in order to create a 3D image. Dan facilitated the careful packing and transport of the skeleton for the six mile journey from his workshop to the IVL rented workspace. It took the IVL team over two weeks to transport and scan each bone. The final images will be added to The Virtual Zooarchaeology of the Arctic Project (VZAP) library as an osteological reference collection for the study of northern vertebrates. http://ivl.imnh.isu.edu/Virtual-Zooarchaeology-of-the-Arctic.htm
NPS Photo |
Last updated: August 16, 2023